Man, time really flies by. I’m about to start another bathroom remodel project, so I guess I should close out this one! As many of my friends know, I got super frustrated at the end of this one and just kinda walked away from it for a while. I’ll add details below, but where did I last leave off? Tiling the tub.
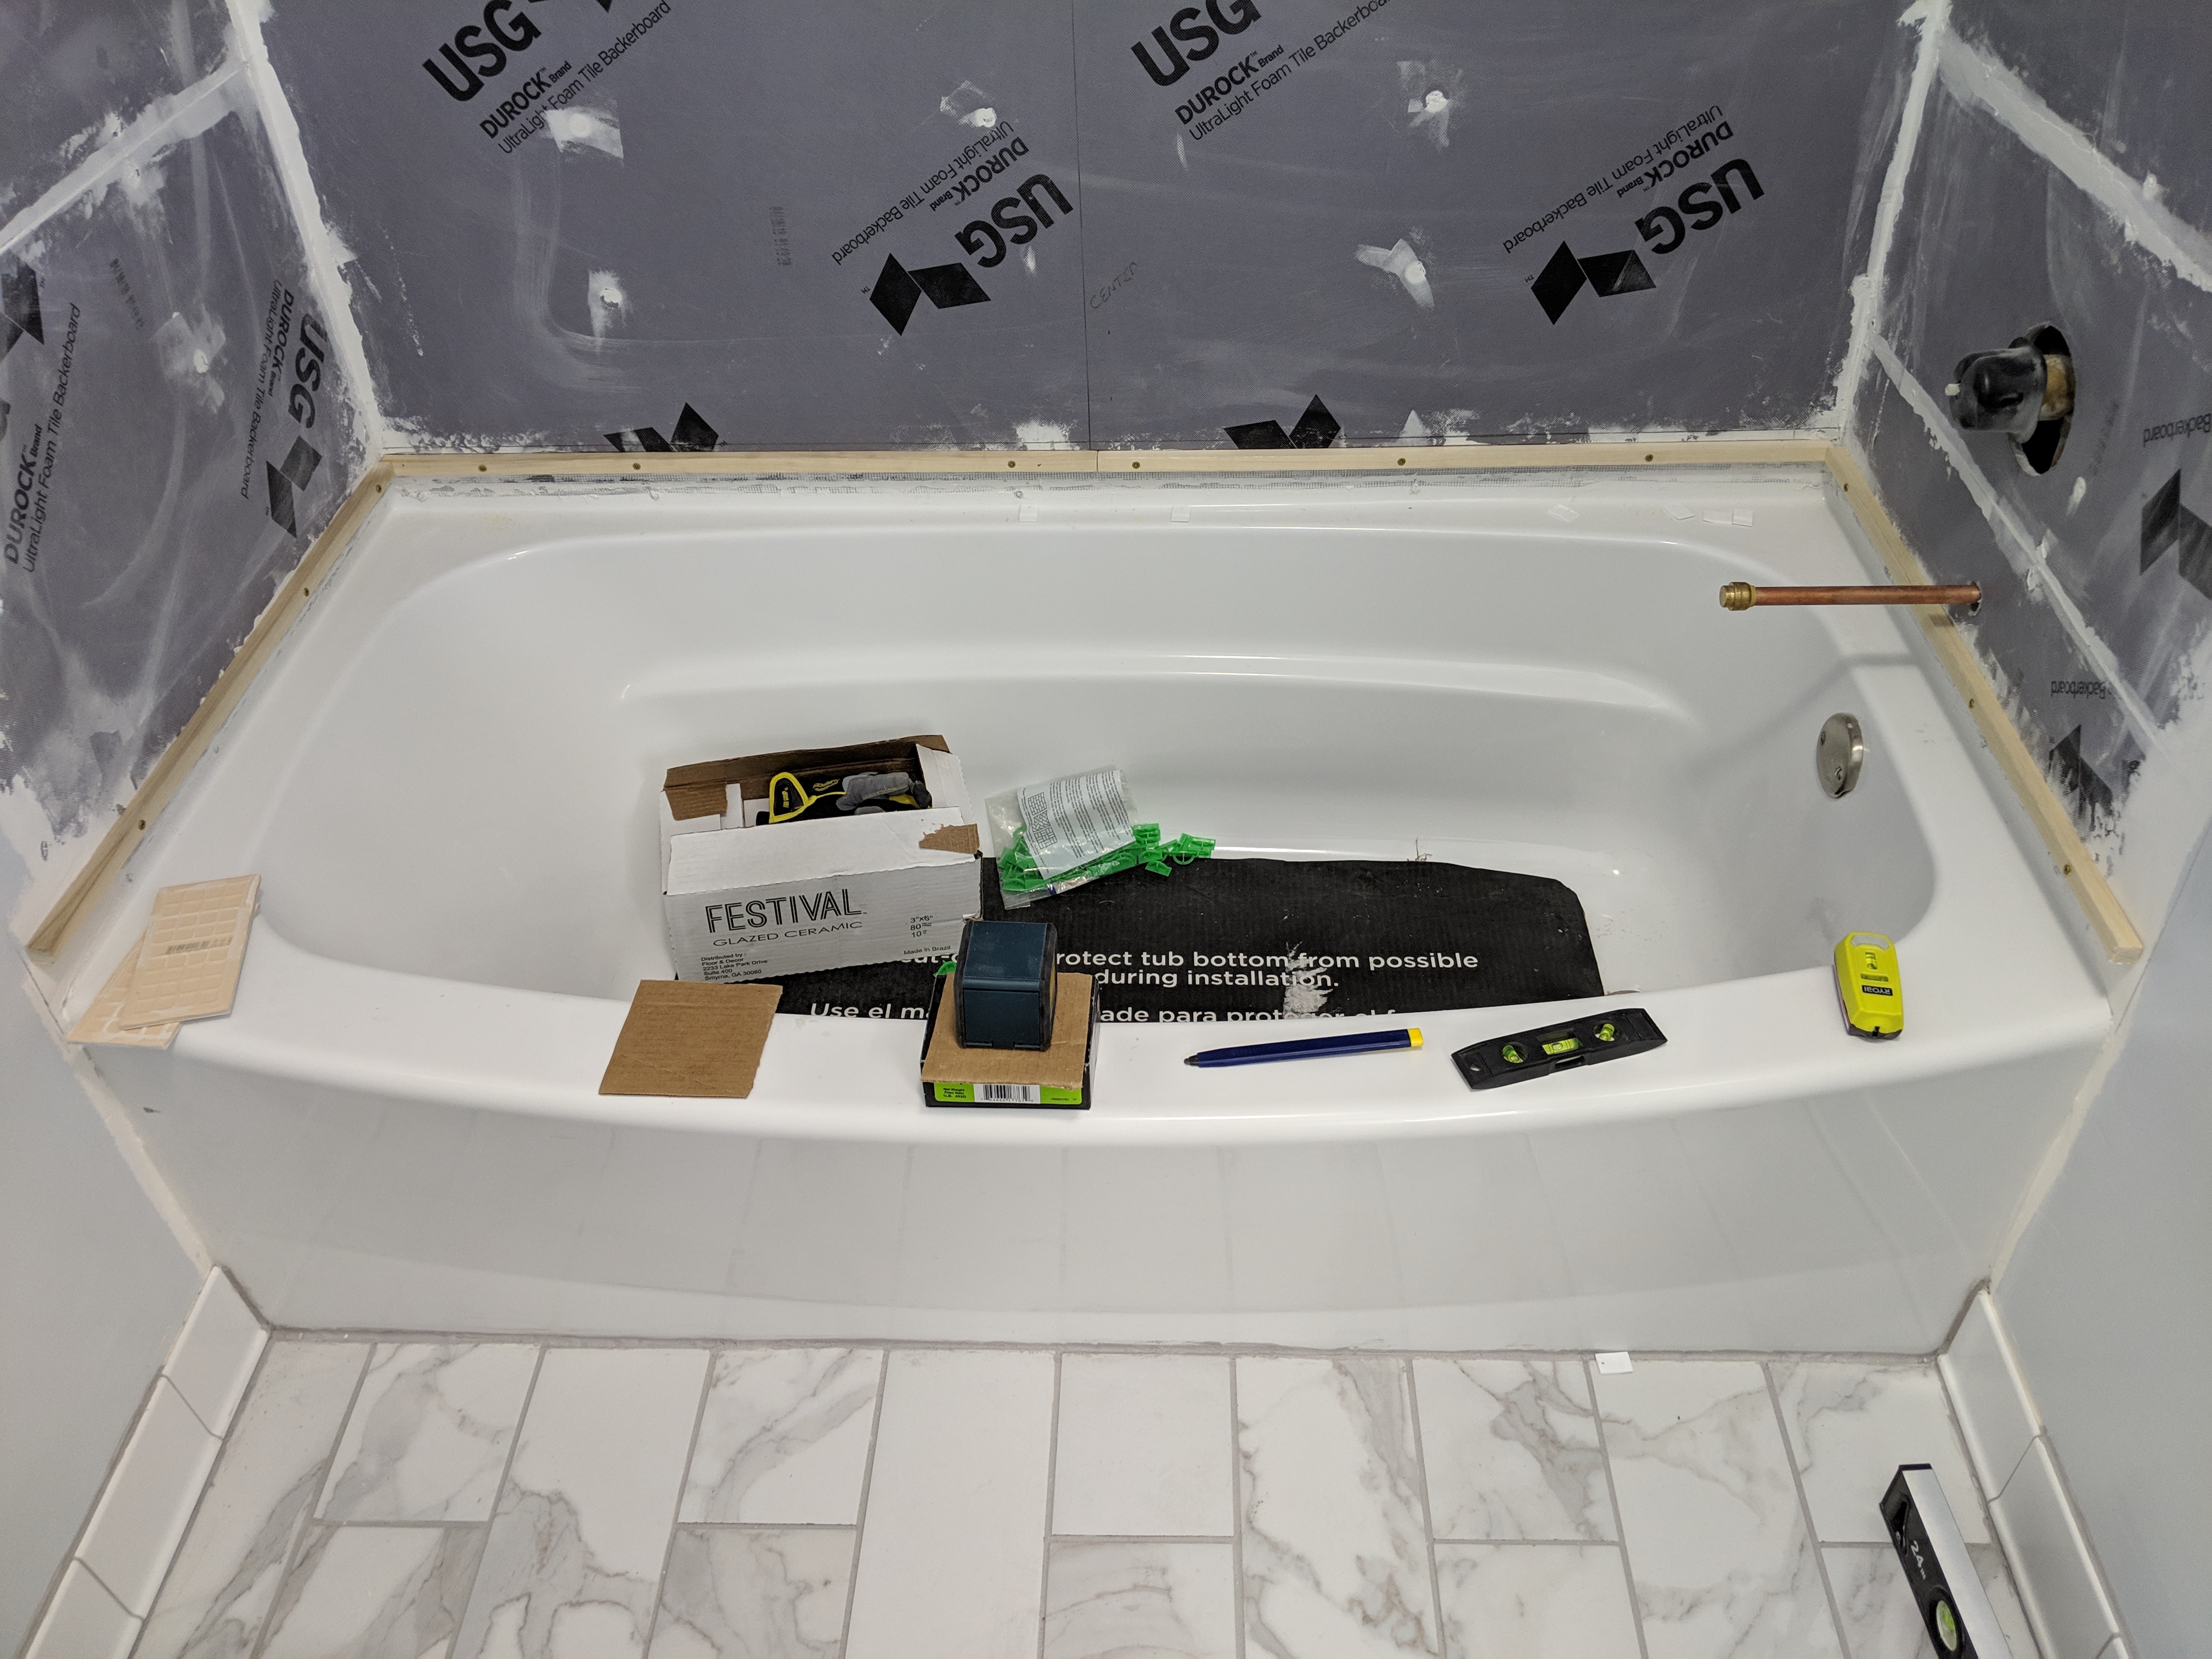
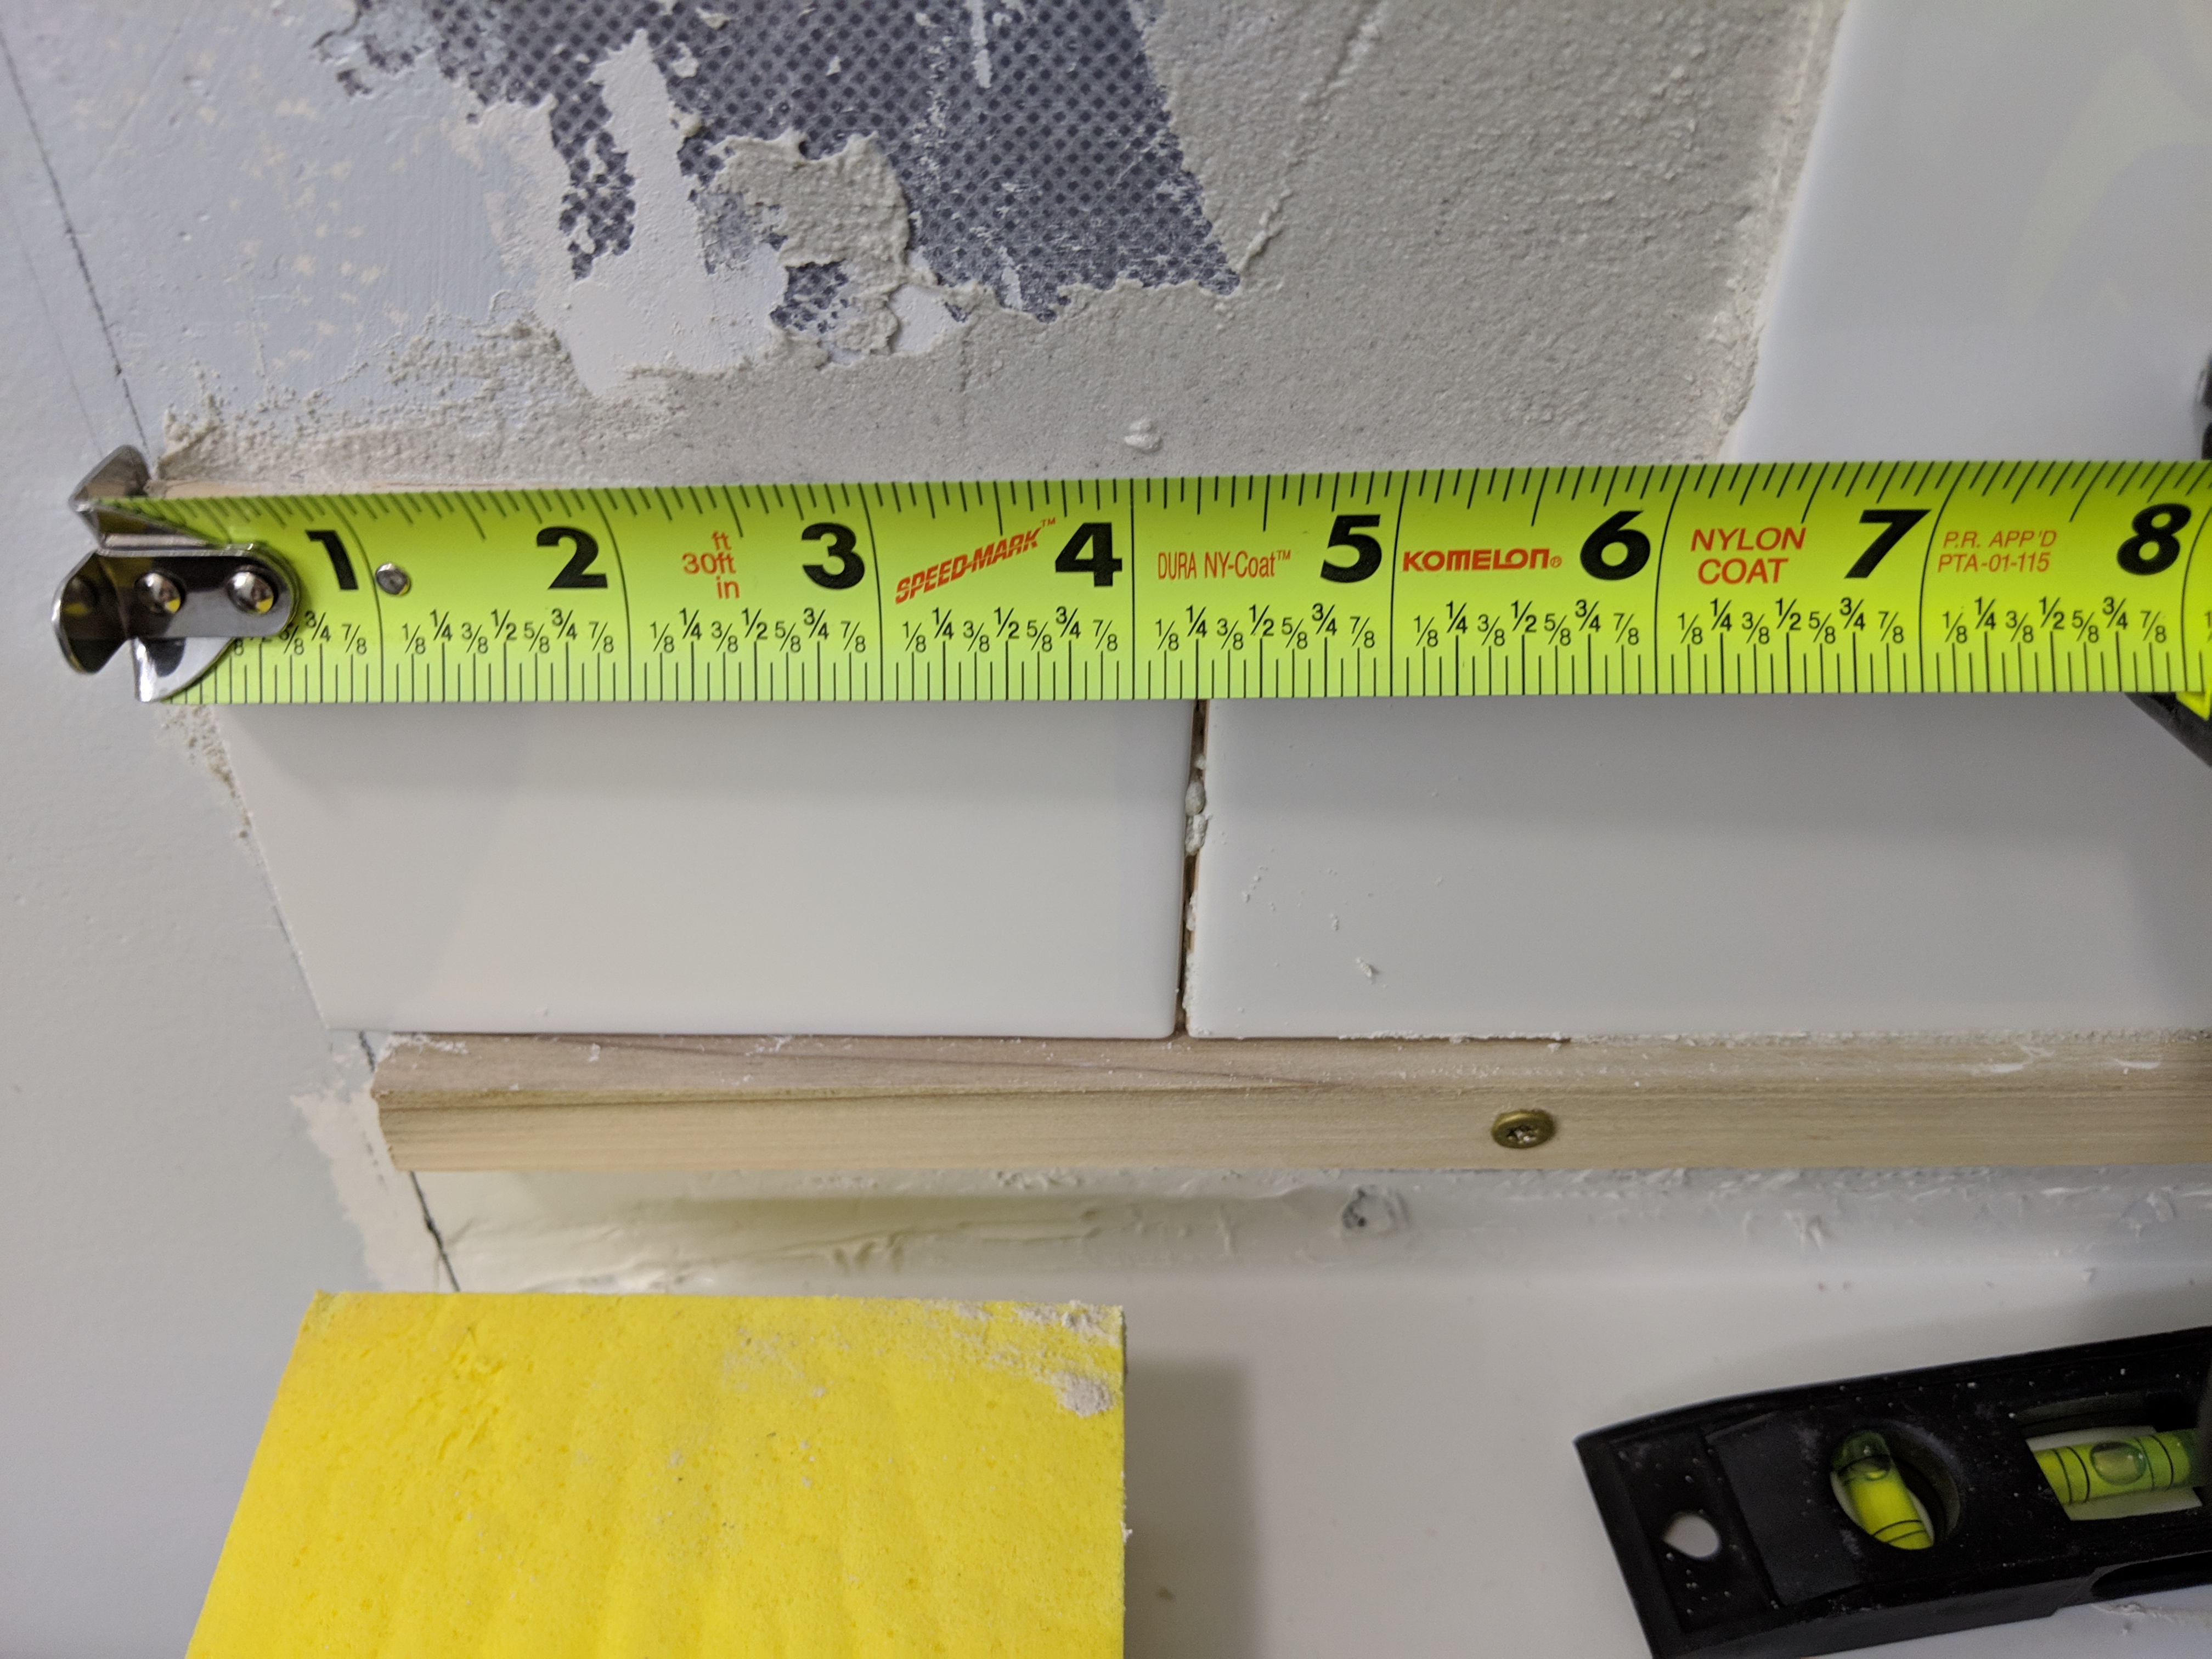
I finally started working on the tub the week of Christmas. The first thing I had to do was setup a “shelf” for the first (second really) row of tile to sit on, so they wouldn’t slide. I just got some cheap 1/2″ square dowel type wood and cut it the size of the area to be tiled. Then I measured the point that the second row of tile would sit and marked it with the laser level. Once marked, I just drilled a few holes and screwed it in. The holes will be sealed before covering with tile. After that it was time to mix up some mortar and get to tiling.
So one of the first hurdles working with smallish tiles in a big space (there were over 500 once I was done), is dealing with mortar. The first day, I had no idea how much mortar I’d need, or how quickly I’d use it. I ended up mixing WAY too much, and had to toss the majority of it, because it’s shelf life once mixed is only a couple of hours. I felt like I was working at a pretty good pace, but I won’t lie I was a little surprised how little I got done in that time. It goes way faster with a helper to back butter the tiles for you, and make the cuts, but day one I was completely solo.
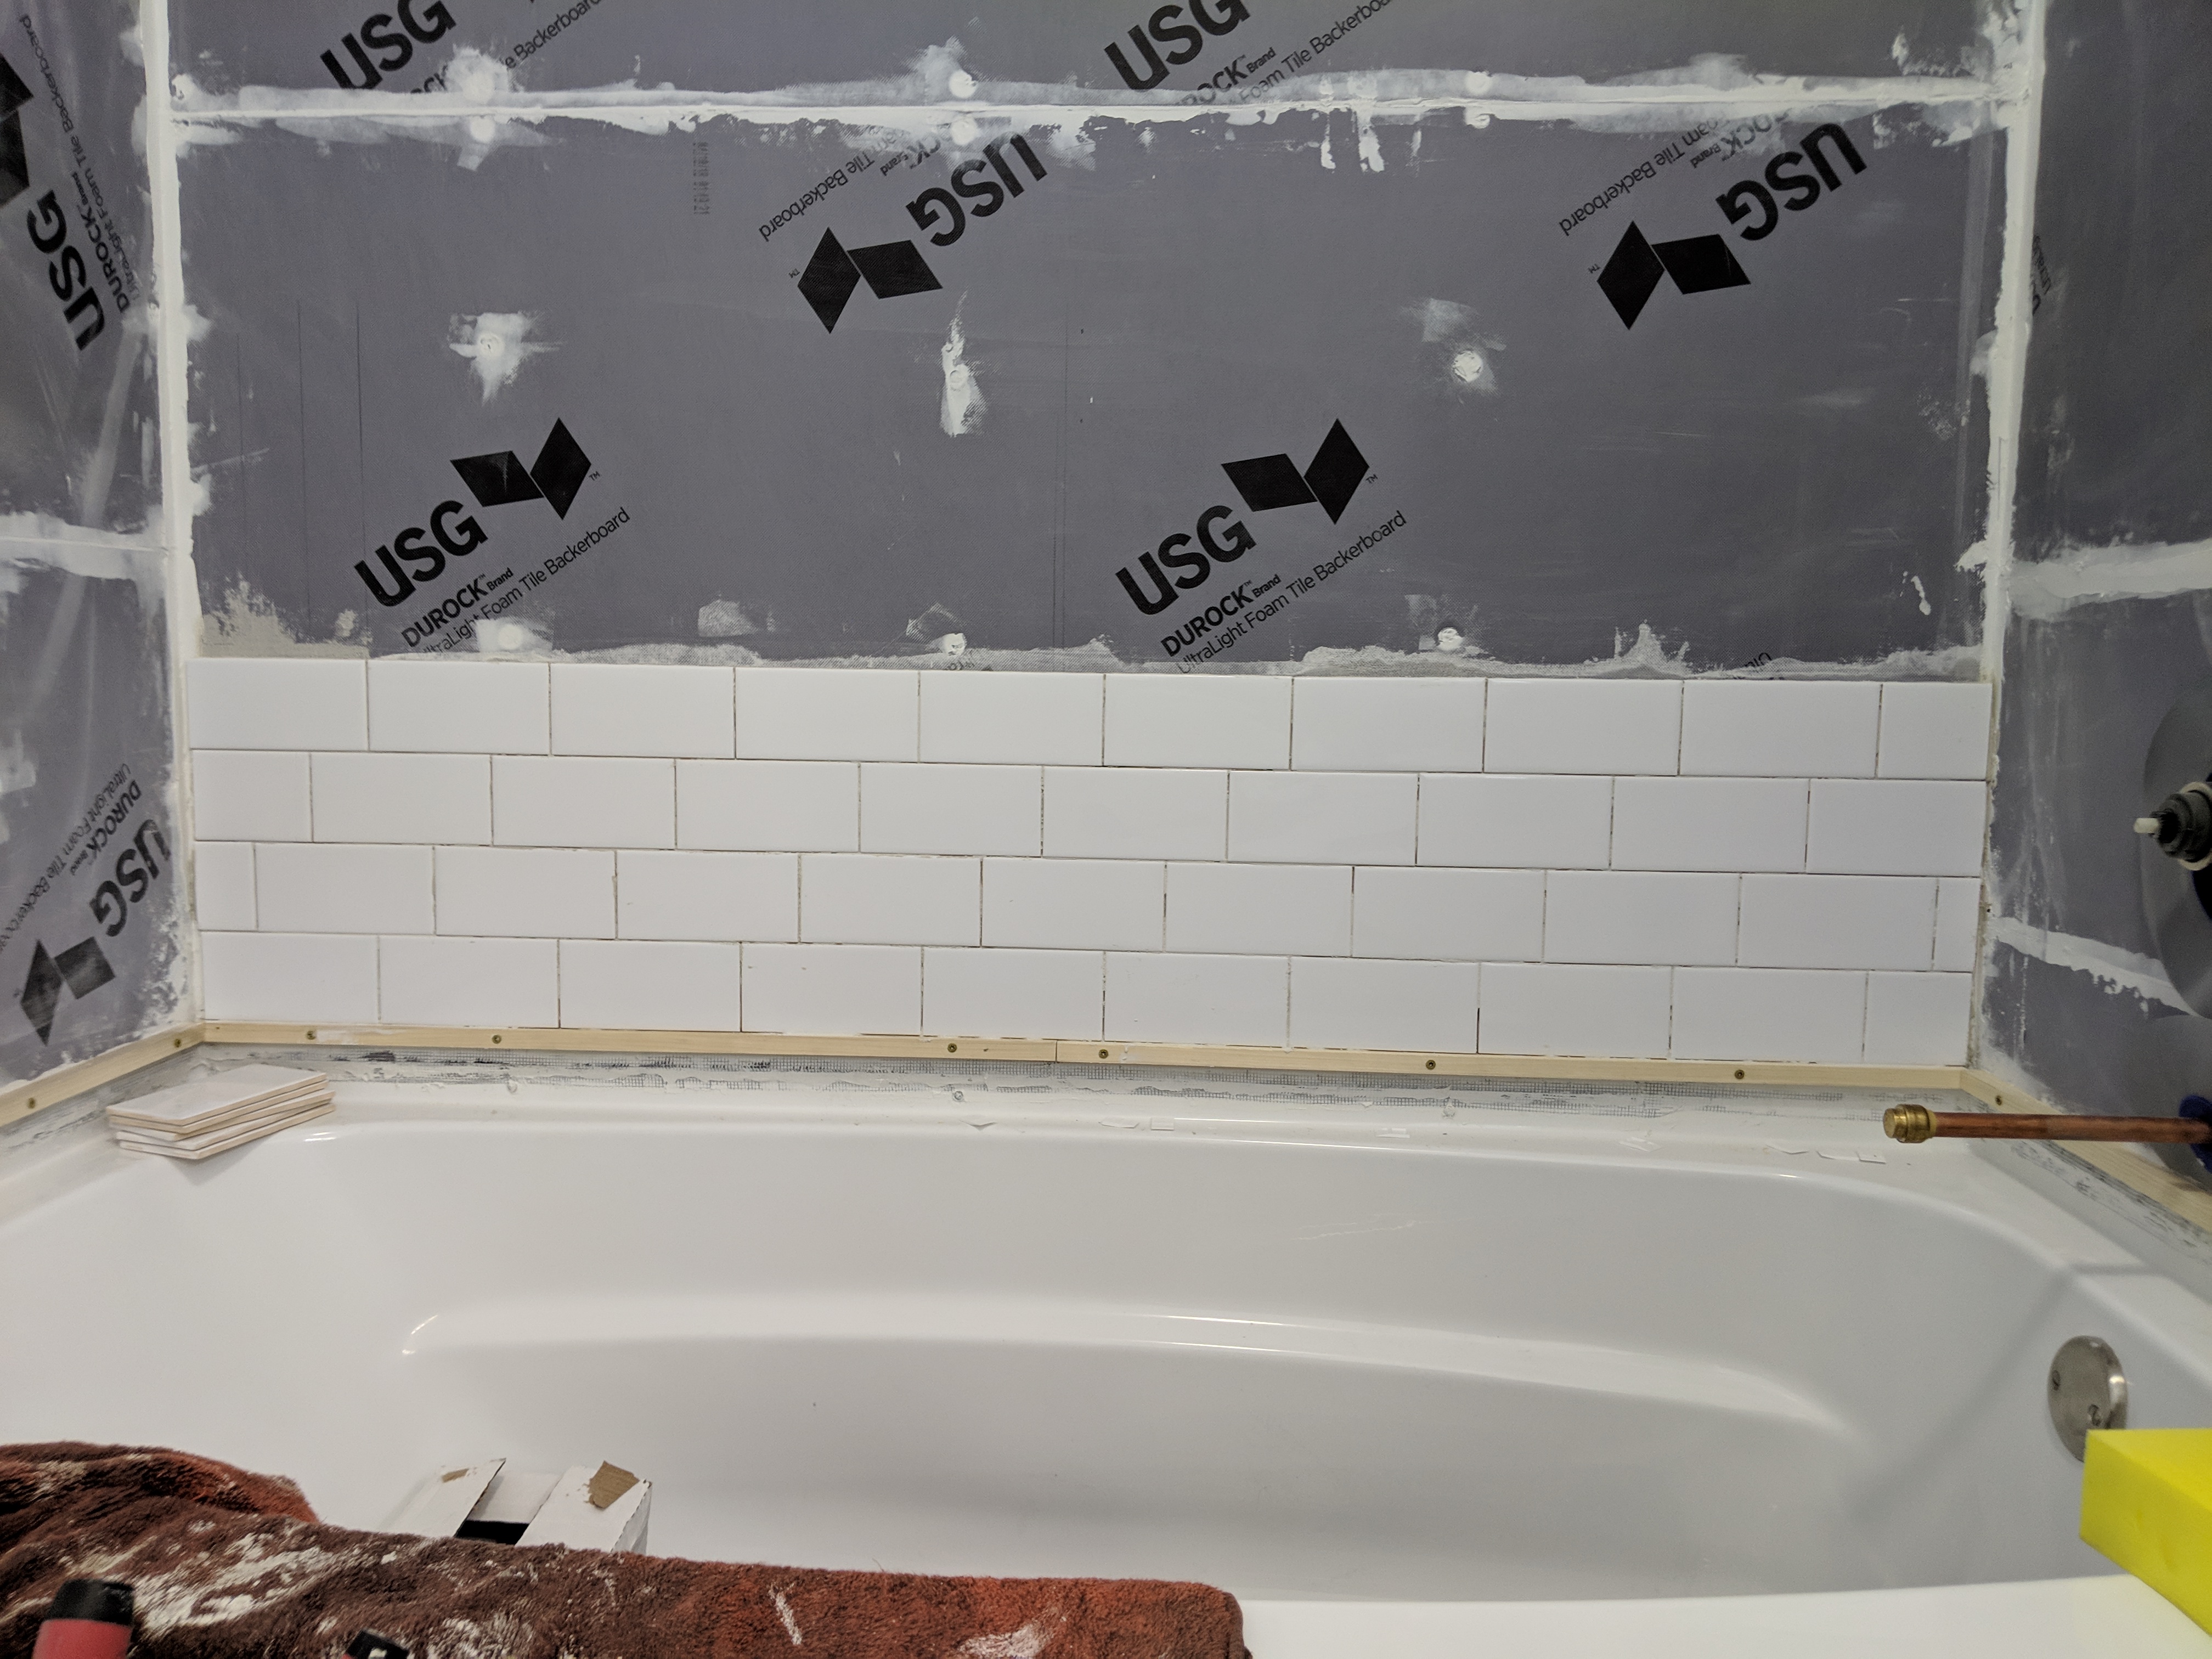
I decided to go with no spacers on the tiles, because we liked the look better, and they have little nub spacers built into them that give you 1/16″ spacing. This made the process a lot quicker, but would turn out to give me massive headaches later. Hint, it was not a happy New Year!
The next day was Christmas Eve, so I got an early start and made good progress. After the first day, I had figured out a system and was able to move a bit faster. I still made too much mortar, but I stretched the time by mixing regularly, and went about 3 hours. Before I dumped what was left.
No rest for the wicked! You bet your ass I worked on Christmas day. I wanted to get this done over the holiday break. So I spent a few hours working my way up the wall another 6 rows. Did I mention this is time consuming? It’s not so much the time and effort, as it is the setup/breakdown every day. Later in the project, I’d mix small amounts of mortar to do a row or whatever when I had a chance, but not the 2+ hours to commit to a “session”.
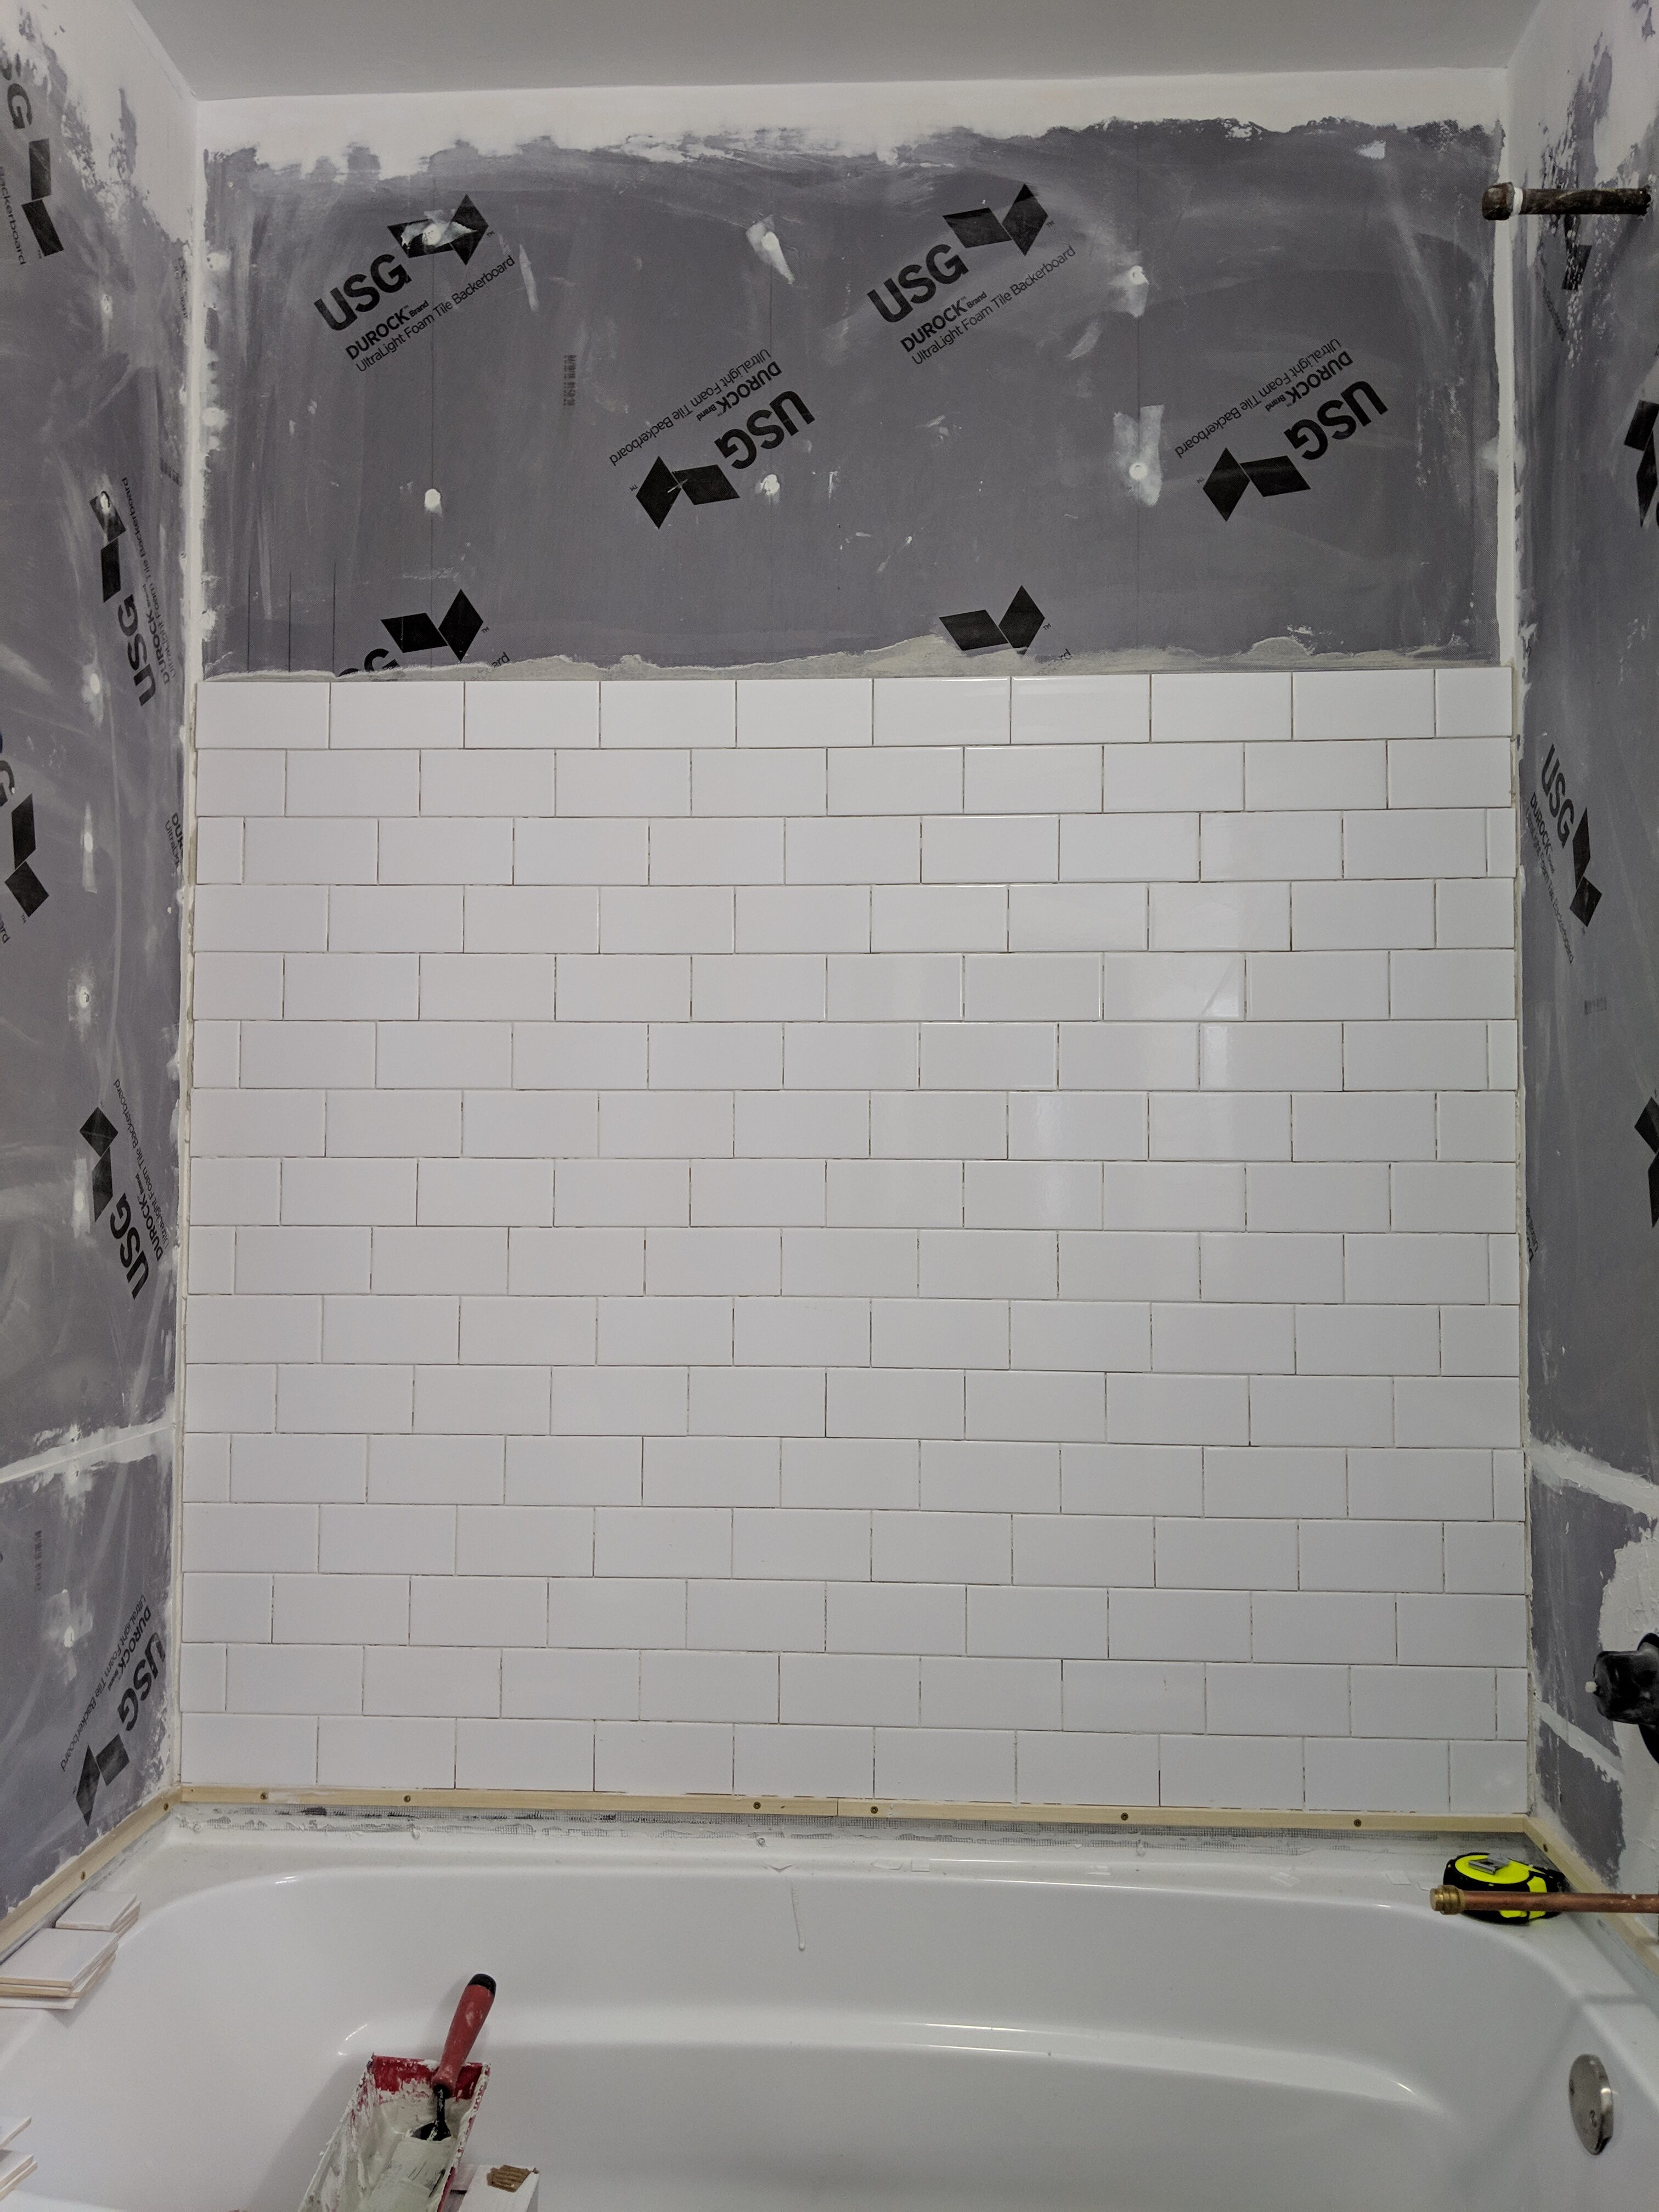
The next day, I decided to start working on the side wall. It’s important to keep the pattern going in the corners, so if you cut a tile say, in half at the end of one wall, you’d want the other half to start the row on the next wall. Since I started with a full tile here, then I want a full tile in the corner, and work my way out from there. All good, until I get to the last tile on the second row and realize that I’m about 1/8″ too far out on the first row.
After some thought, I decided to just cut back the tile on the first row. While this seems like it should be common sense, the issue is that all of the cut tiles should be roughly the same size throughout the pattern. So instead of having the same cut that I can do multiple times, I have 2 odd sizes that will now repeat up the wall. I was able to make it work in the end though, as this one ended up being almost exactly 4″ and the tile 2 rows up would be almost exactly 2″. So every cut gave me 2 useable tiles.
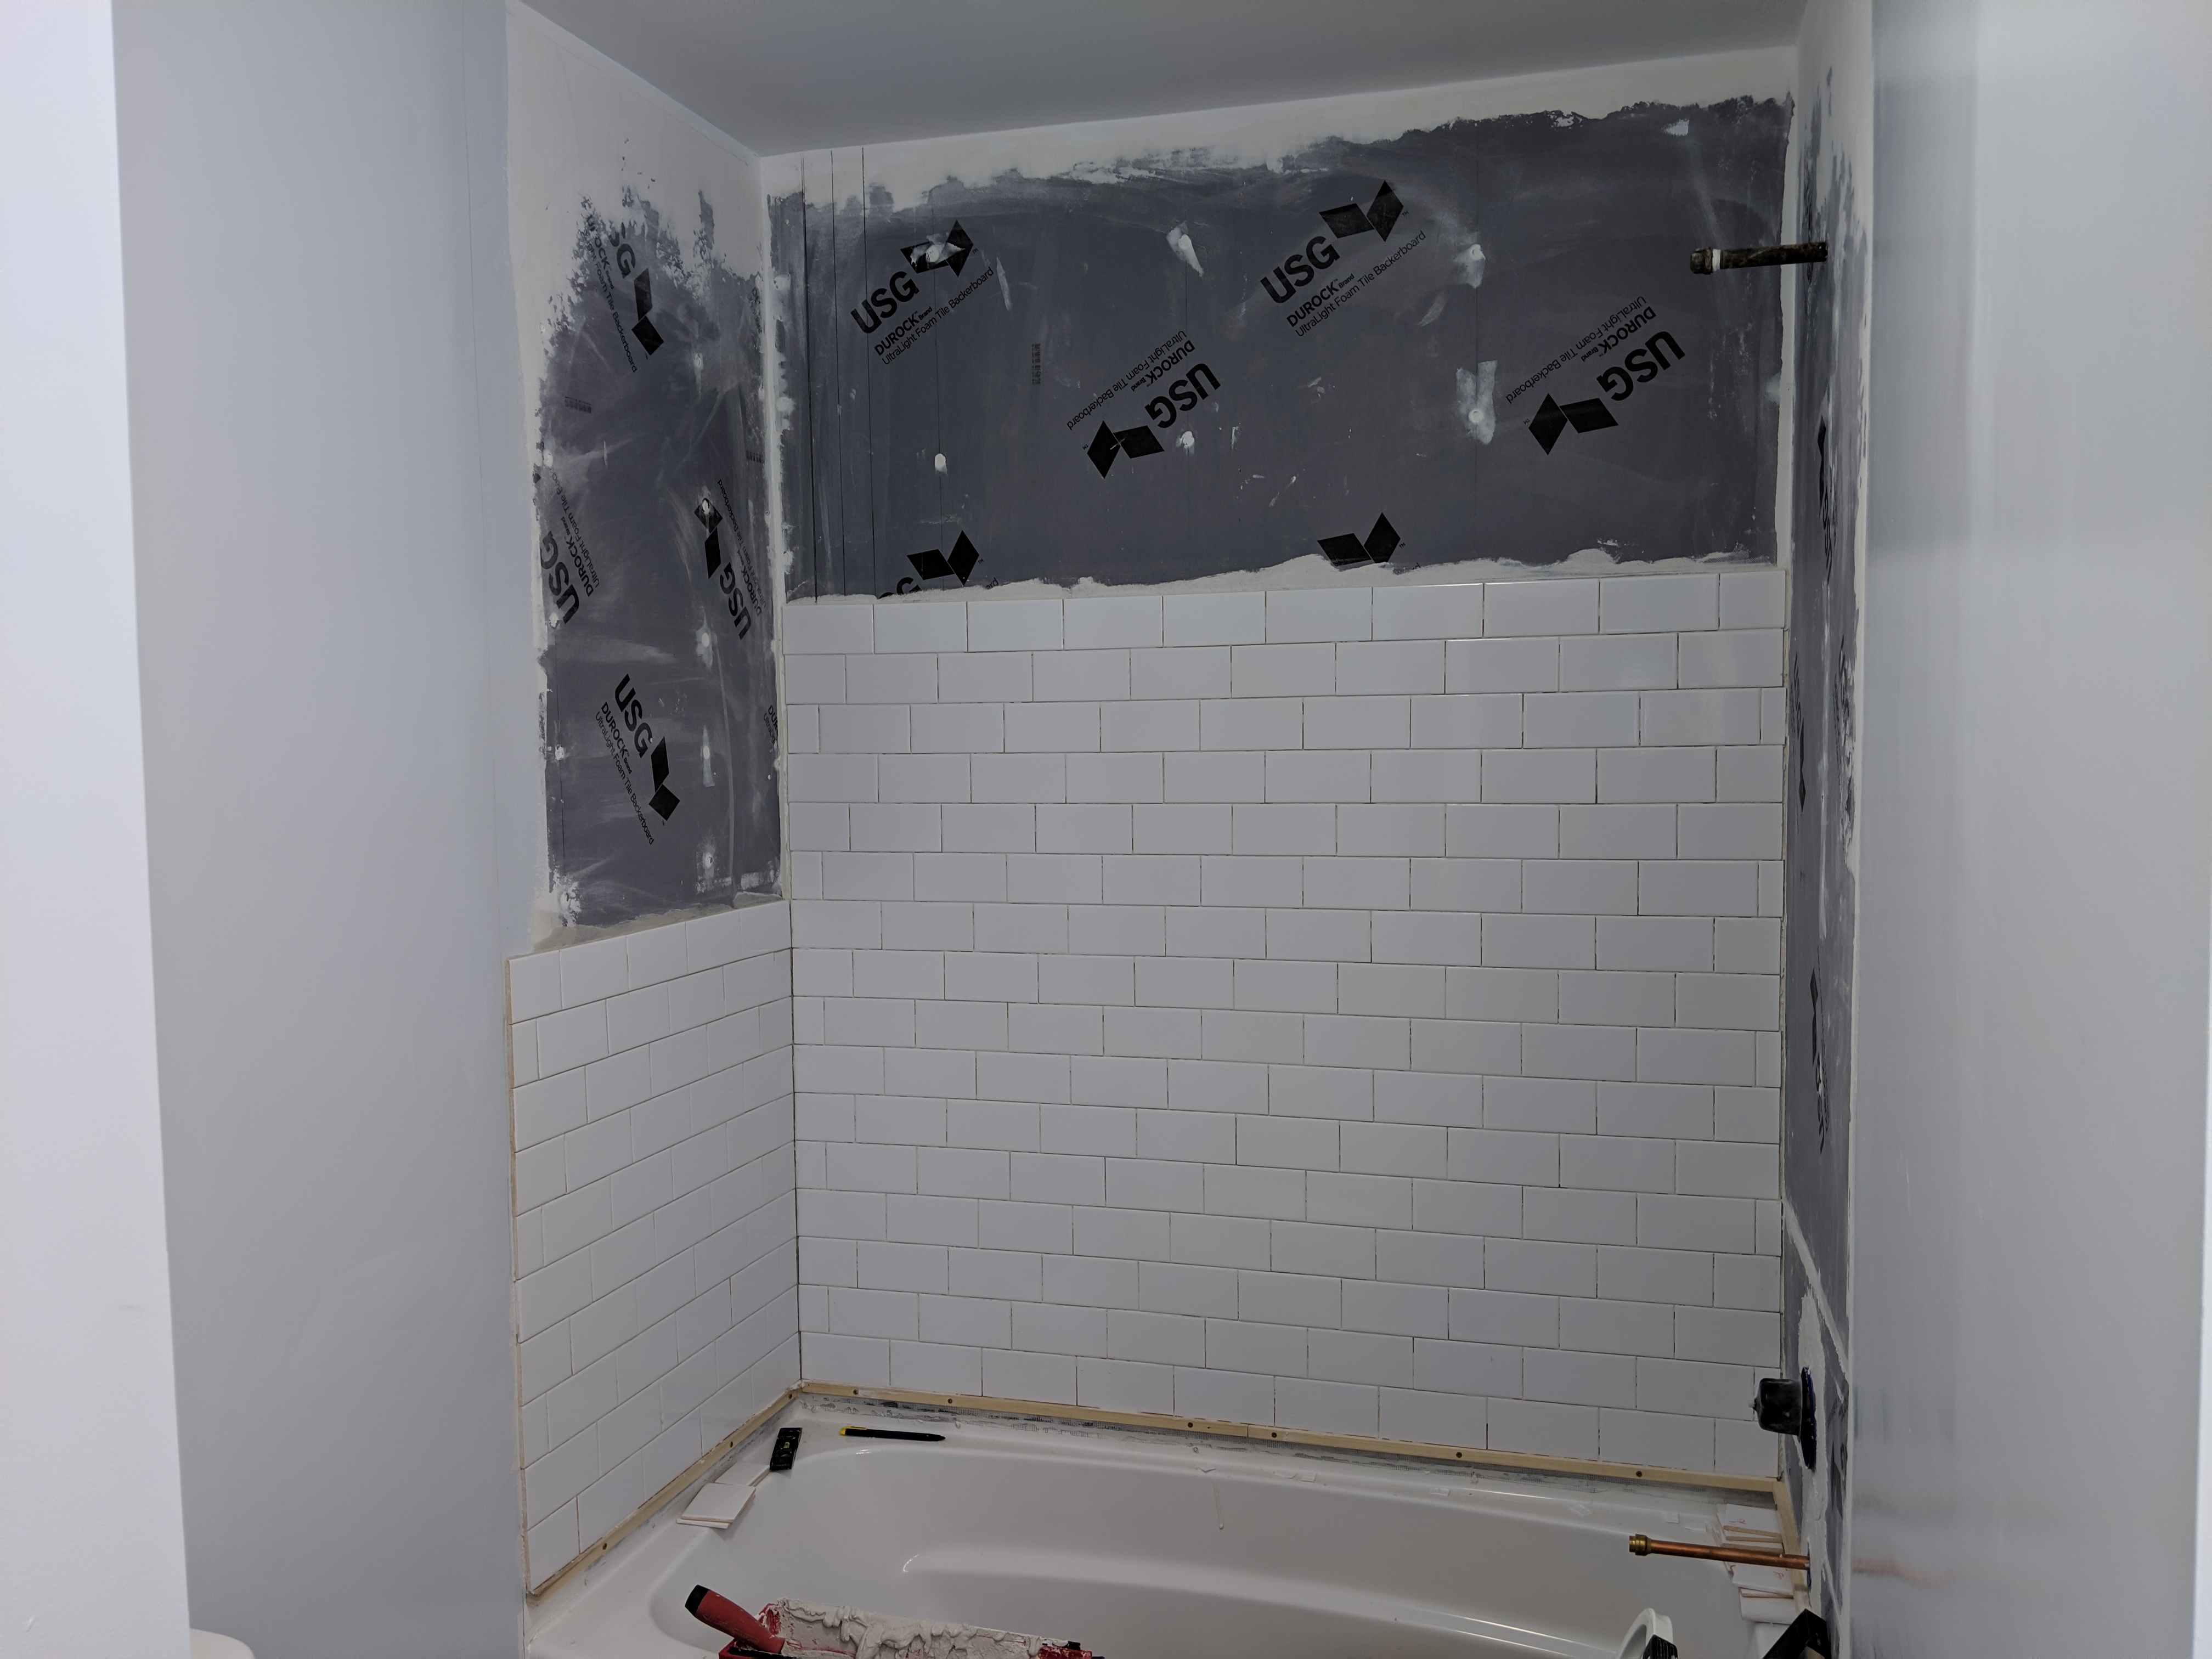
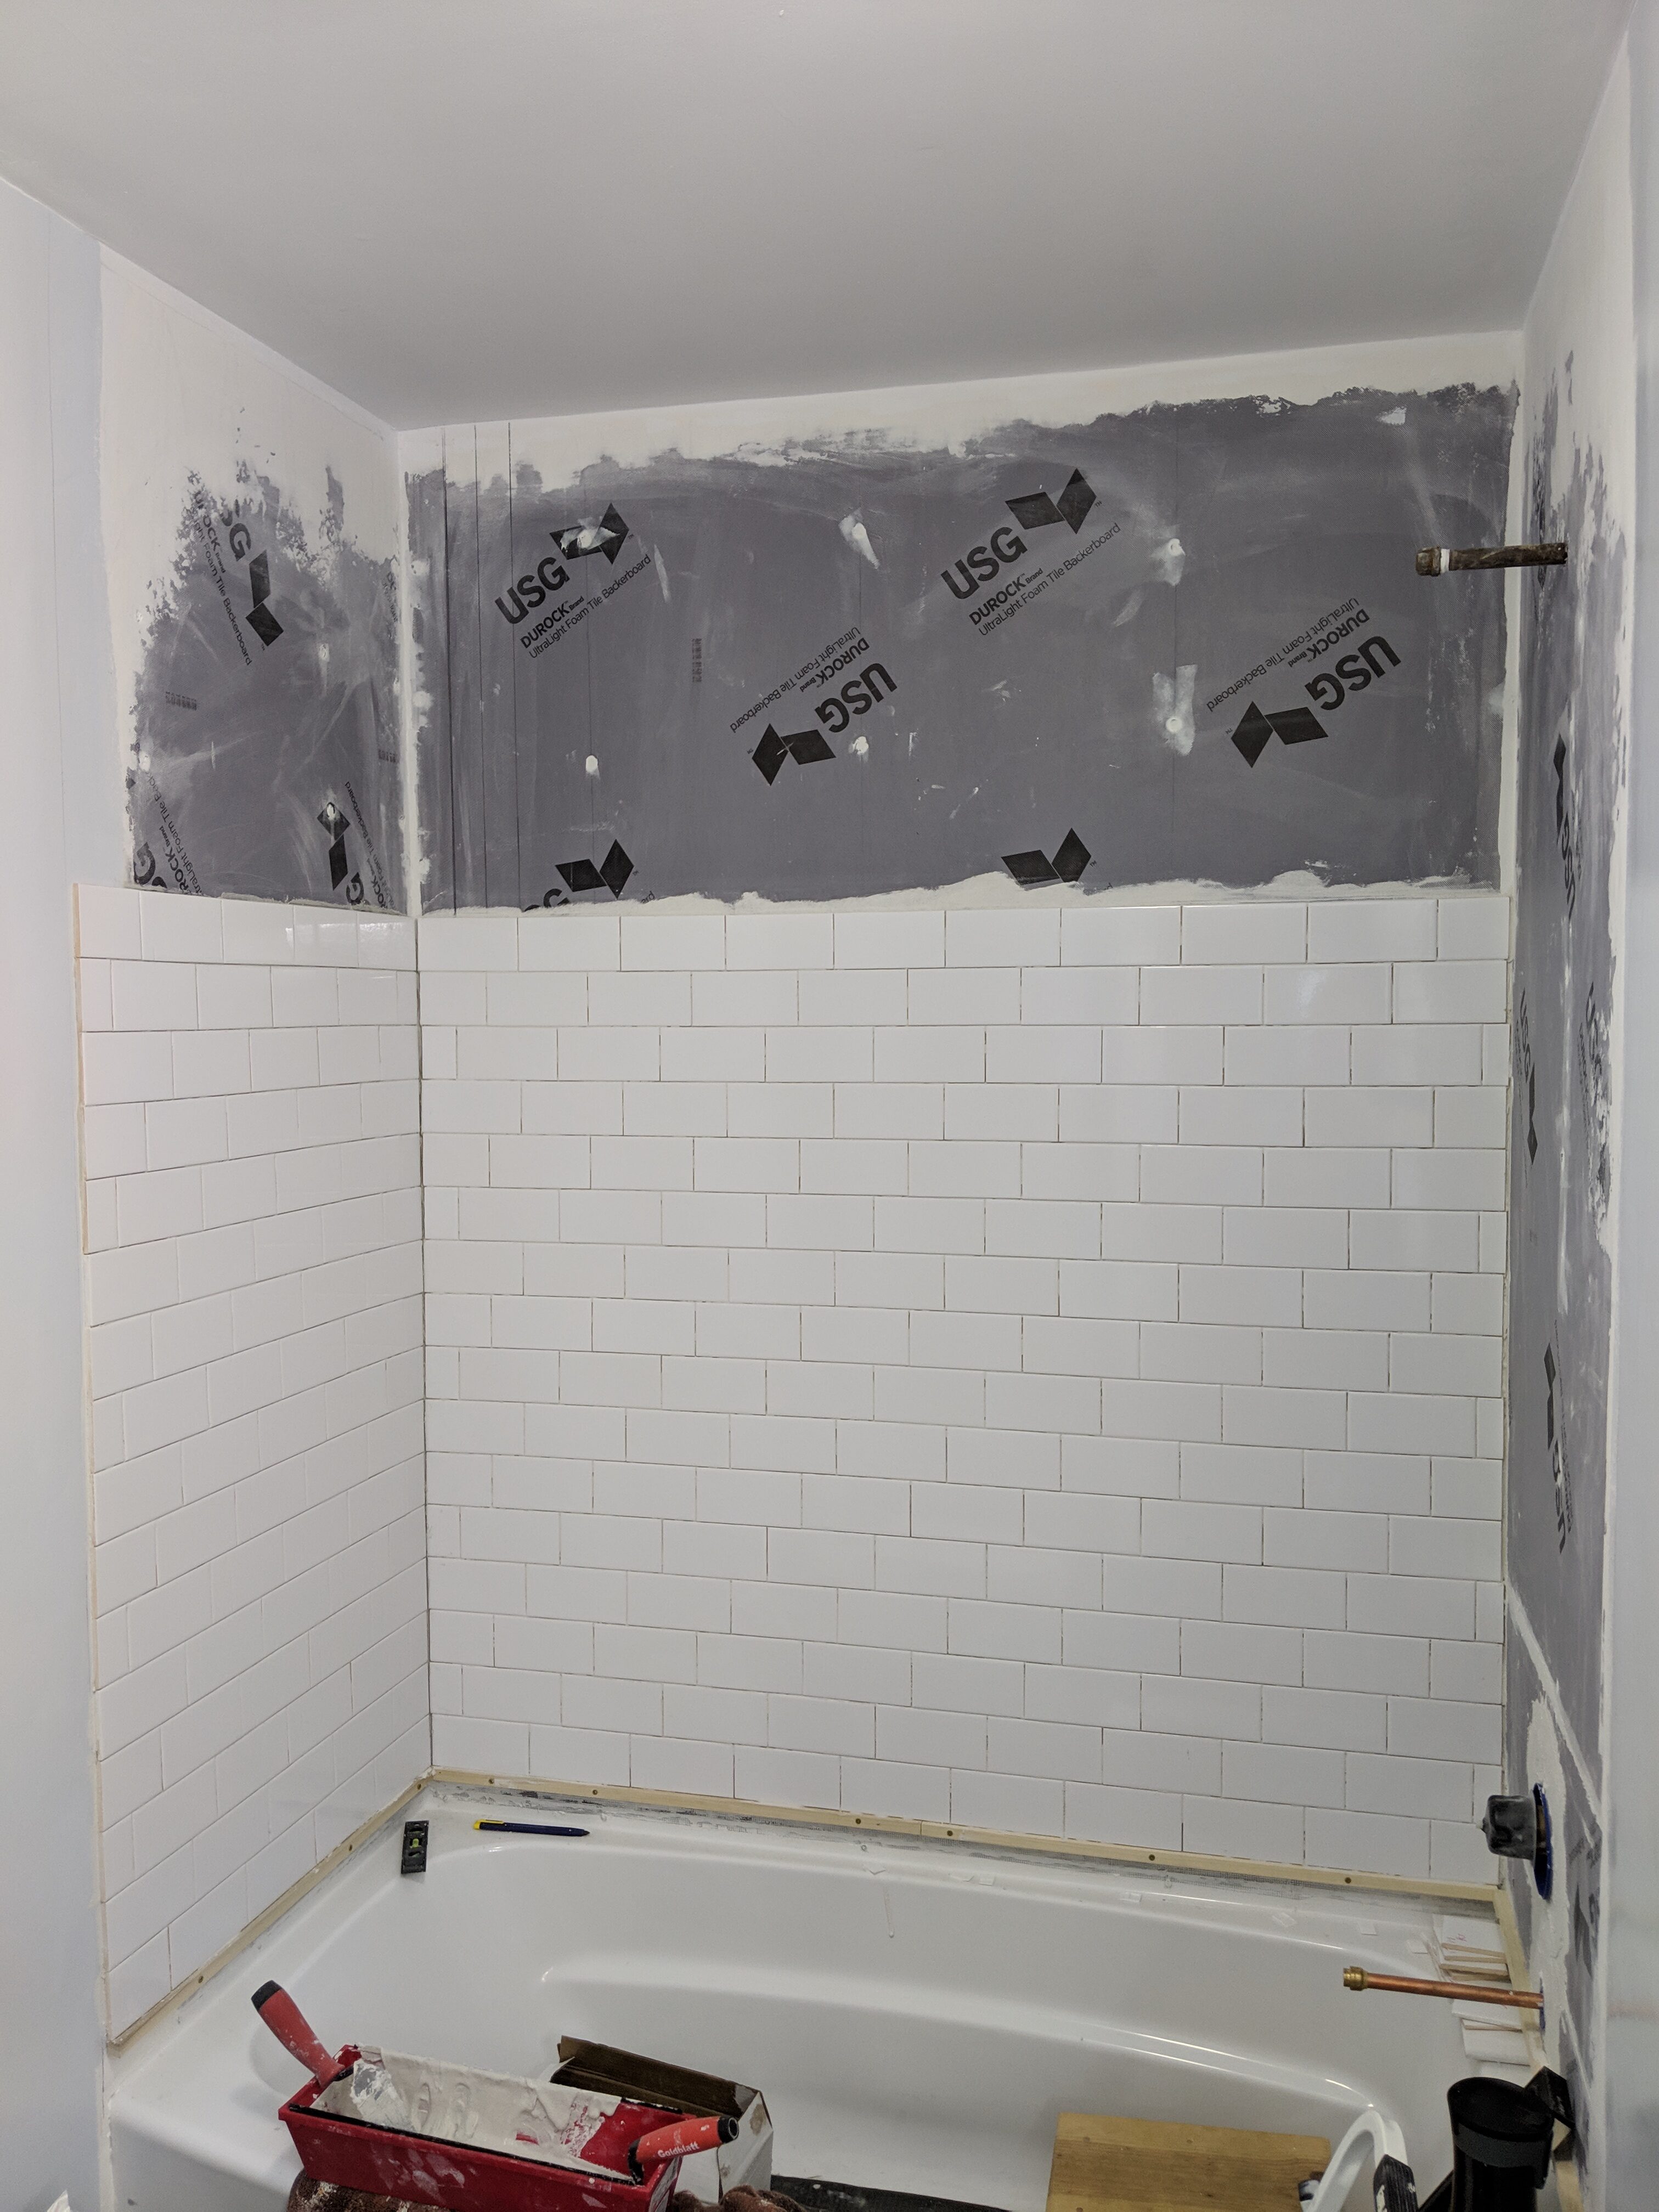
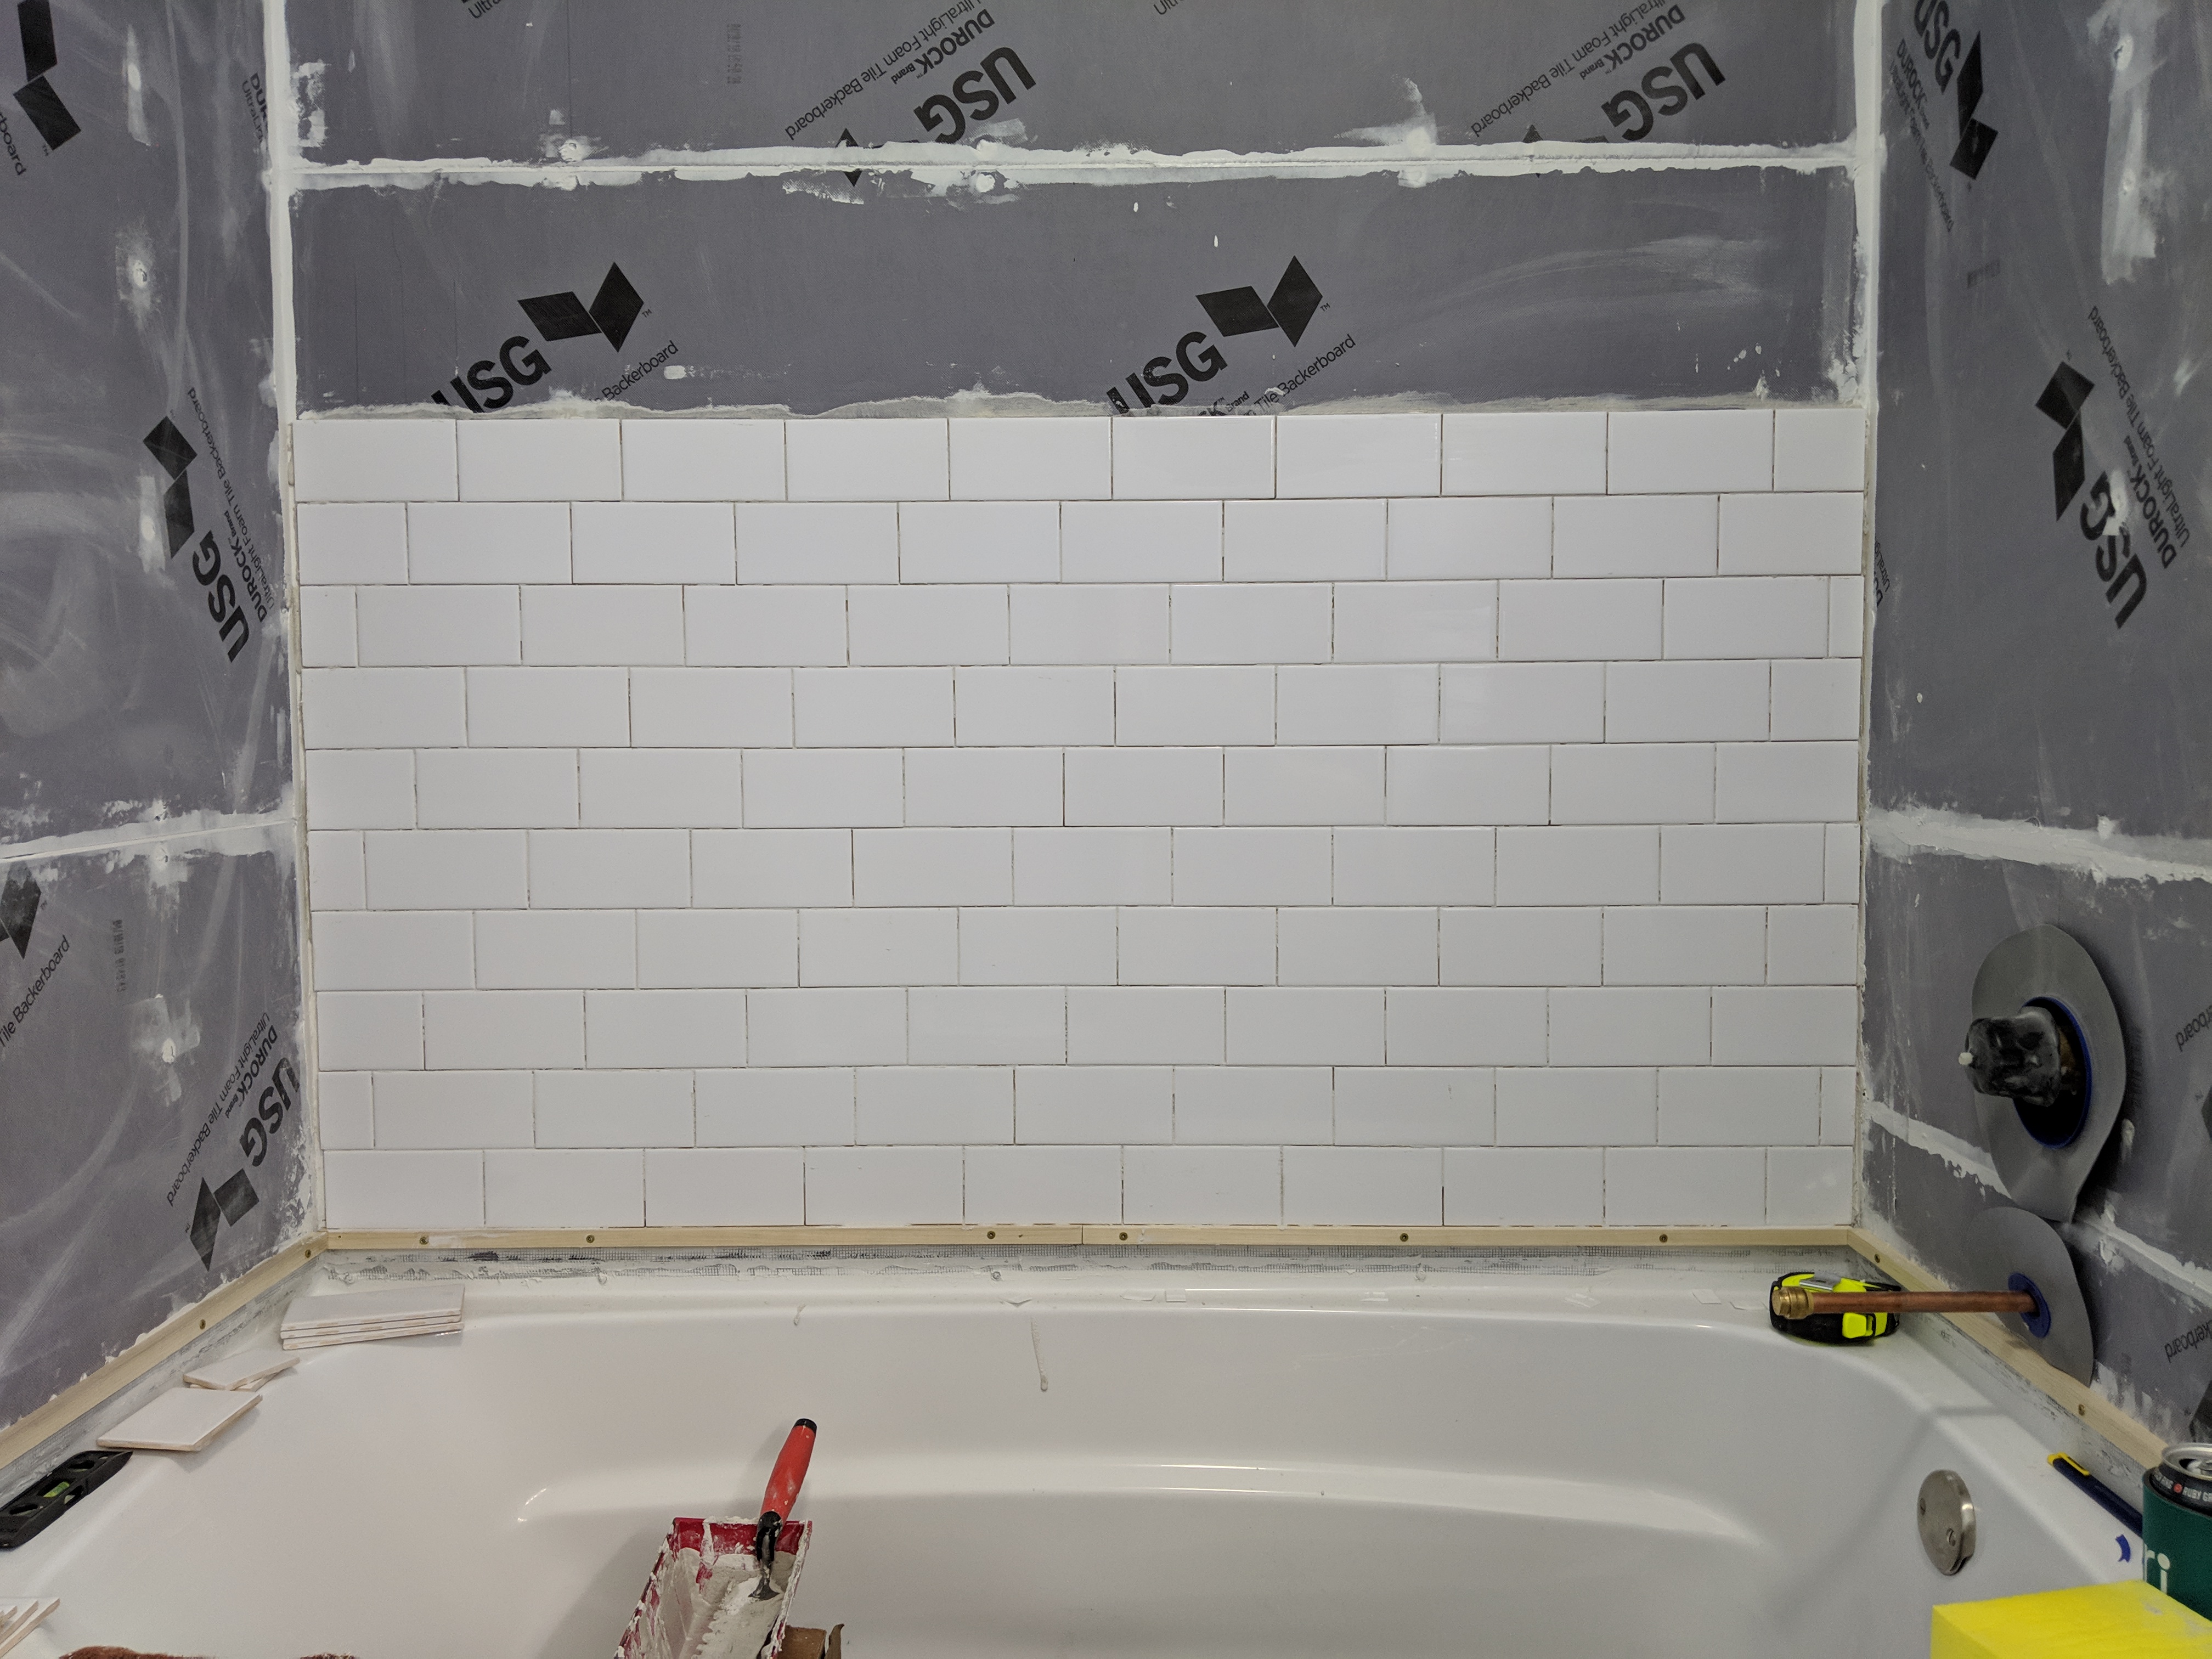
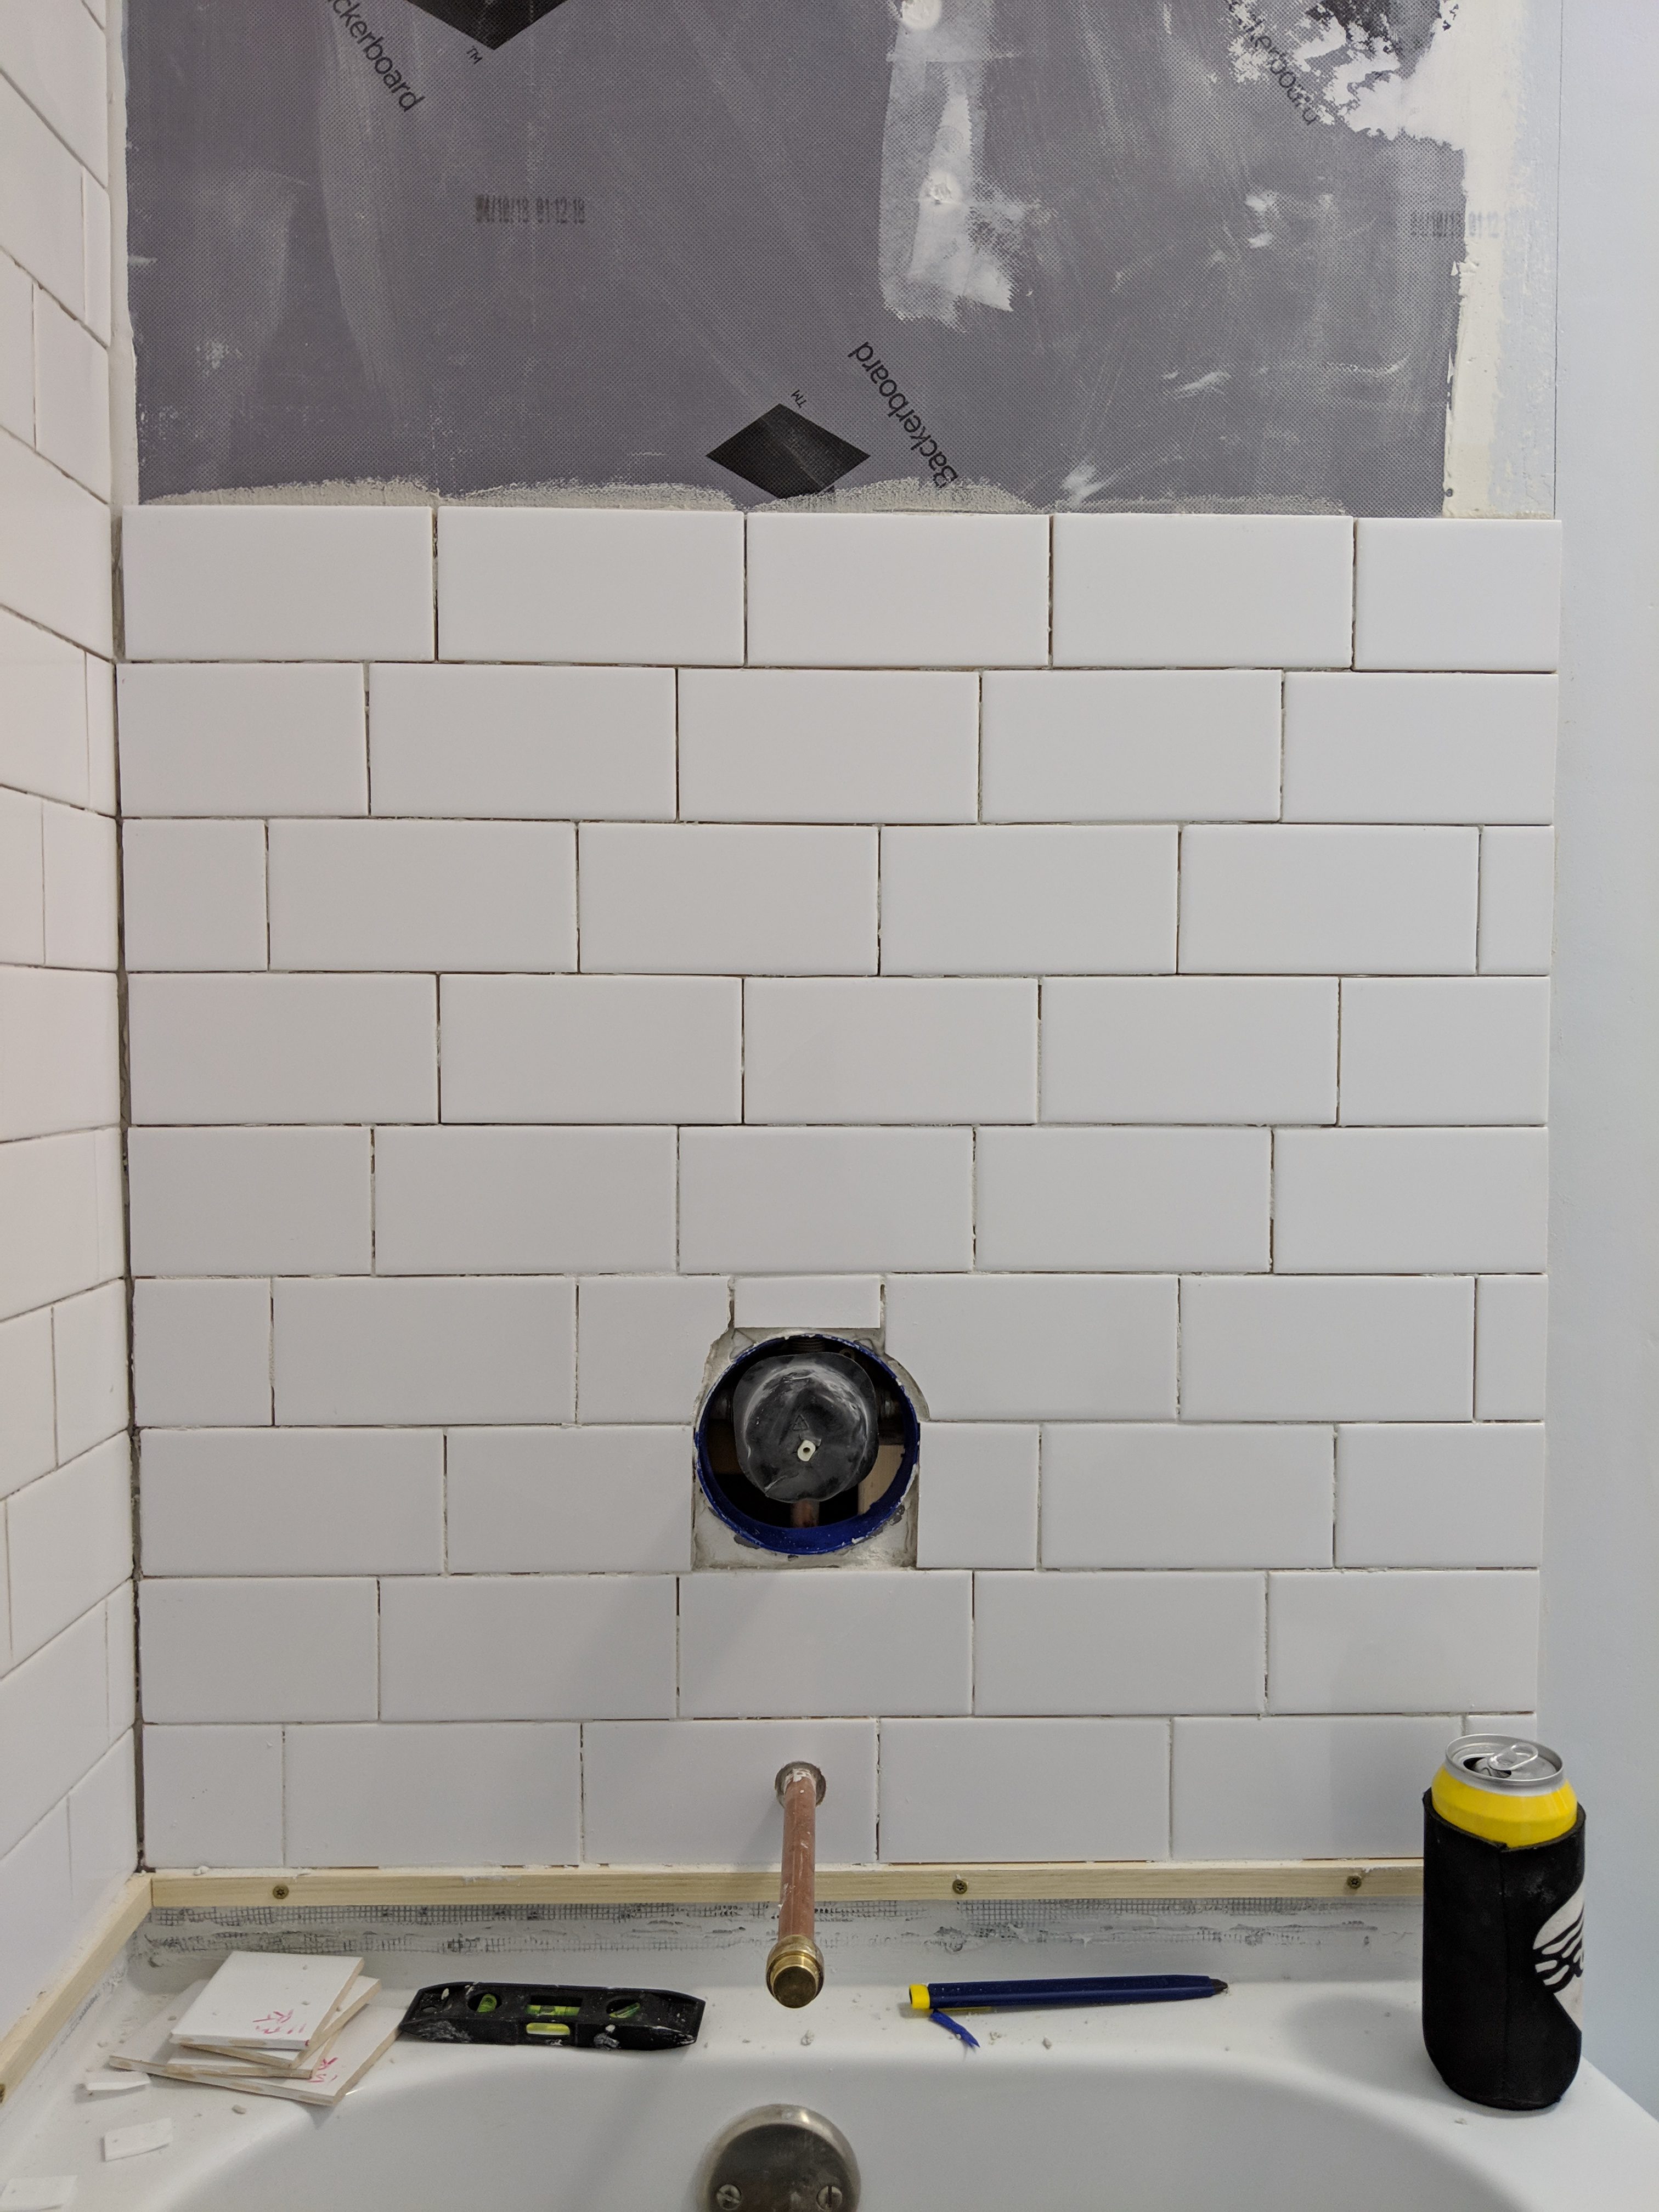
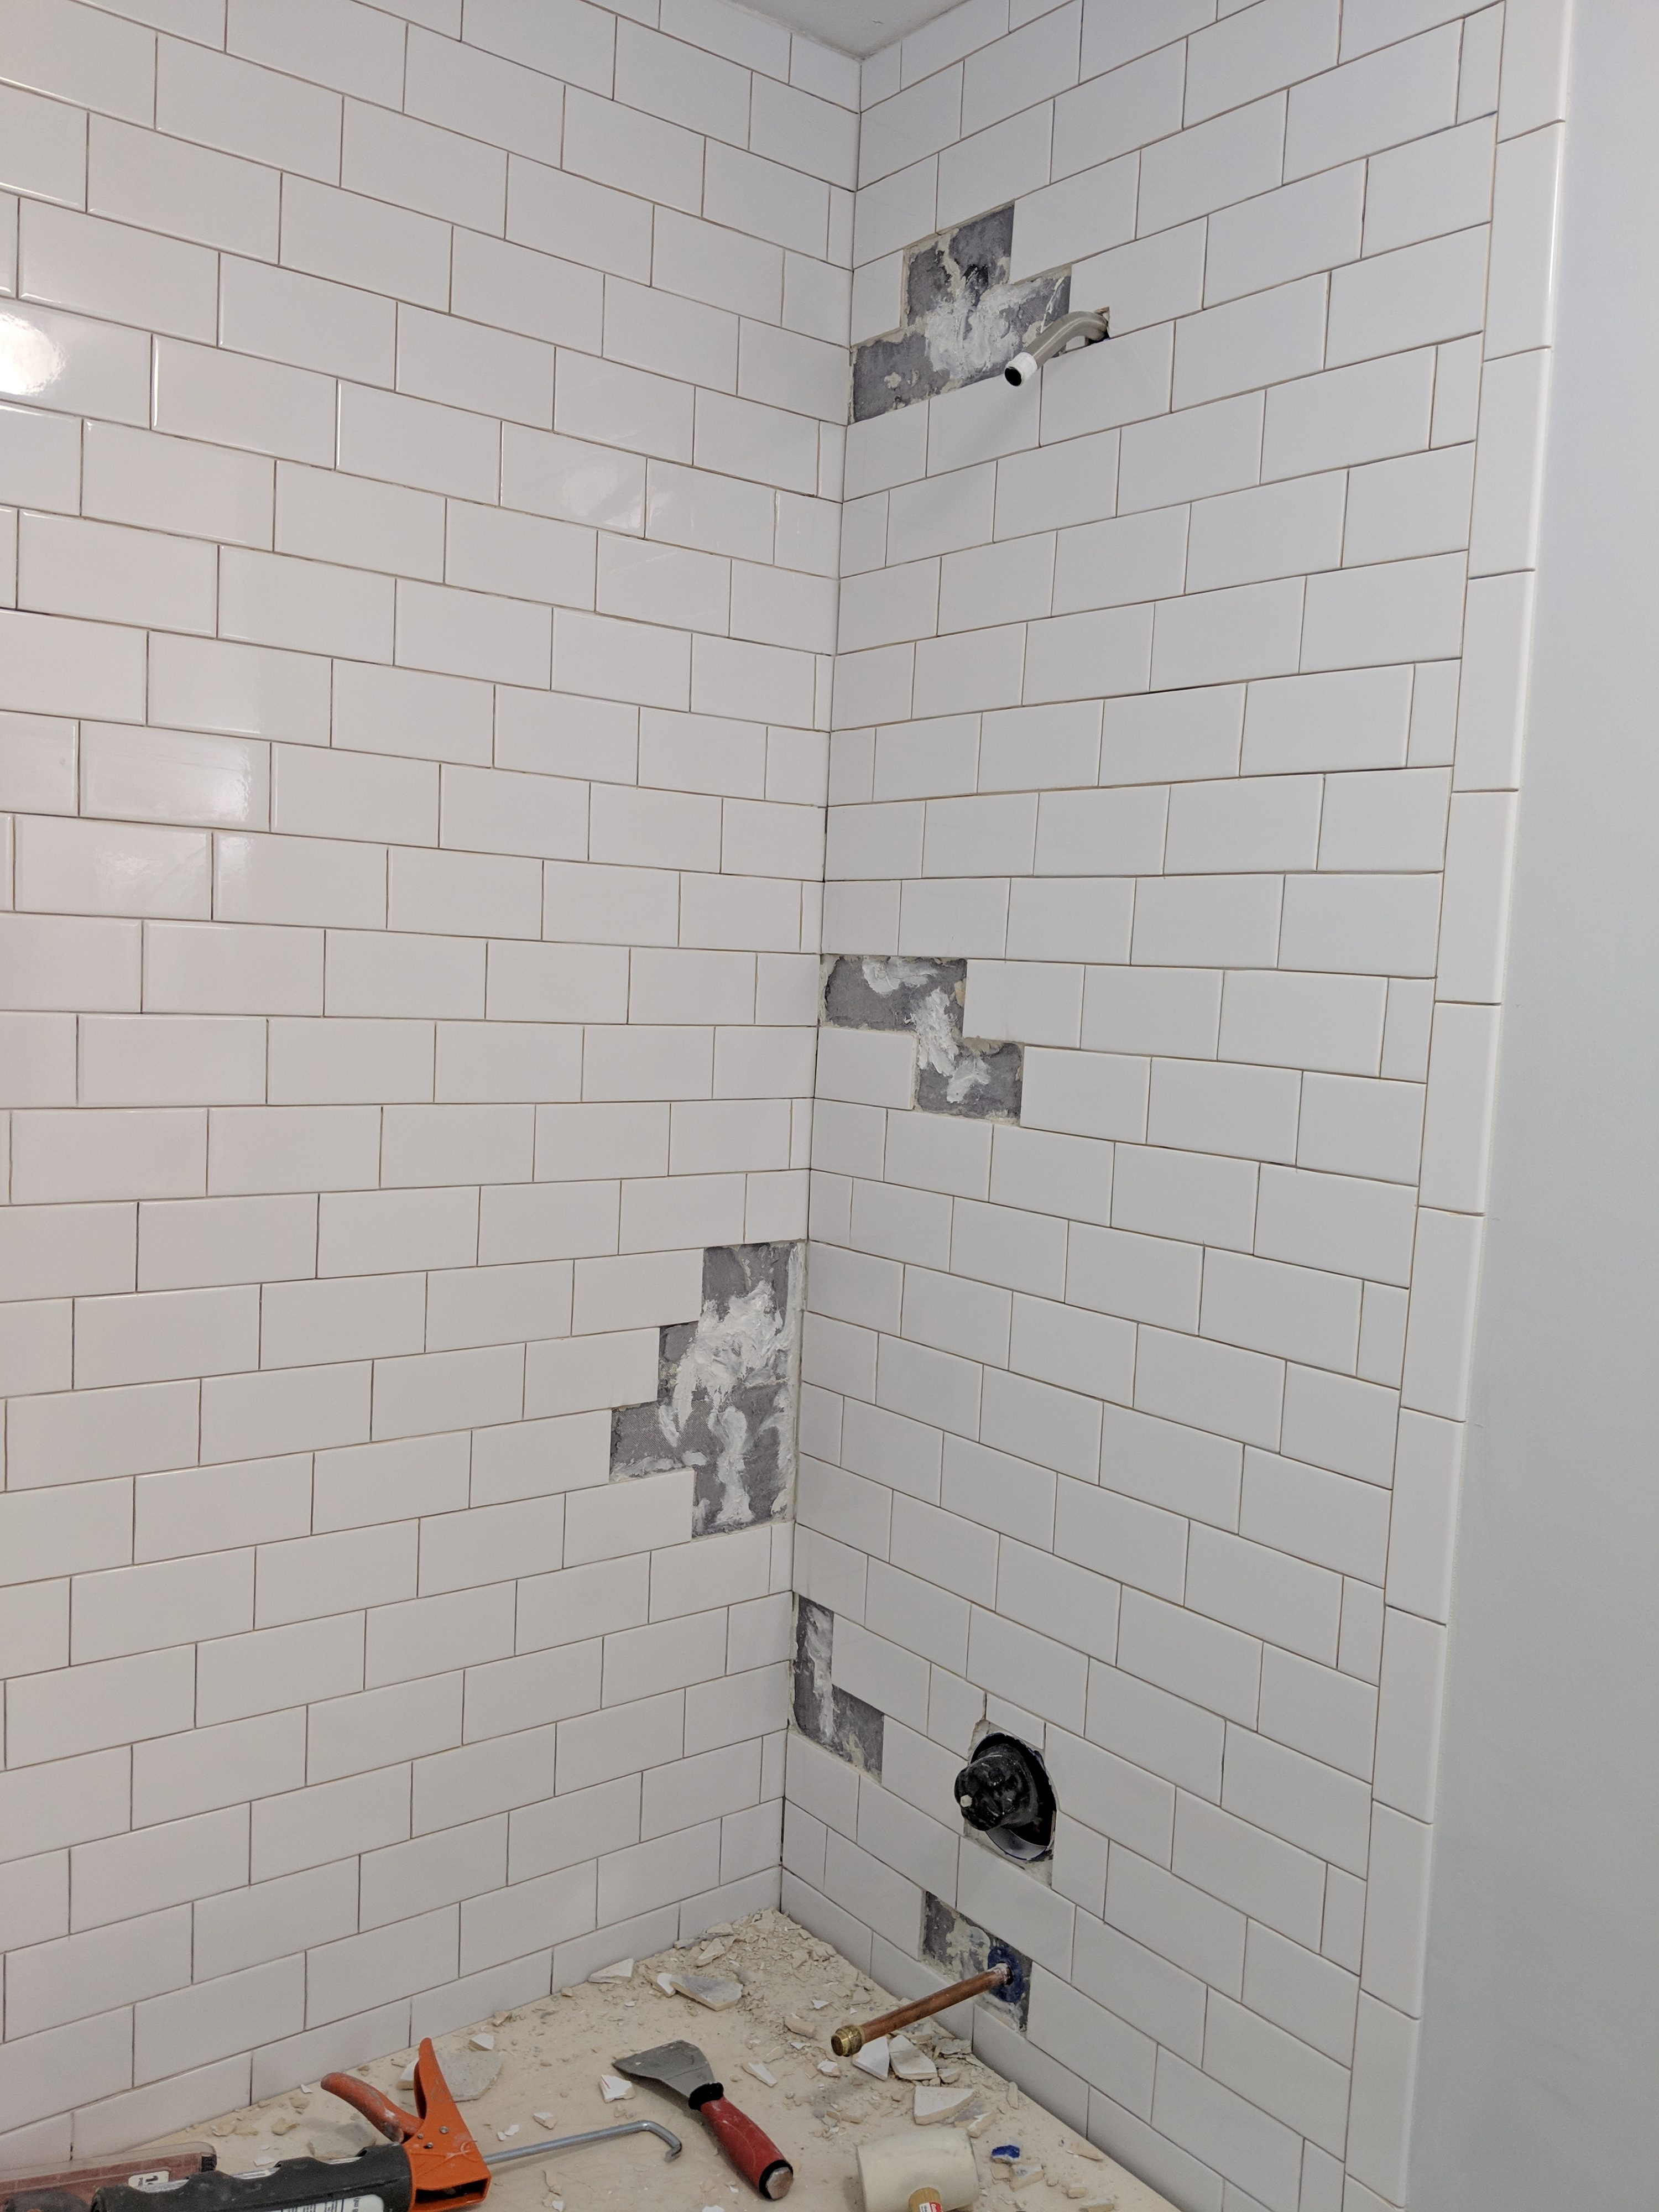
Day 5 was uneventful. I got evened out with the back wall, so things were coming together nicely. The next day I started on the plumbing wall. This one is obviously a bit trickier, since there are odd shaped pipes to cut around. The exact size/shape isn’t too important since they’ll get covered by the spout and trim plate respectively, but getting the cuts at all in the tiles based on placement is a challenge. If you noticed in previous pictures there were grey sheet looking things around the pipe & valve. These are actually seals that get mortared in, to make sure that water can’t find a way between the backer board and tile. If you notice in the Day 5 pic, I had already mortared them in.
So I got started laying tile around the faucet pipe, so I could figure out exactly how I would land. Once I had the tiles in place next to, and above it, it was easy to measure and mark the tile. Unfortunately, I didn’t think to snap a pic of my baller ass tile drilling skills, but I was able to use a 1″ hole saw drill bit and a lot of water to make a perfect circle. For the valve, I had to just cut tiles close, then use the tile nippers and file to make them somewhat shaped like a circle. Again, this doesn’t have to be perfect, because the trim plate is going to cover it. It just needs to be level and close enough that the plate touches all the way around.
I don’t quite remember why, but I only did 2 rows on the main wall the next day. I probably went out during the day and forced myself to do some work. Actually, I think this was the day I had a young helper. And also I had to get a board and cut it, to place over the tub so I could stand on it to do the higher rows. While it was nice to have someone helping me, it was slow going, having to try and teach him how to back butter the tiles, using the trowel the right way. Anyhow, only two rows got done.
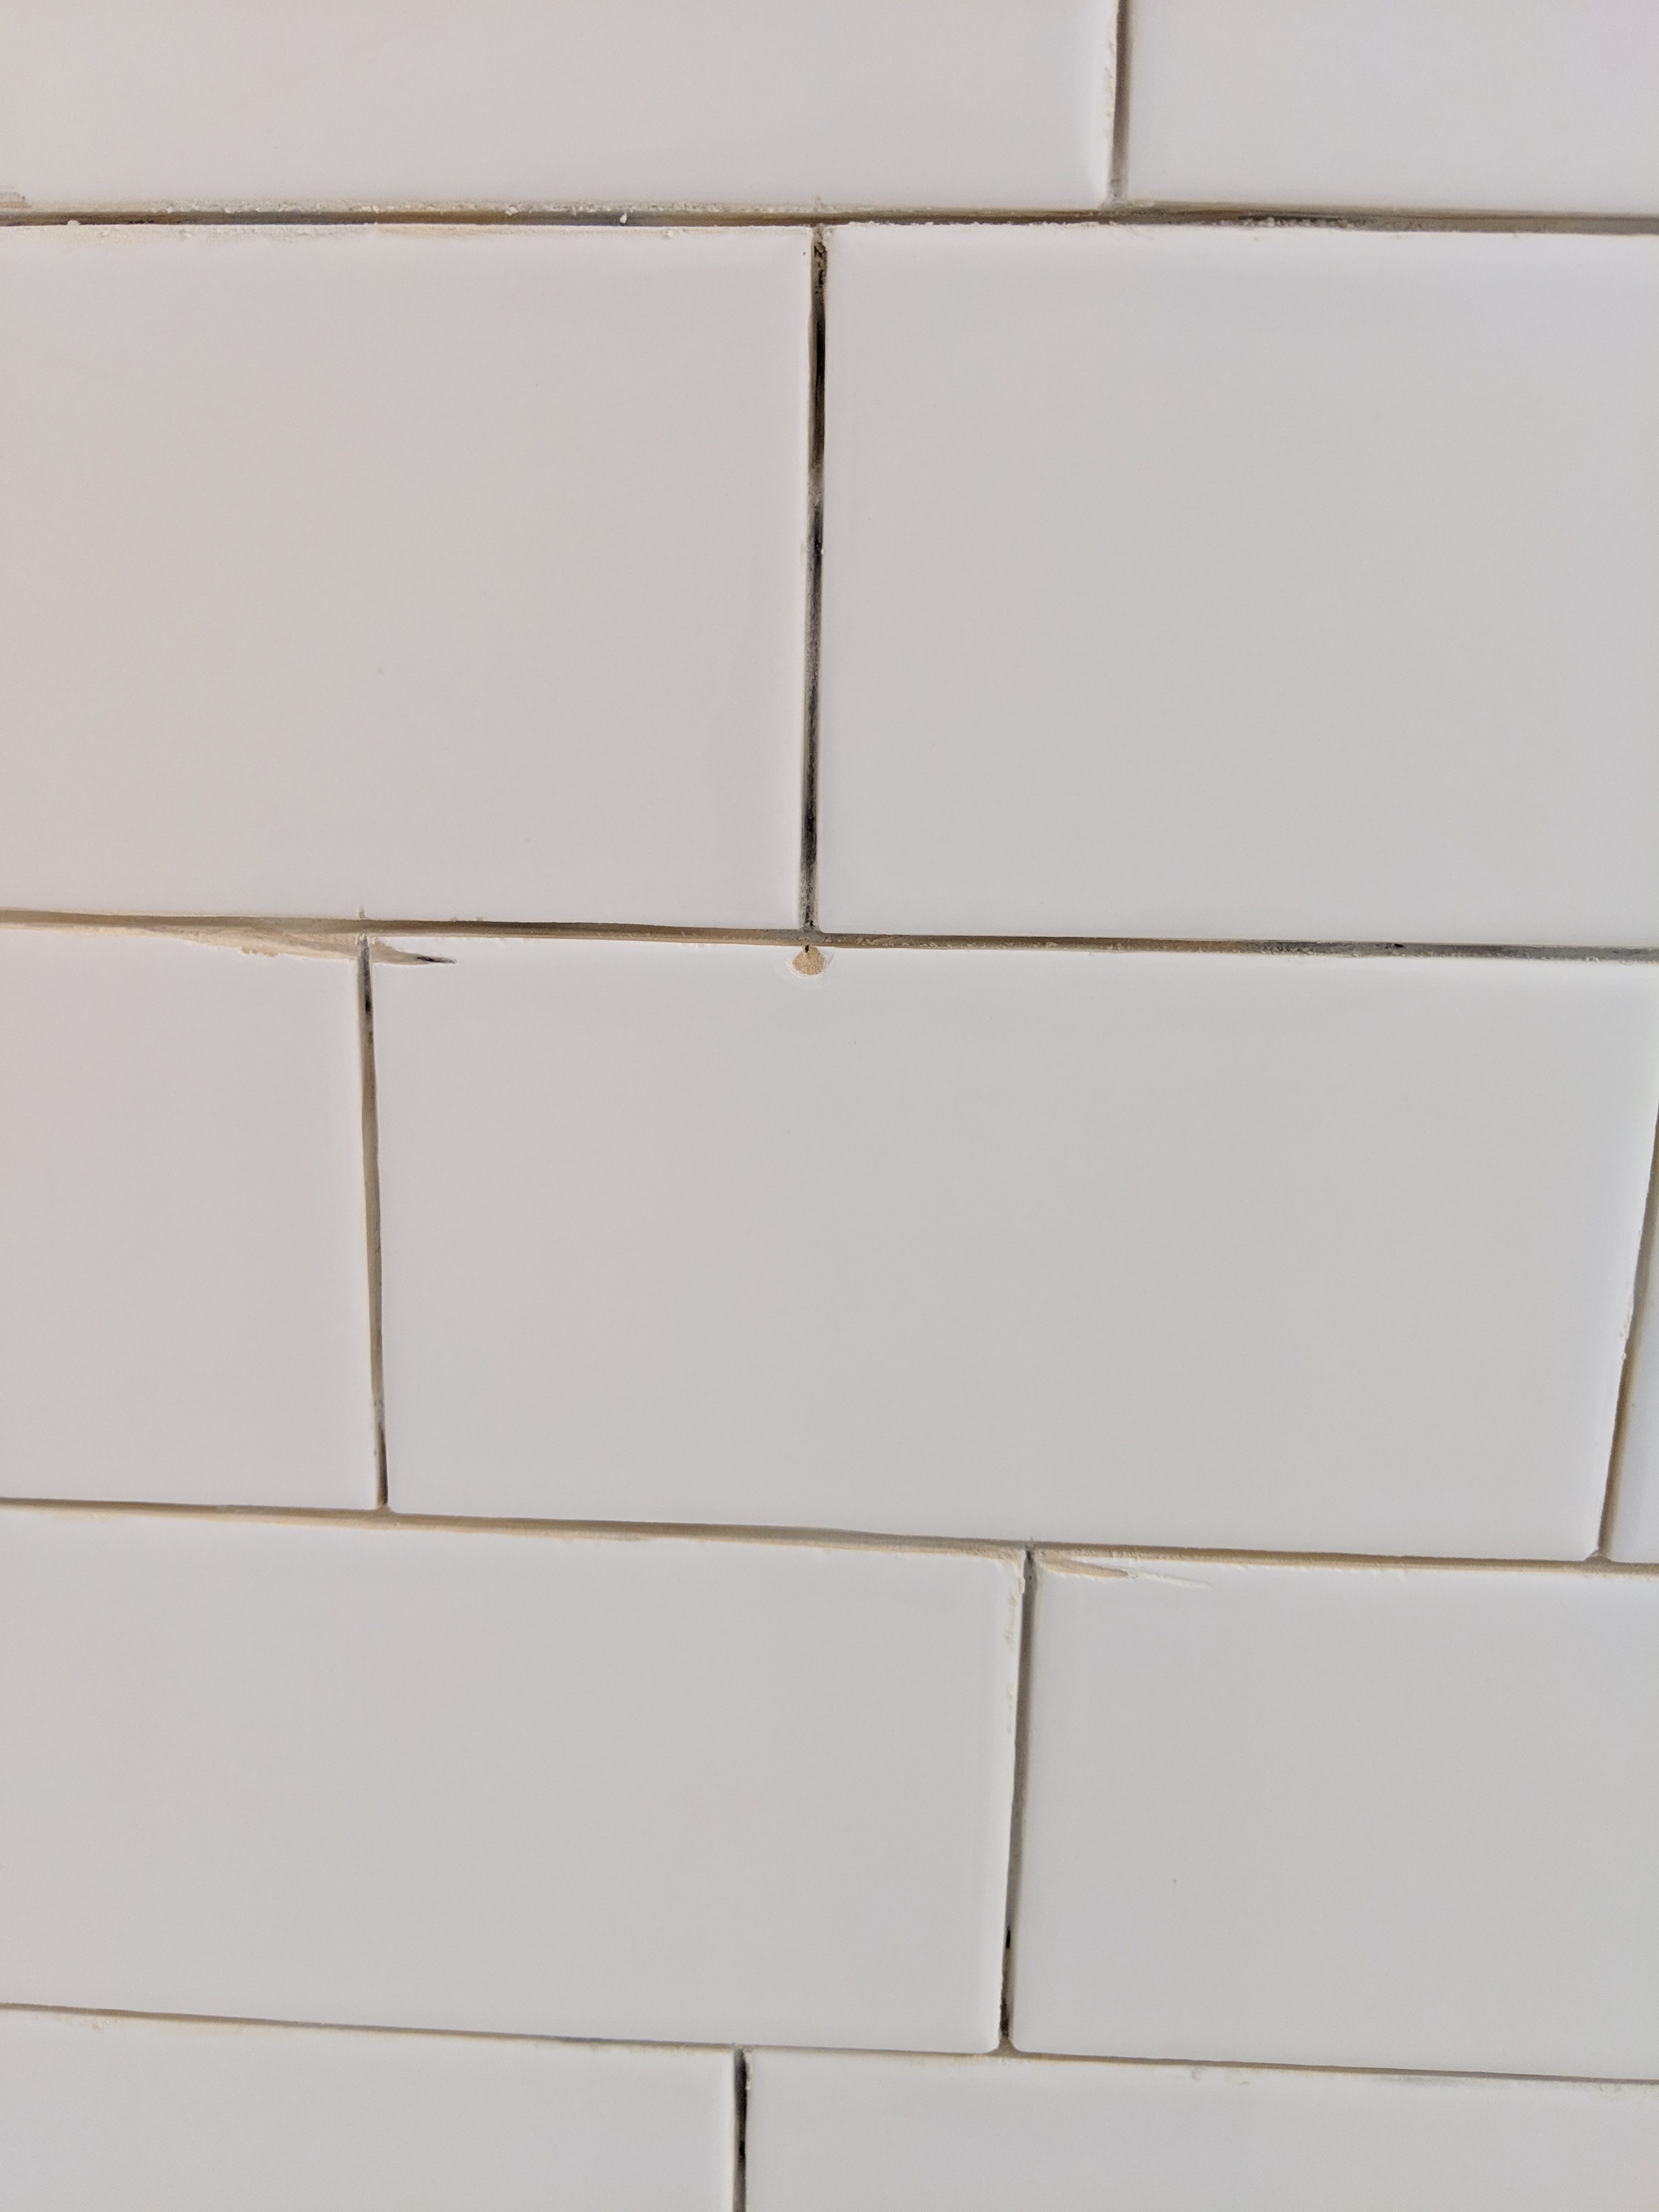
Somehow, I didn’t notice it when I did it, but I totally screwed up the pattern on the last row. I immediately noticed this when I walked in to start working the next day. I had a lot of people stare at this pic and not see it. But it’s super obvious to me. So…

I broke out the scraper and mallet and tore down that row. One of the many reasons to always buy extra tile! Once I cleaned up that mess, I got super motivated and did a double mortar day and crushed both the back wall and the shower wall! I was stoked!

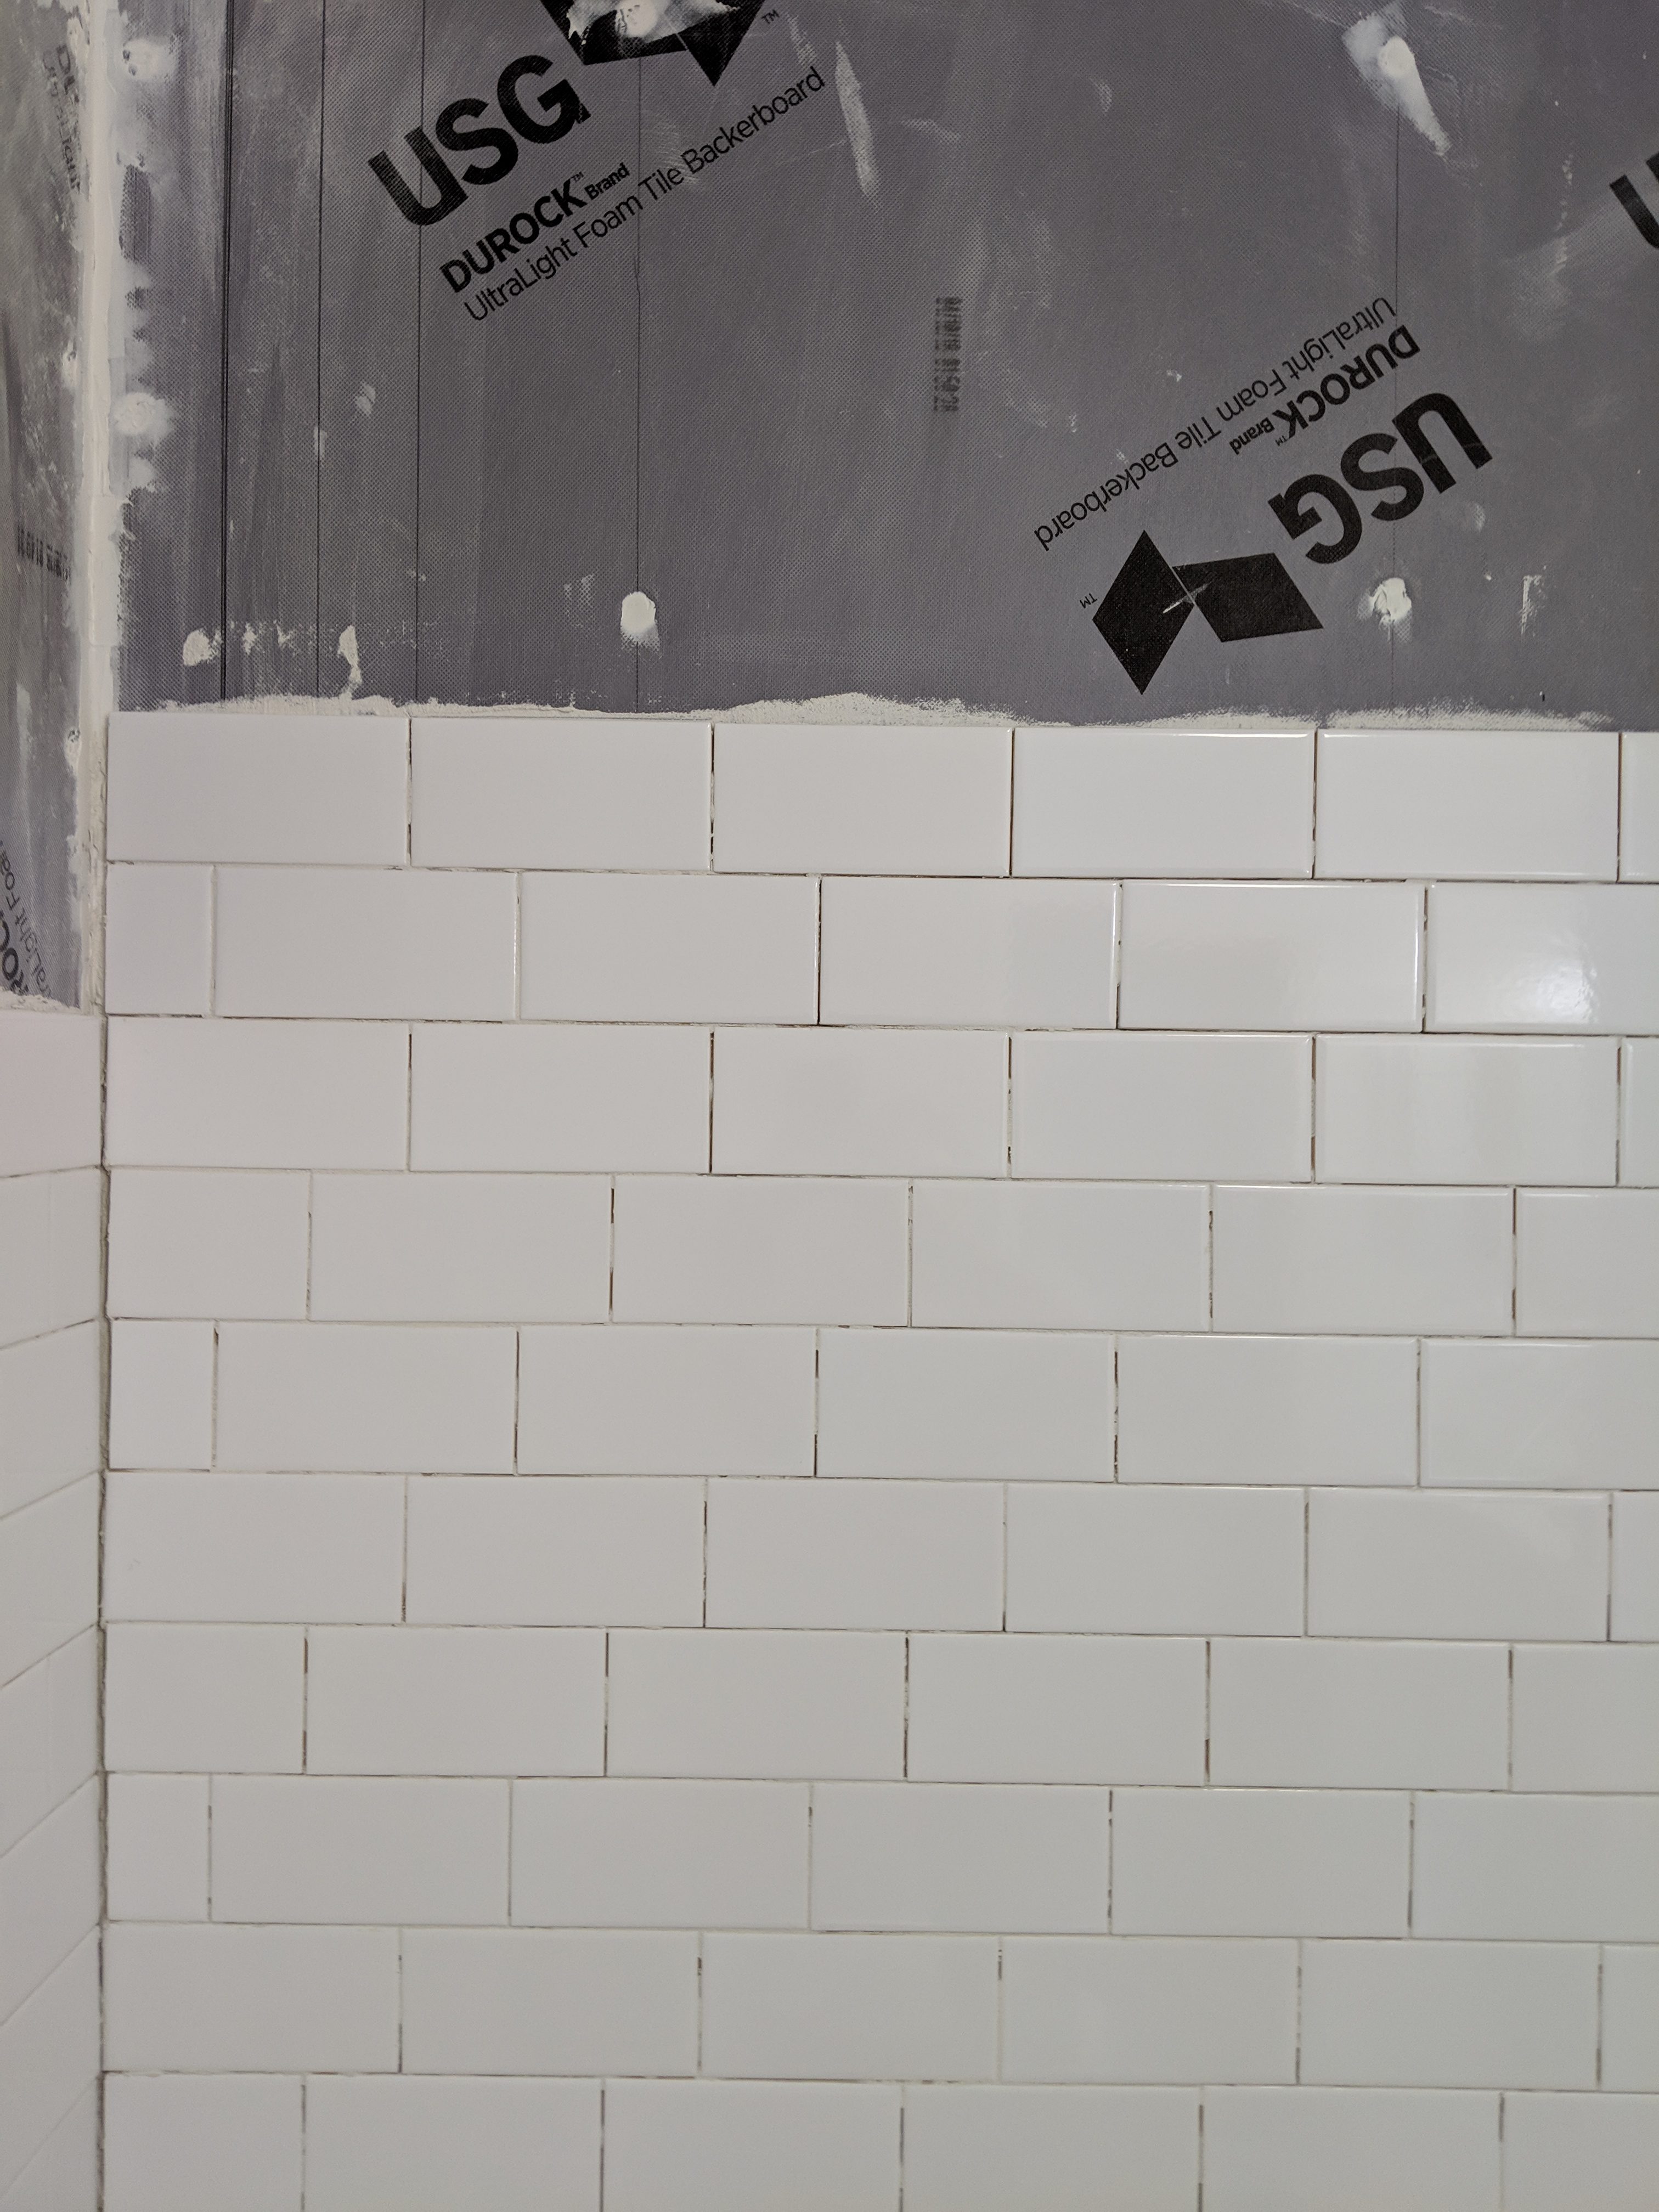
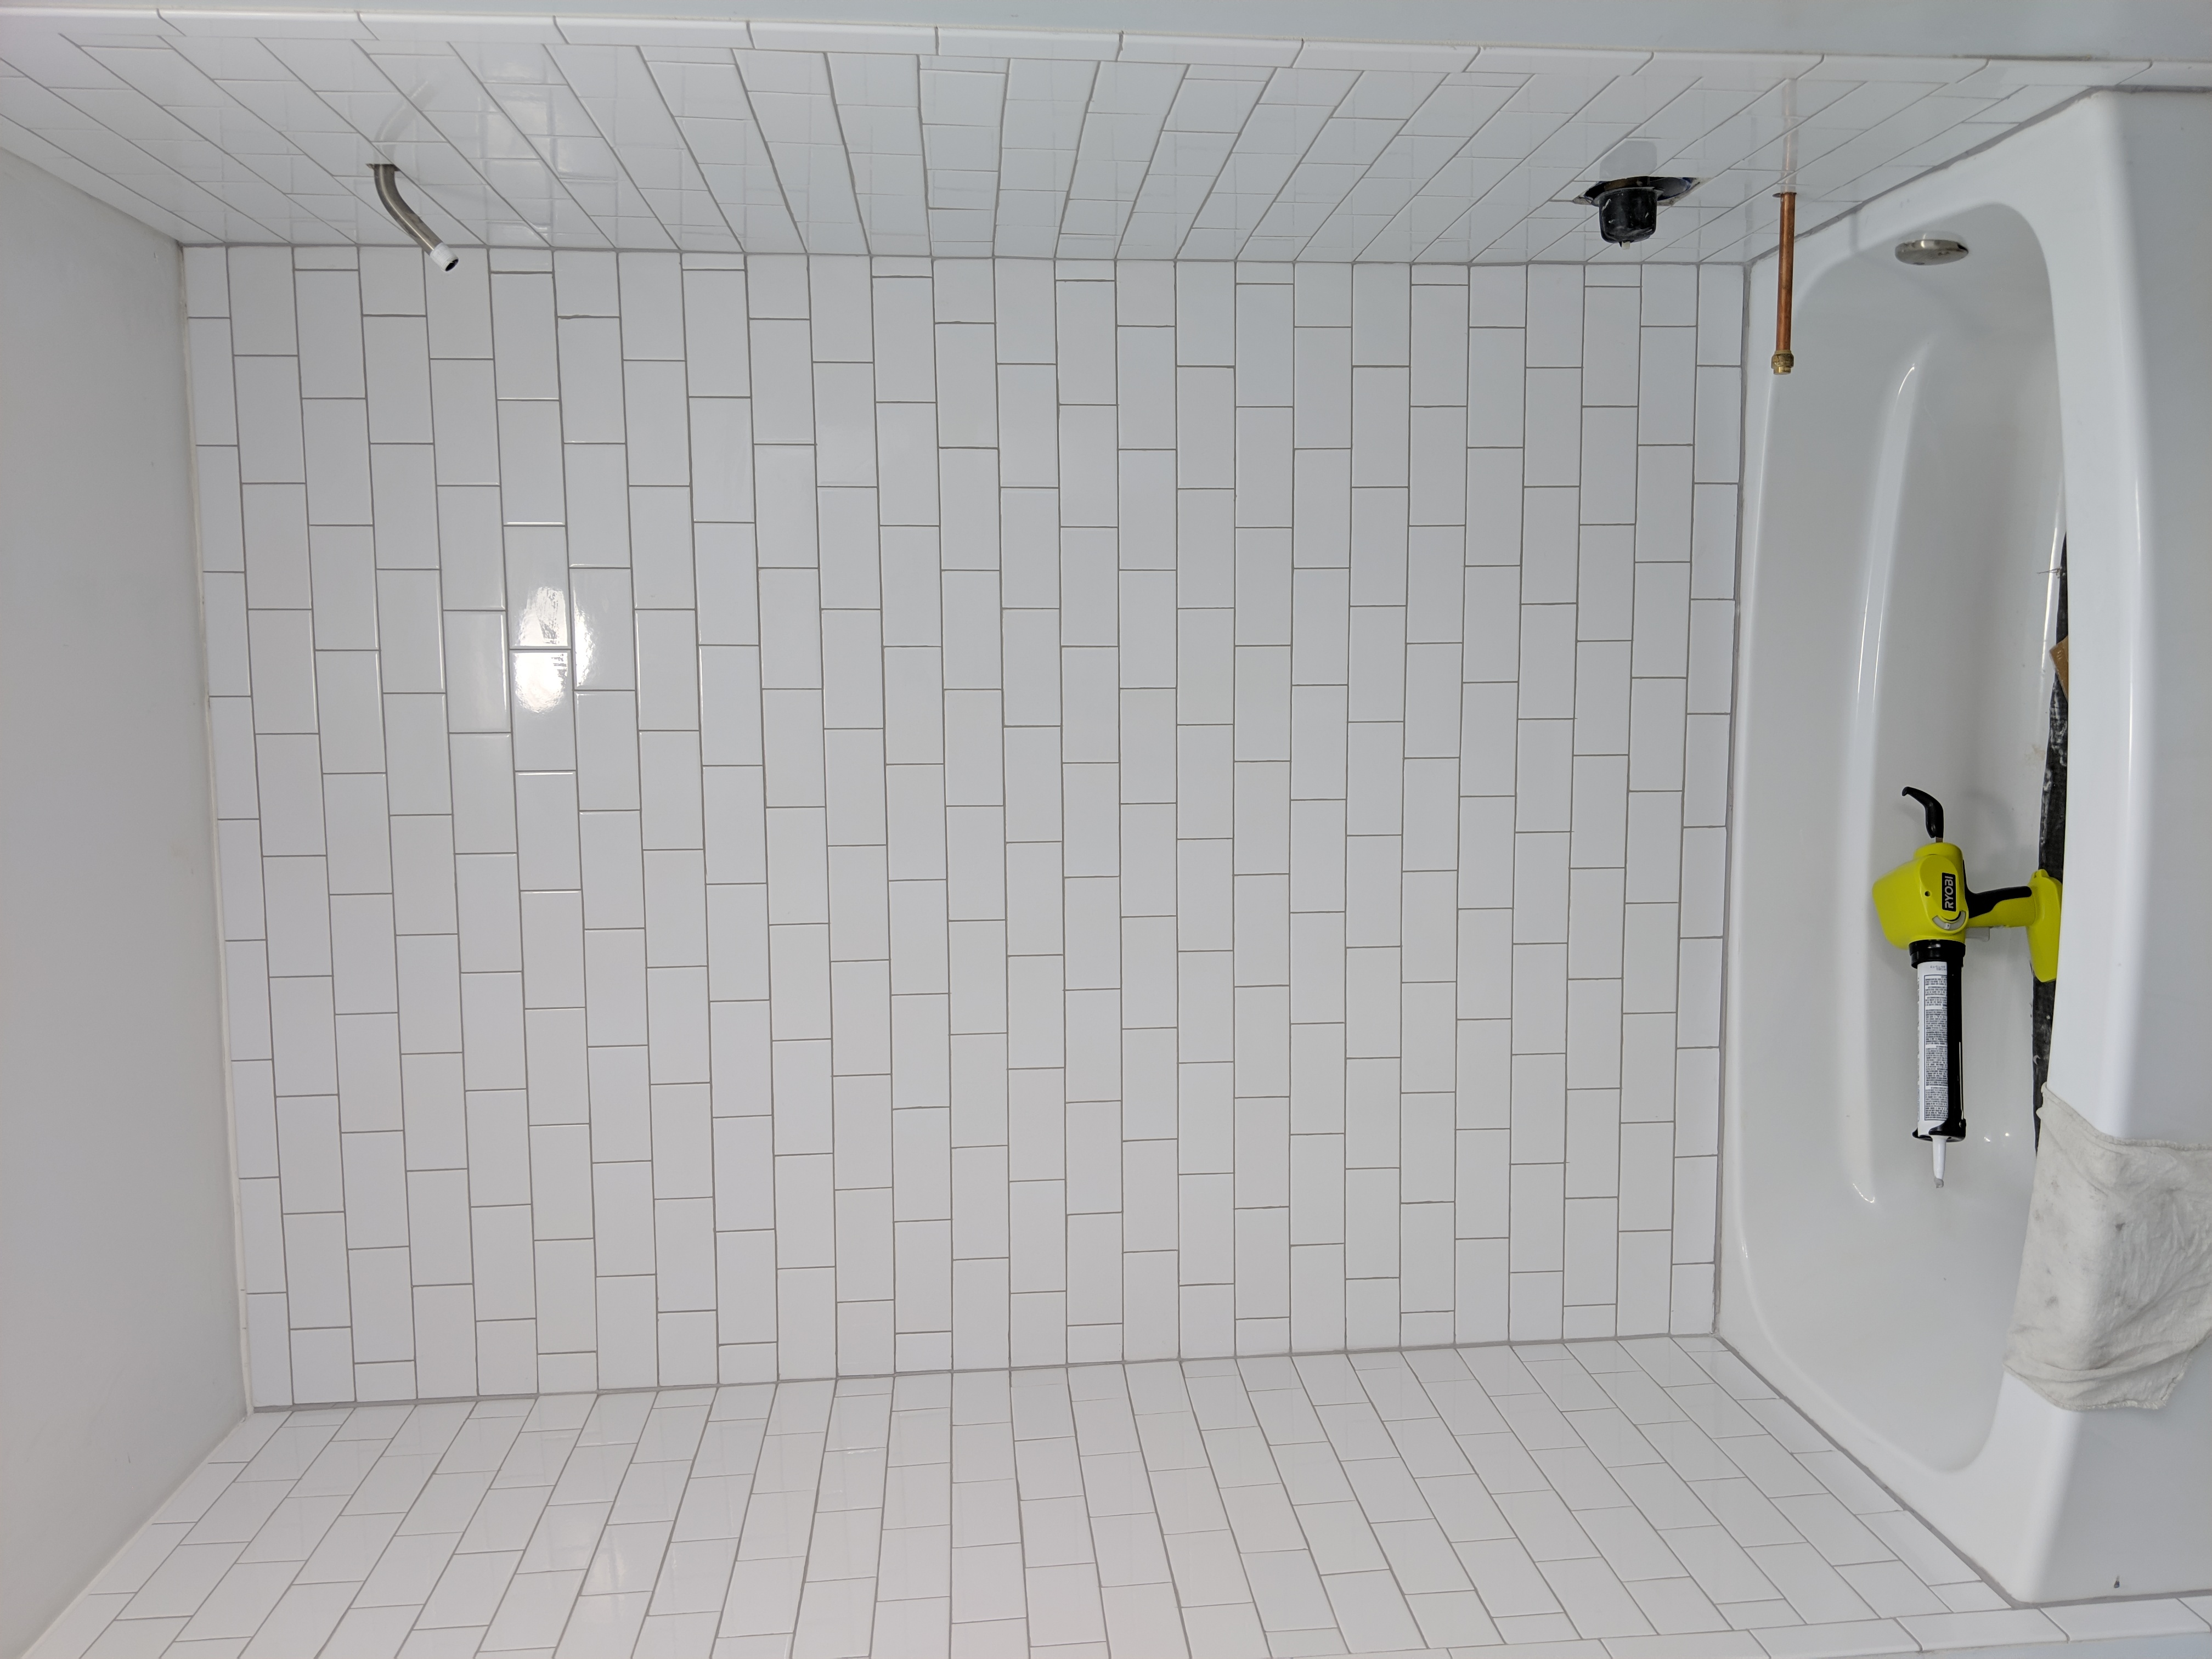
The next day was New Years Eve. I got right to it, and finished the side wall. Then I knocked out the bullnose trim which runs all the way around the top and sides down to the floor. I also set the first row, which is on spacers to leave the expansion gap which will be filled with caulk. Finally, 8 days later! I was super excited that the next day I’d be able to clean out the mortar and start grouting. Time to clean up and head to a party!
New Years Day I got down to business with my favorite tool, the multitool. New tile grinding bit in place, I worked my way between all the tile, grinding out the excess mortar. This was a VERY long process. It’s incredibly loud, and vibrates through your bones. It was going well, but as it wore on, I started to slip occasionally. A little knick in the next tile. Oops. Then a big knick! Then some more. SHIT! By the time I was done, there were at least a couple dozen very noticeable cuts in tile, and many more lesser so. I was completely devastated.
I was so upset about this, I had to just walk away. I didn’t go back to it for 4 days, or I was gonna take a sledgehammer to the entire thing. Once I did go back in, I picked out the worst tiles of the bunch and proceeded to carefully try to remove them. This is super hard to do without damaging the tile next to it. So all in, I removed about 3 dozen tiles! I replaced all the tiles, and got everything grouted up the next day.

The next challenge came with caulk. I think I made it clear in previous posts just how much I hate doing caulk, but let me say it again, I HATE DOING CAULK!!! This is the next place where the flaws in my work are exposed. When I tiled to the corners, I was trying to leave a 1/4″ gap for expansion, which gets filled with caulk. I wasn’t super worried about making the tiles line up perfectly, thinking this would be covered by the caulk. That would have worked out okay if it were a smaller gap, but I actually overshot in some spots and under in others. So much so that I had to do more like 1/2″ of caulk to account for this. That’s a lot of caulk! Even with my powered caulk gun, it was not a simple task. It was a giant mess, and I was crazy frustrated dealing with it.
It took almost a month before I dealt with the outer edges of the tile. I just did not want to do it. I was completely over this project by this point, and really didn’t want to make more of a mess. I finally enlisted Ivan to come help me, from going insane. It still looks like amateur hour, but we got it done.
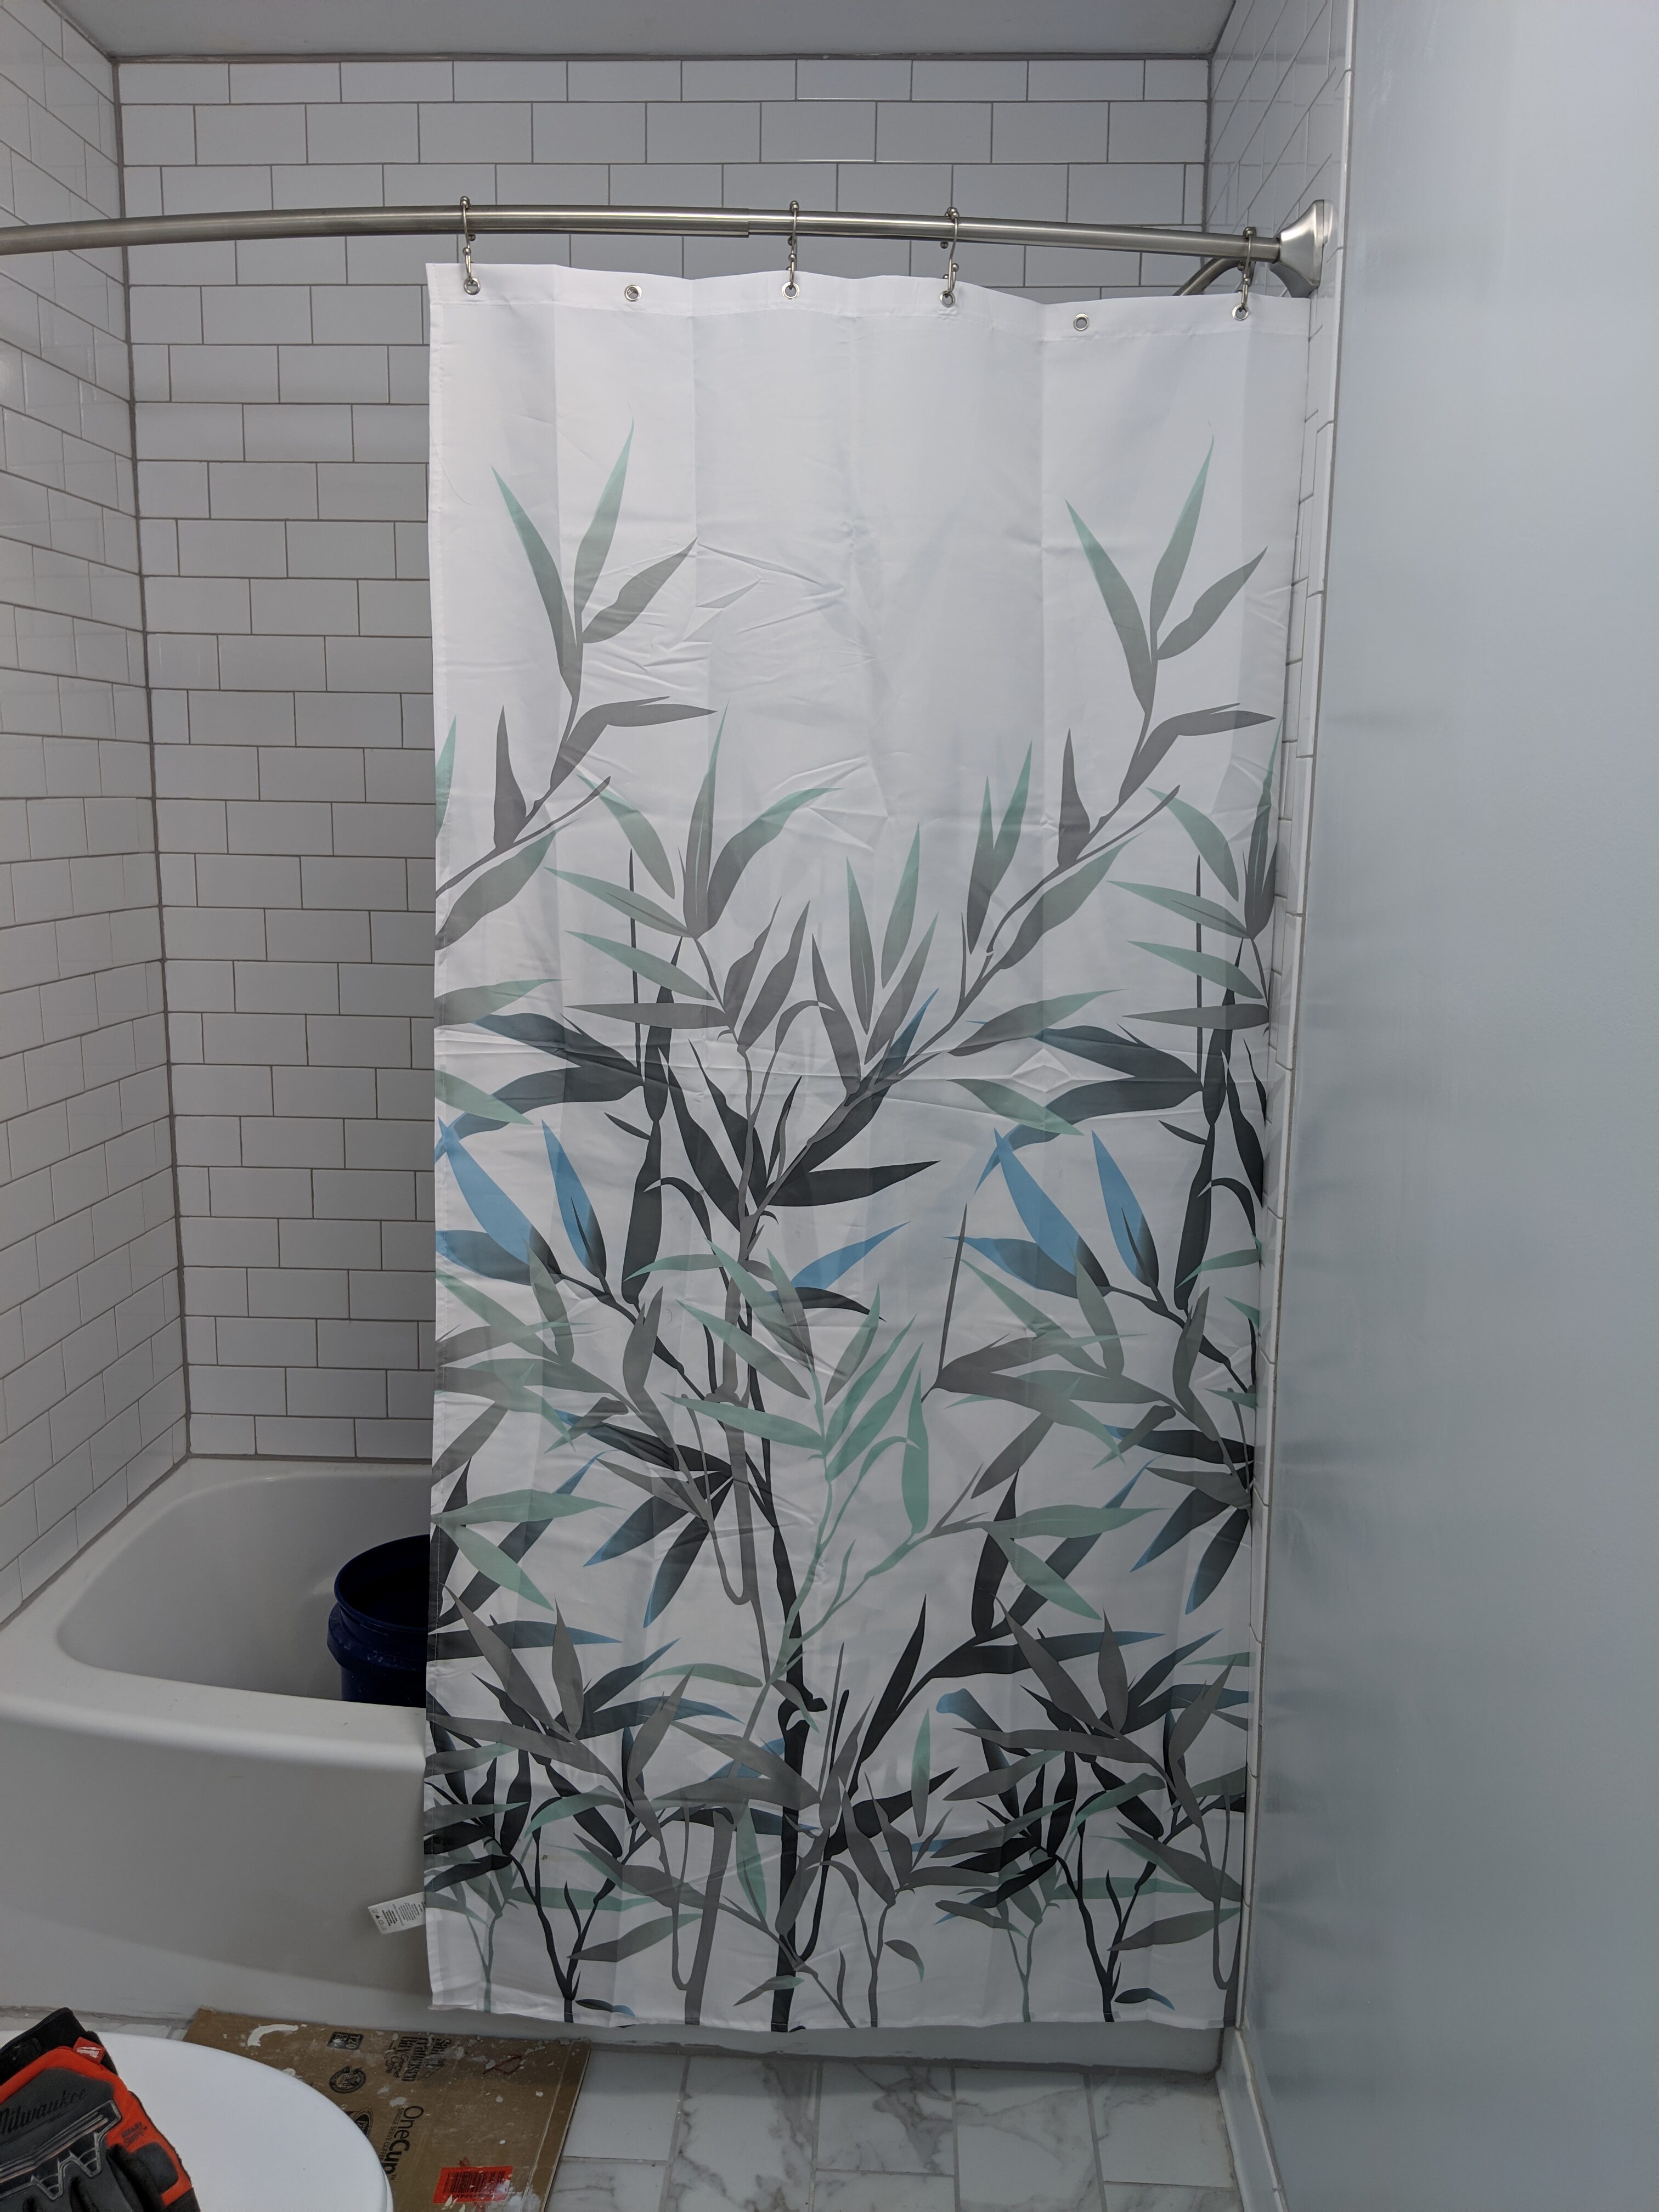
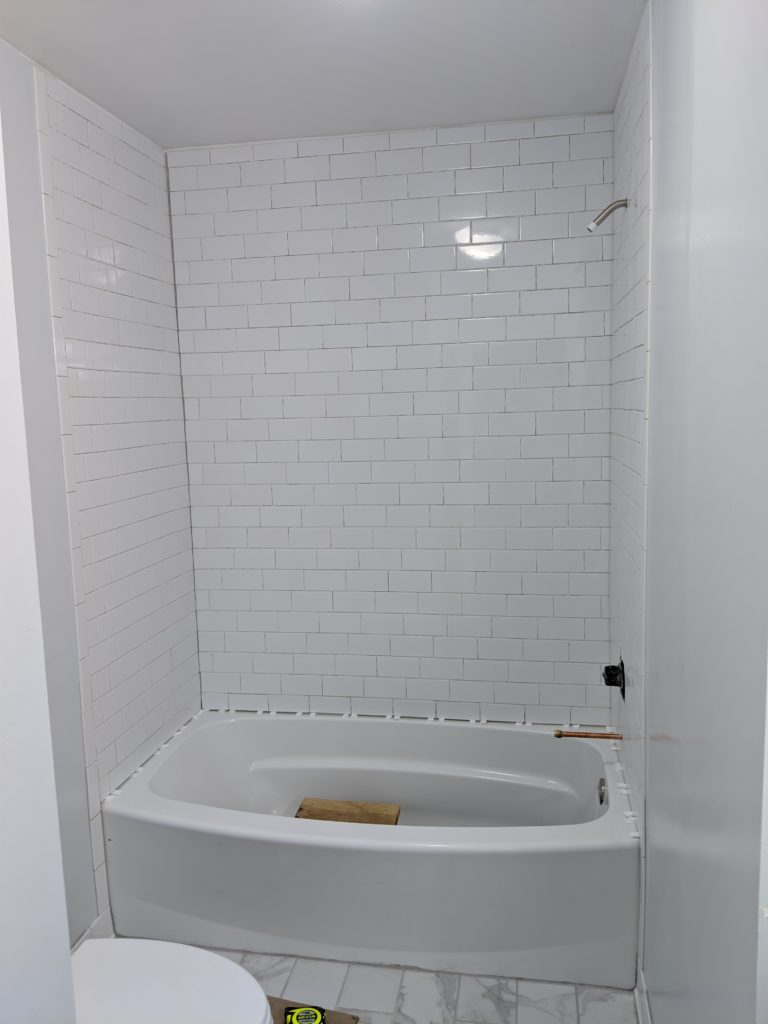
This is actually the last photo I took of the bathroom, in mid February! That’s how done I was. All in all, I don’t regret doing it. It mostly came out great. I’m a bit of a perfectionist, which makes doing these kinds of things difficult, when you don’t necessarily have the skill level to do things perfectly. I’m my own worst critic, so all of the little flaws add up. A lot of people have told me that they don’t even notice most of the things until I point them out. Which I’m sure is mostly true, with a helping of being nice on top. I will say that I use the toilet in this bathroom almost every night before bed, and it looks pretty good to me (without my glasses on).
At some point, I’ll get some good pics of the finished product. We still haven’t gotten bath mats or decorated at all. The kids use the bathroom daily and love having a tub and shower of their own. Since “finishing” the bathroom, I’ve been busy with many smaller projects around the house, so the powder room kept getting pushed back. But I’m finally starting it this weekend, so stay tuned for updates!
You must be logged in to post a comment.