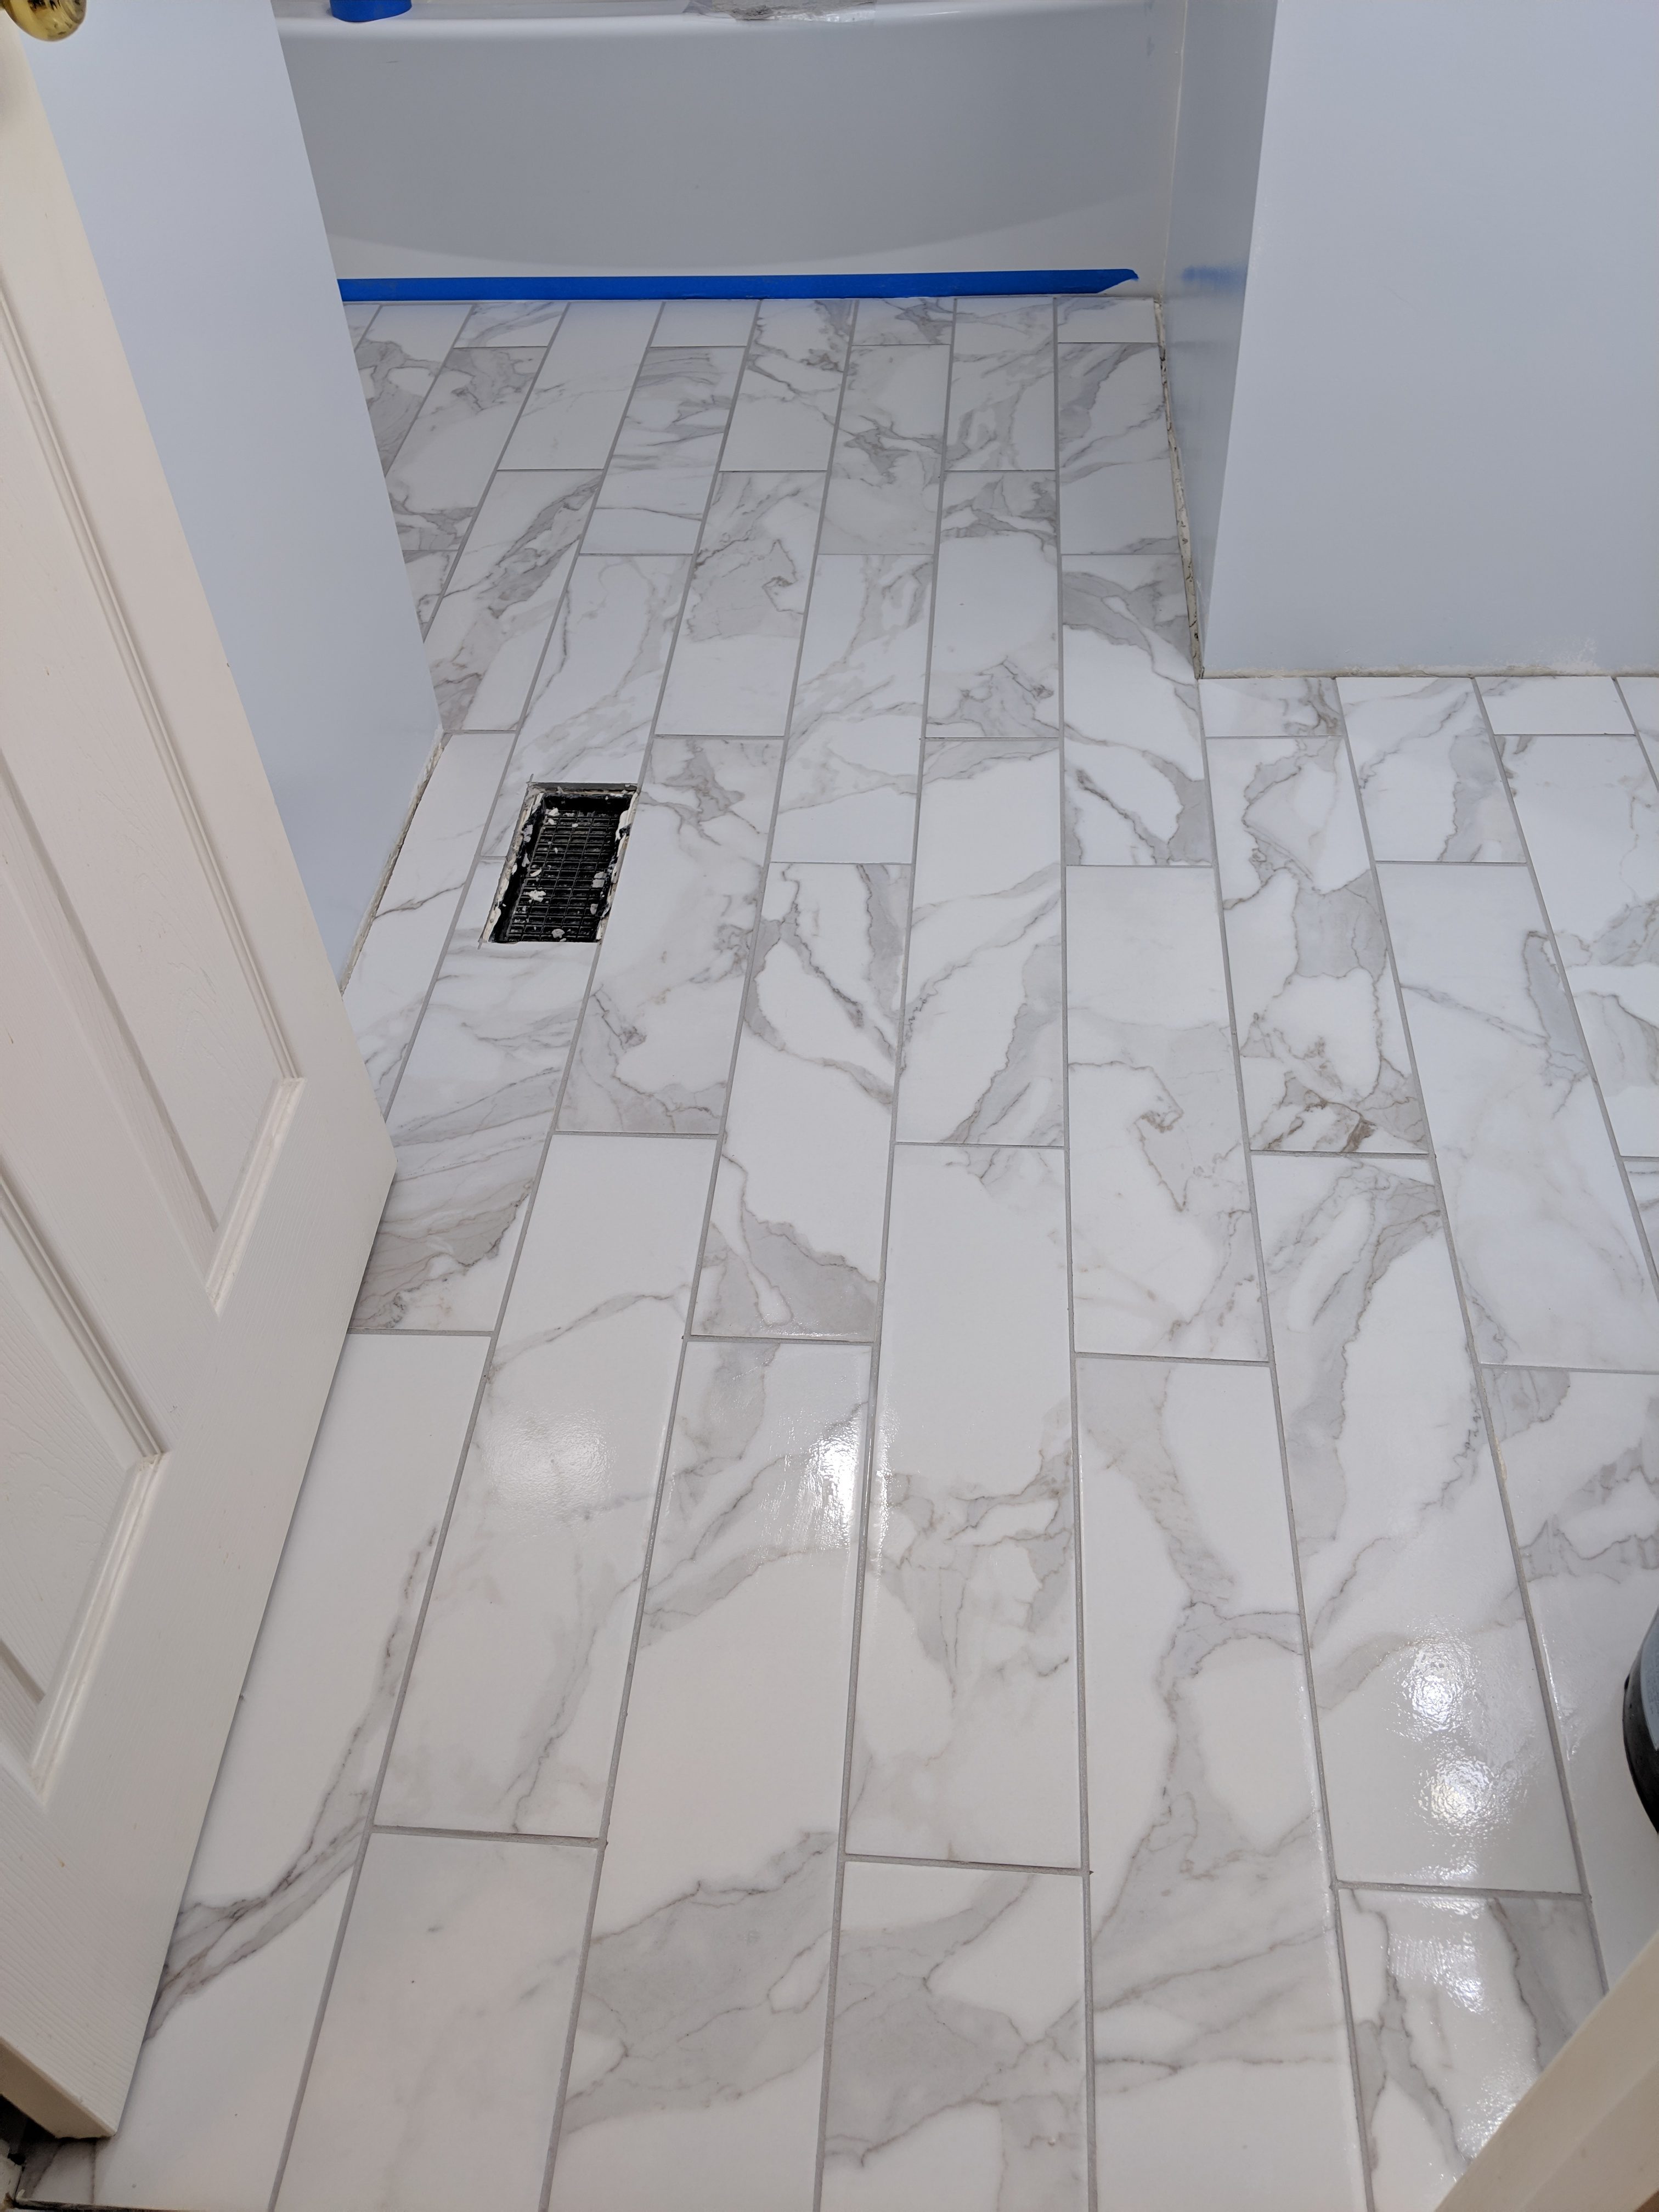
I got a lot accomplished this week. The last post I ended with just finishing setting the floor tiles. I ended up not doing grout until Tuesday night, because I got a late start on Monday, and by the time I got the floor cleaned up, it was already 10:00pm. Anyhow, Monday night, I went in and removed all of the spacers, and kicked off all of the leveling caps. All but a couple snapped cleanly at the base (under the tile) as they should. I knew that a couple of them were not going to budge due to excess mortar in between the tiles. I just hit them with my multi-tool using a carbide grit grout removal blade (more on that below).
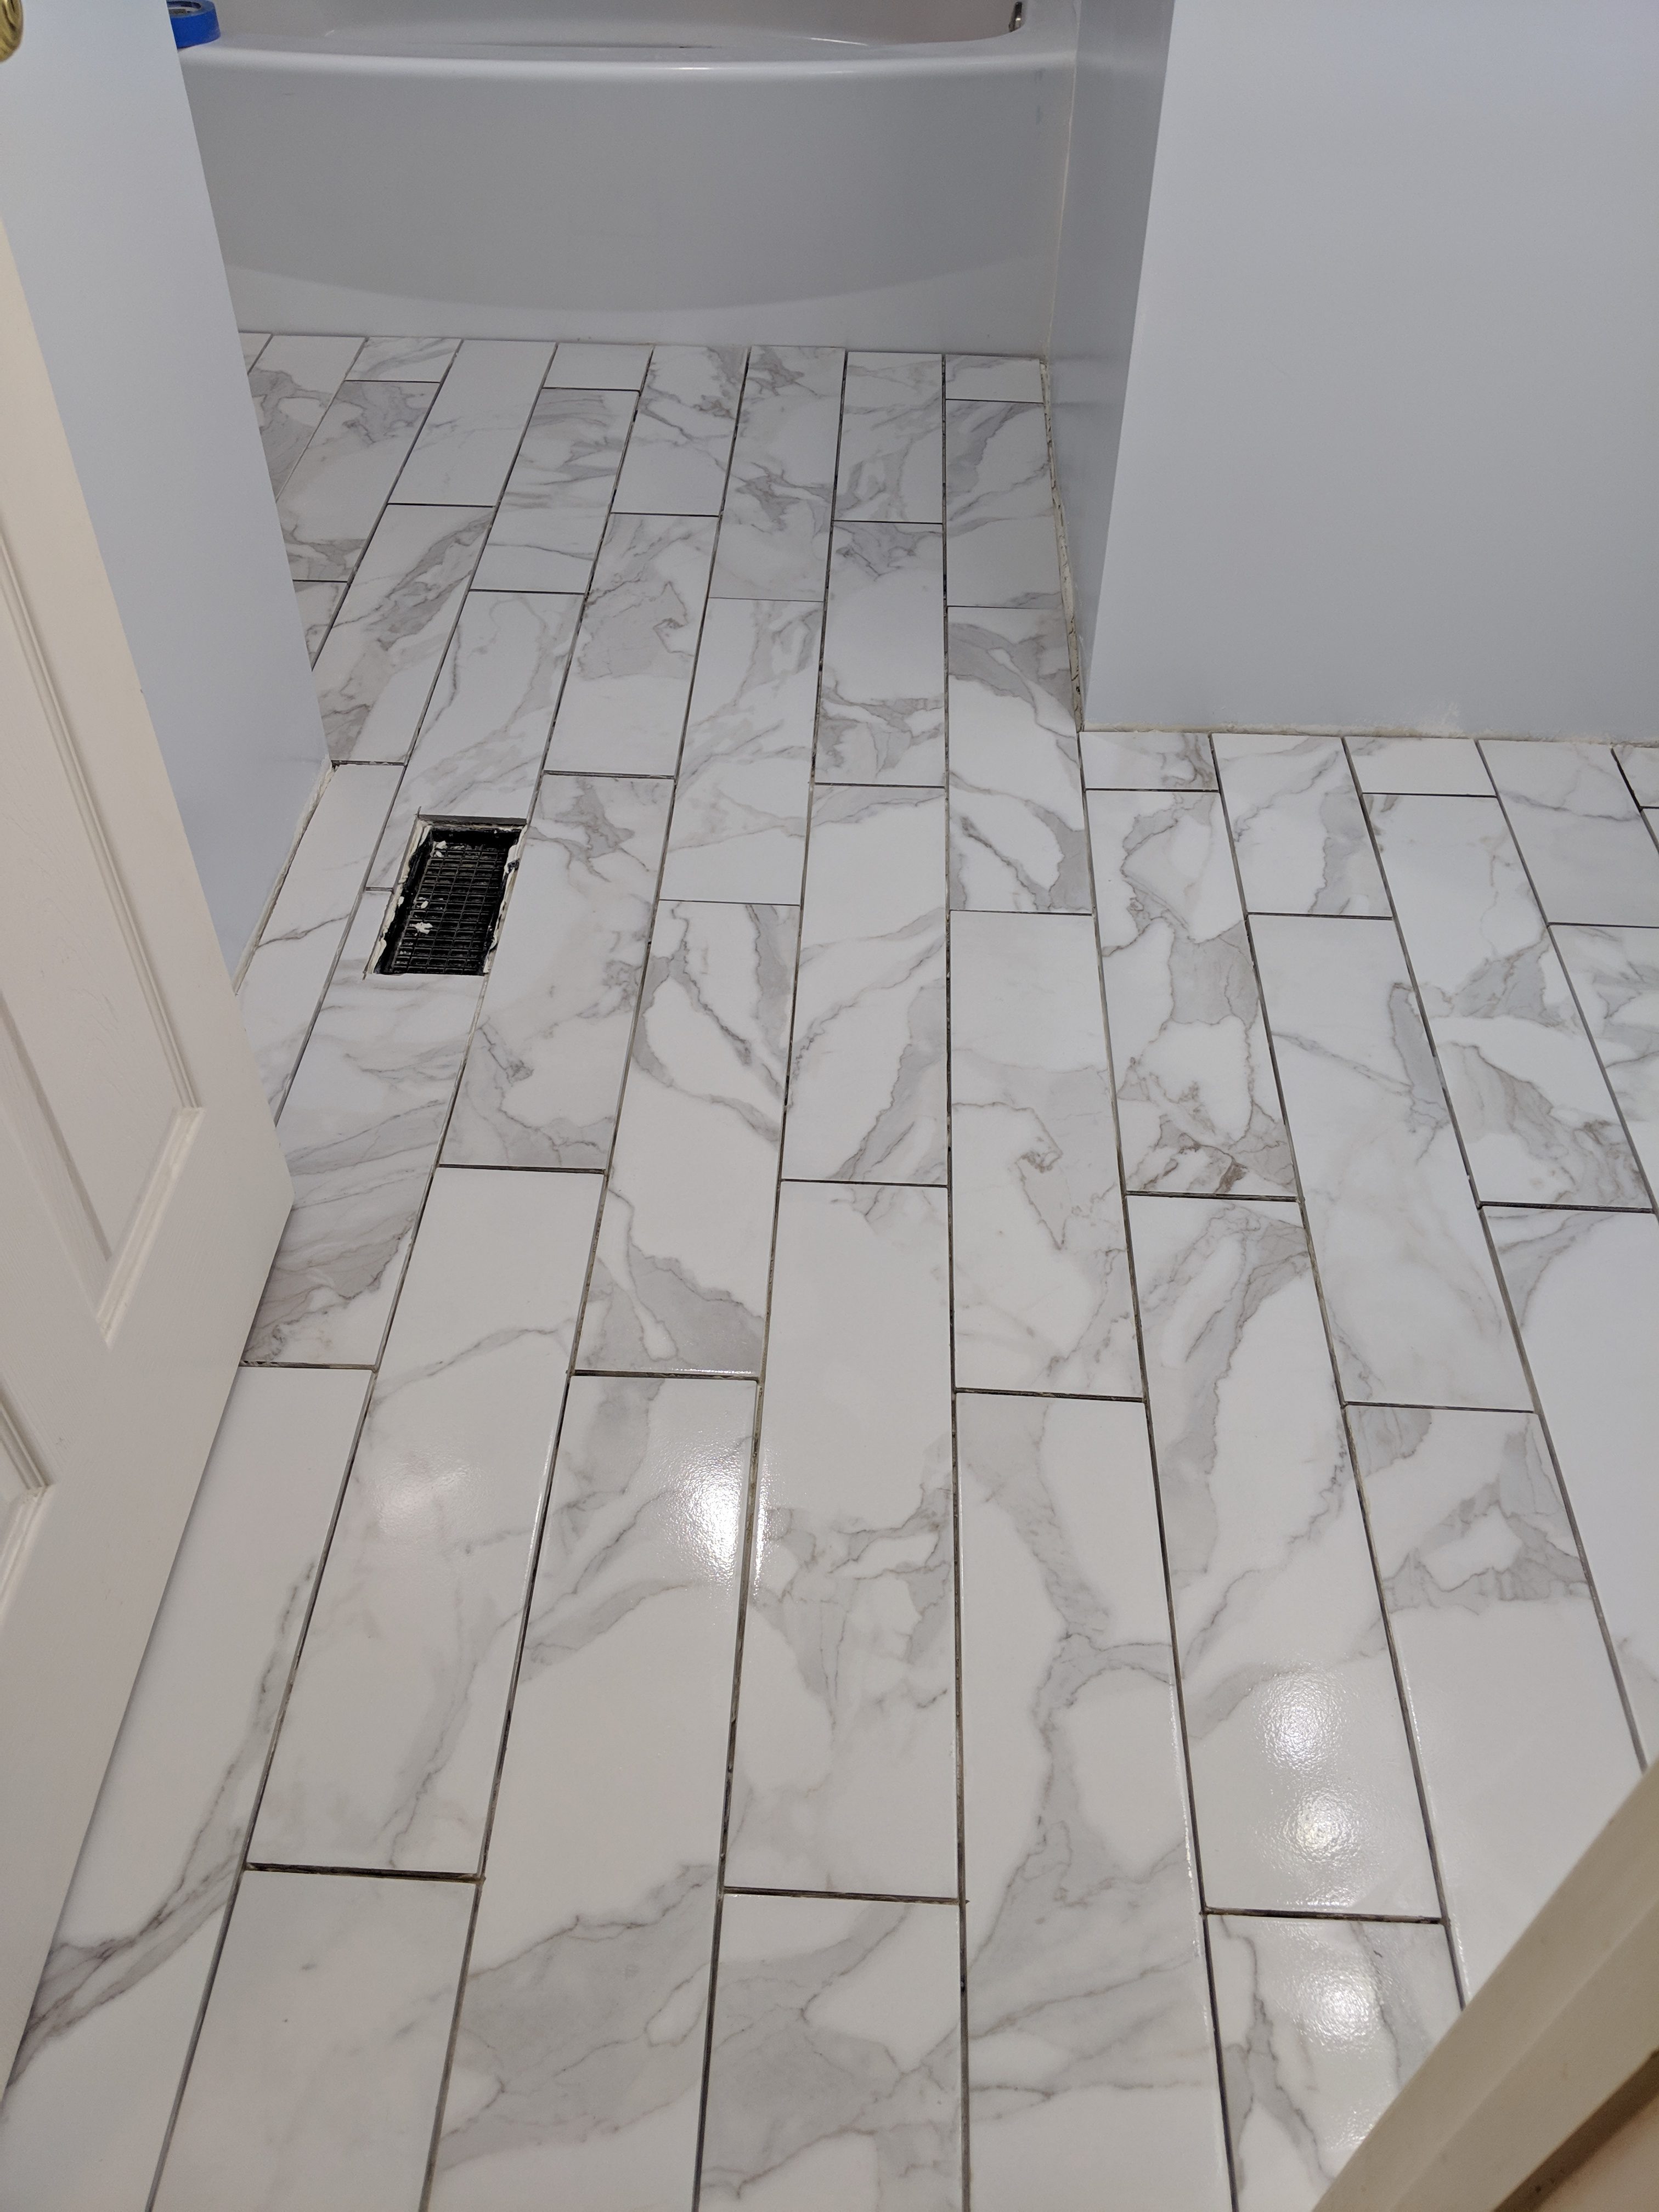
Once all of the levelers and spacers were out, I moved on to cleaning out excess mortar between the tiles. In most areas, this was minimal. We did however have a few areas where things got a little sloppy for various reasons. No problem, I was prepared for this.
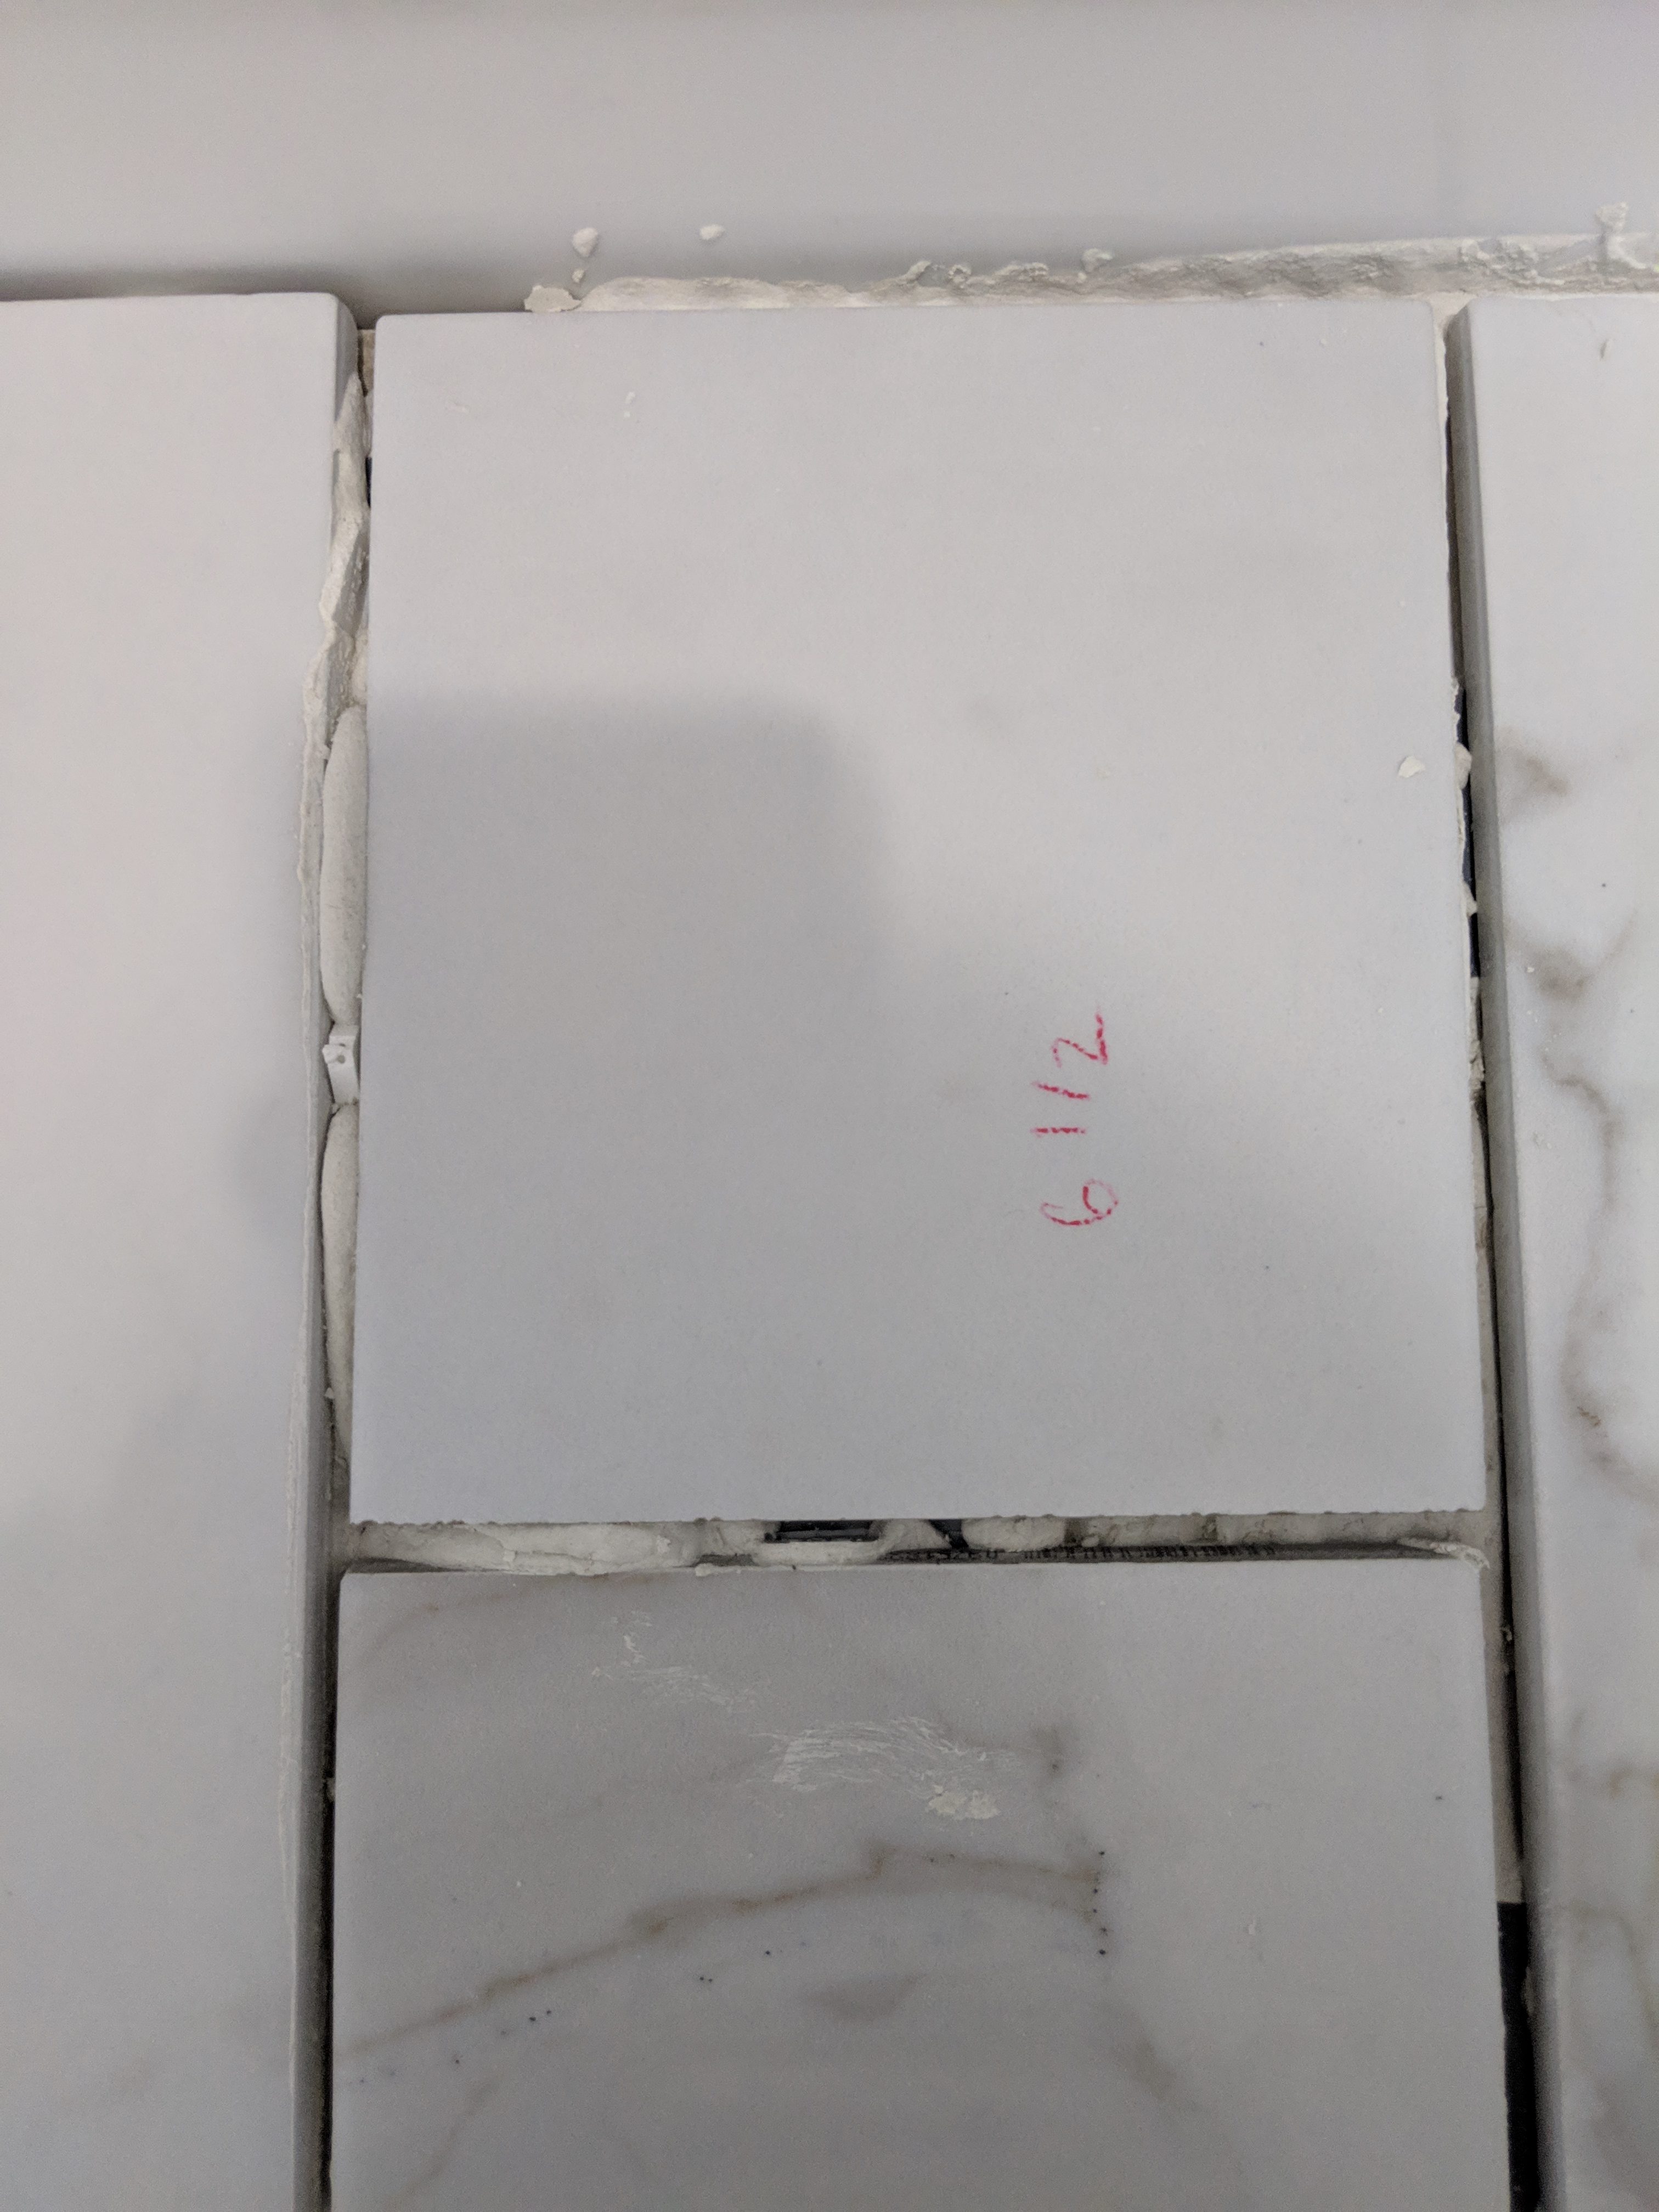
As has been the case during much of this work, I didn’t think to take a picture until I was almost done with this process. So I think this was the last tile I had to do, but as you can see, there was plenty of mortar that had oozed out from under the tiles. For the unprepared, this mess would take a lot of careful scraping. I couldn’t be bothered with that.
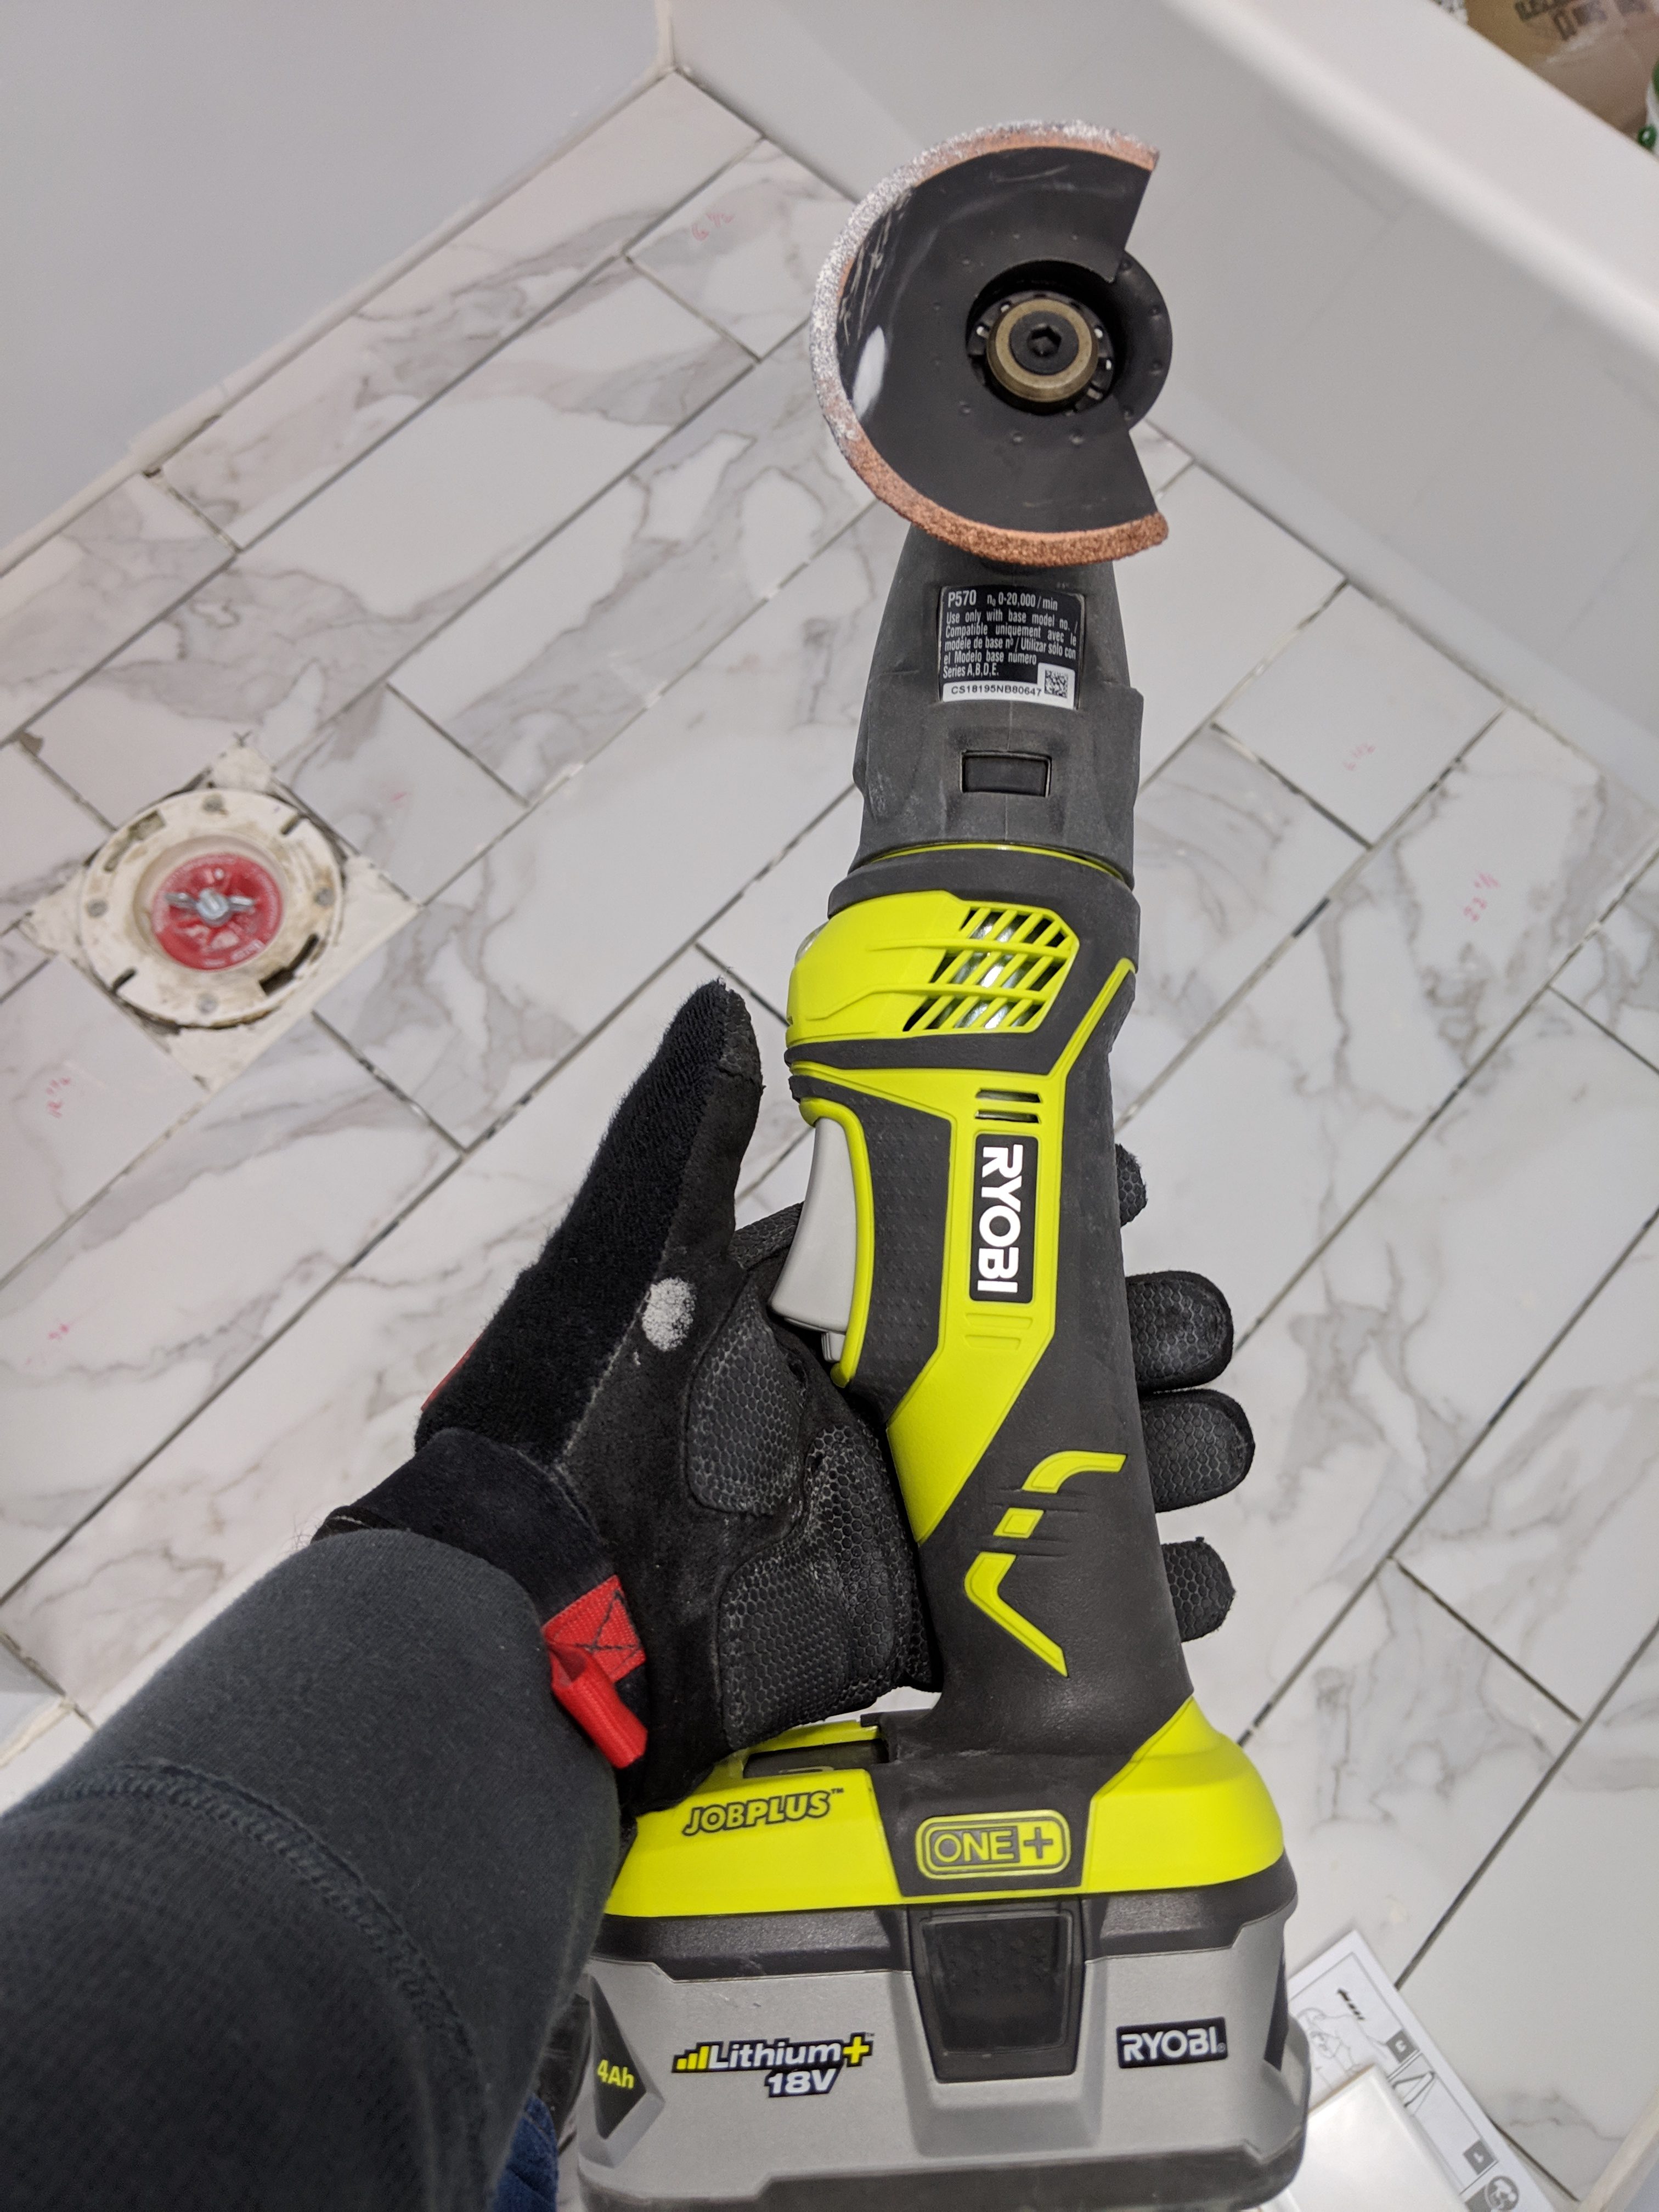
This here is my new best friend. I don’t know why my tool arsenal did not contain a current multi-tool already. I have had what was once Stephanie’s mom’s 40+ year old dremel sitting in the garage for probably 10 years with no use. I tried using that when I was doing demo, and quickly decided that it wasn’t going to be useful for much more than hobby stuff. So I looked at new ones and decided to stick with my one+ tools, even though the dremel one I liked had a couple of nicer features. I’ve used this for a bunch of stuff already, so it’s paid for itself in full. I knew I’d need a blade for this job, so I did some searching prior to this, and found the grout removal blade would do the job. The stand alone blade was like $30, I found a 14 blade set that contained two different sizes of grout blades among other stuff for $39. Sold!
The multi-tool had no problems cleaning these tiles up. It quickly ate through the excess mortar, as well as cutting through any plastic left behind from the levelers and any bits of spacer that got stuck. The only side effect was that in my haste, I kissed the edge of the next tile in several spots, resulting in a little nick in the tile. ¯\_(?)_/¯
Once I finished that, I vacuumed out the lines, and started scrubbing down the tiles. As you can see in the pics above, there were bits of mortar dried onto the edges, as well as random little smears and such all over. Most wiped up pretty easily with some warm water and the scrubbing side of my grout sponge. Some took a bit of scraping with a razor. So as I said before, I didn’t finish cleaning the floor until about 10:00pm.
Full disclosure: on Tuesday, before I started grouting, I actually pulled and replaced three tiles. One that was too short and bothering me, another that had gotten shifted and had some terrible lippage, and a full tile that didn’t feel fully set when I stepped on it. I avoided these areas when I did the grout and did them later.
Doing the grout was a breeze. I really didn’t know what to expect using the Flexcolor grout. As I wrote about in an earlier post, the reviews were all over the place about it being easy or hard to work with. Lots of people said that it started to dry on tile really fast, so I kept that in mind starting in a small area. I had no issues with it, and was able to wipe up the excess just fine. I did need to do a final wipe down after an hour, which the instructions indicated might not be needed. So maybe I didn’t clean wipe it as fast as I should’ve, but I had no difficulty cleaning it up.
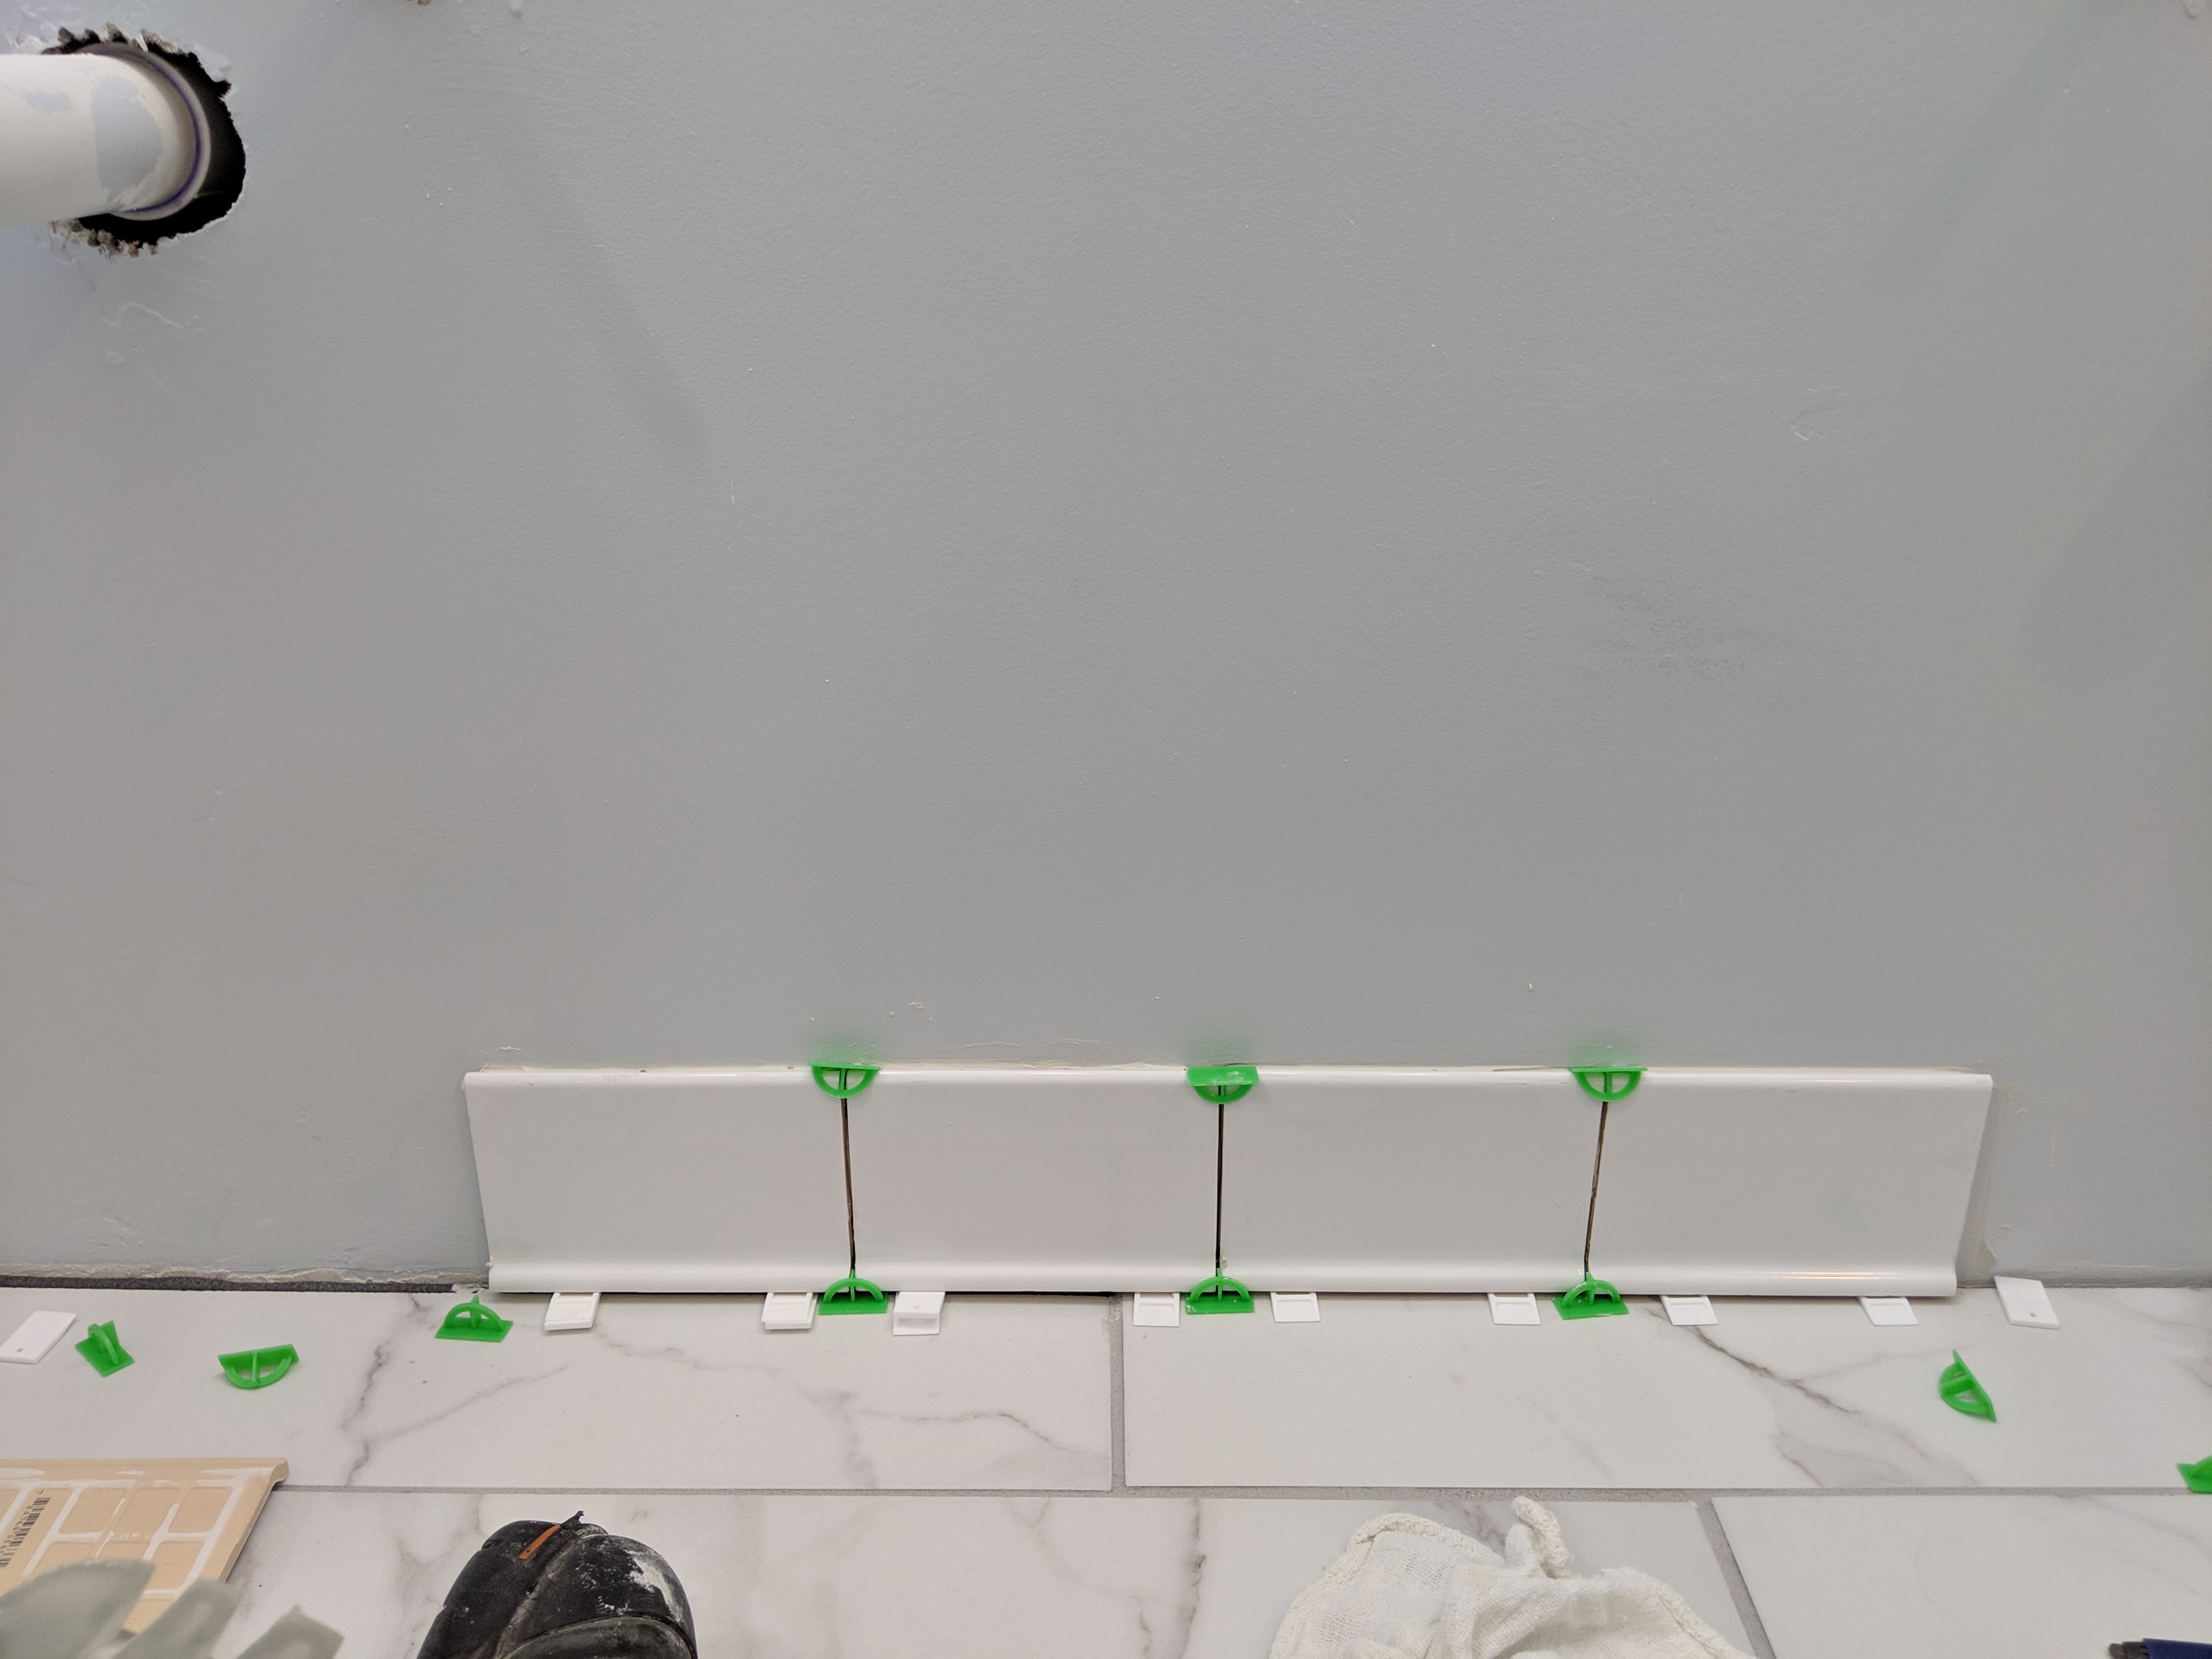
On Wednesday night, I got started with the cove base tile. Getting the tiles set was a fairly painless process. The only real pain point for me here is that I had to pre-cut the tiles in the afternoon, so that I could work at night. I really like to be able to dry-fit the files with spacers so that I know exactly what I’m working with. I was somewhat rushed cutting them before I had to run out so I ended up getting not great measurements, and having to re-cut a few. Back to the start though, if you look closely there, you’ll see some double stacked wedge spacers there.
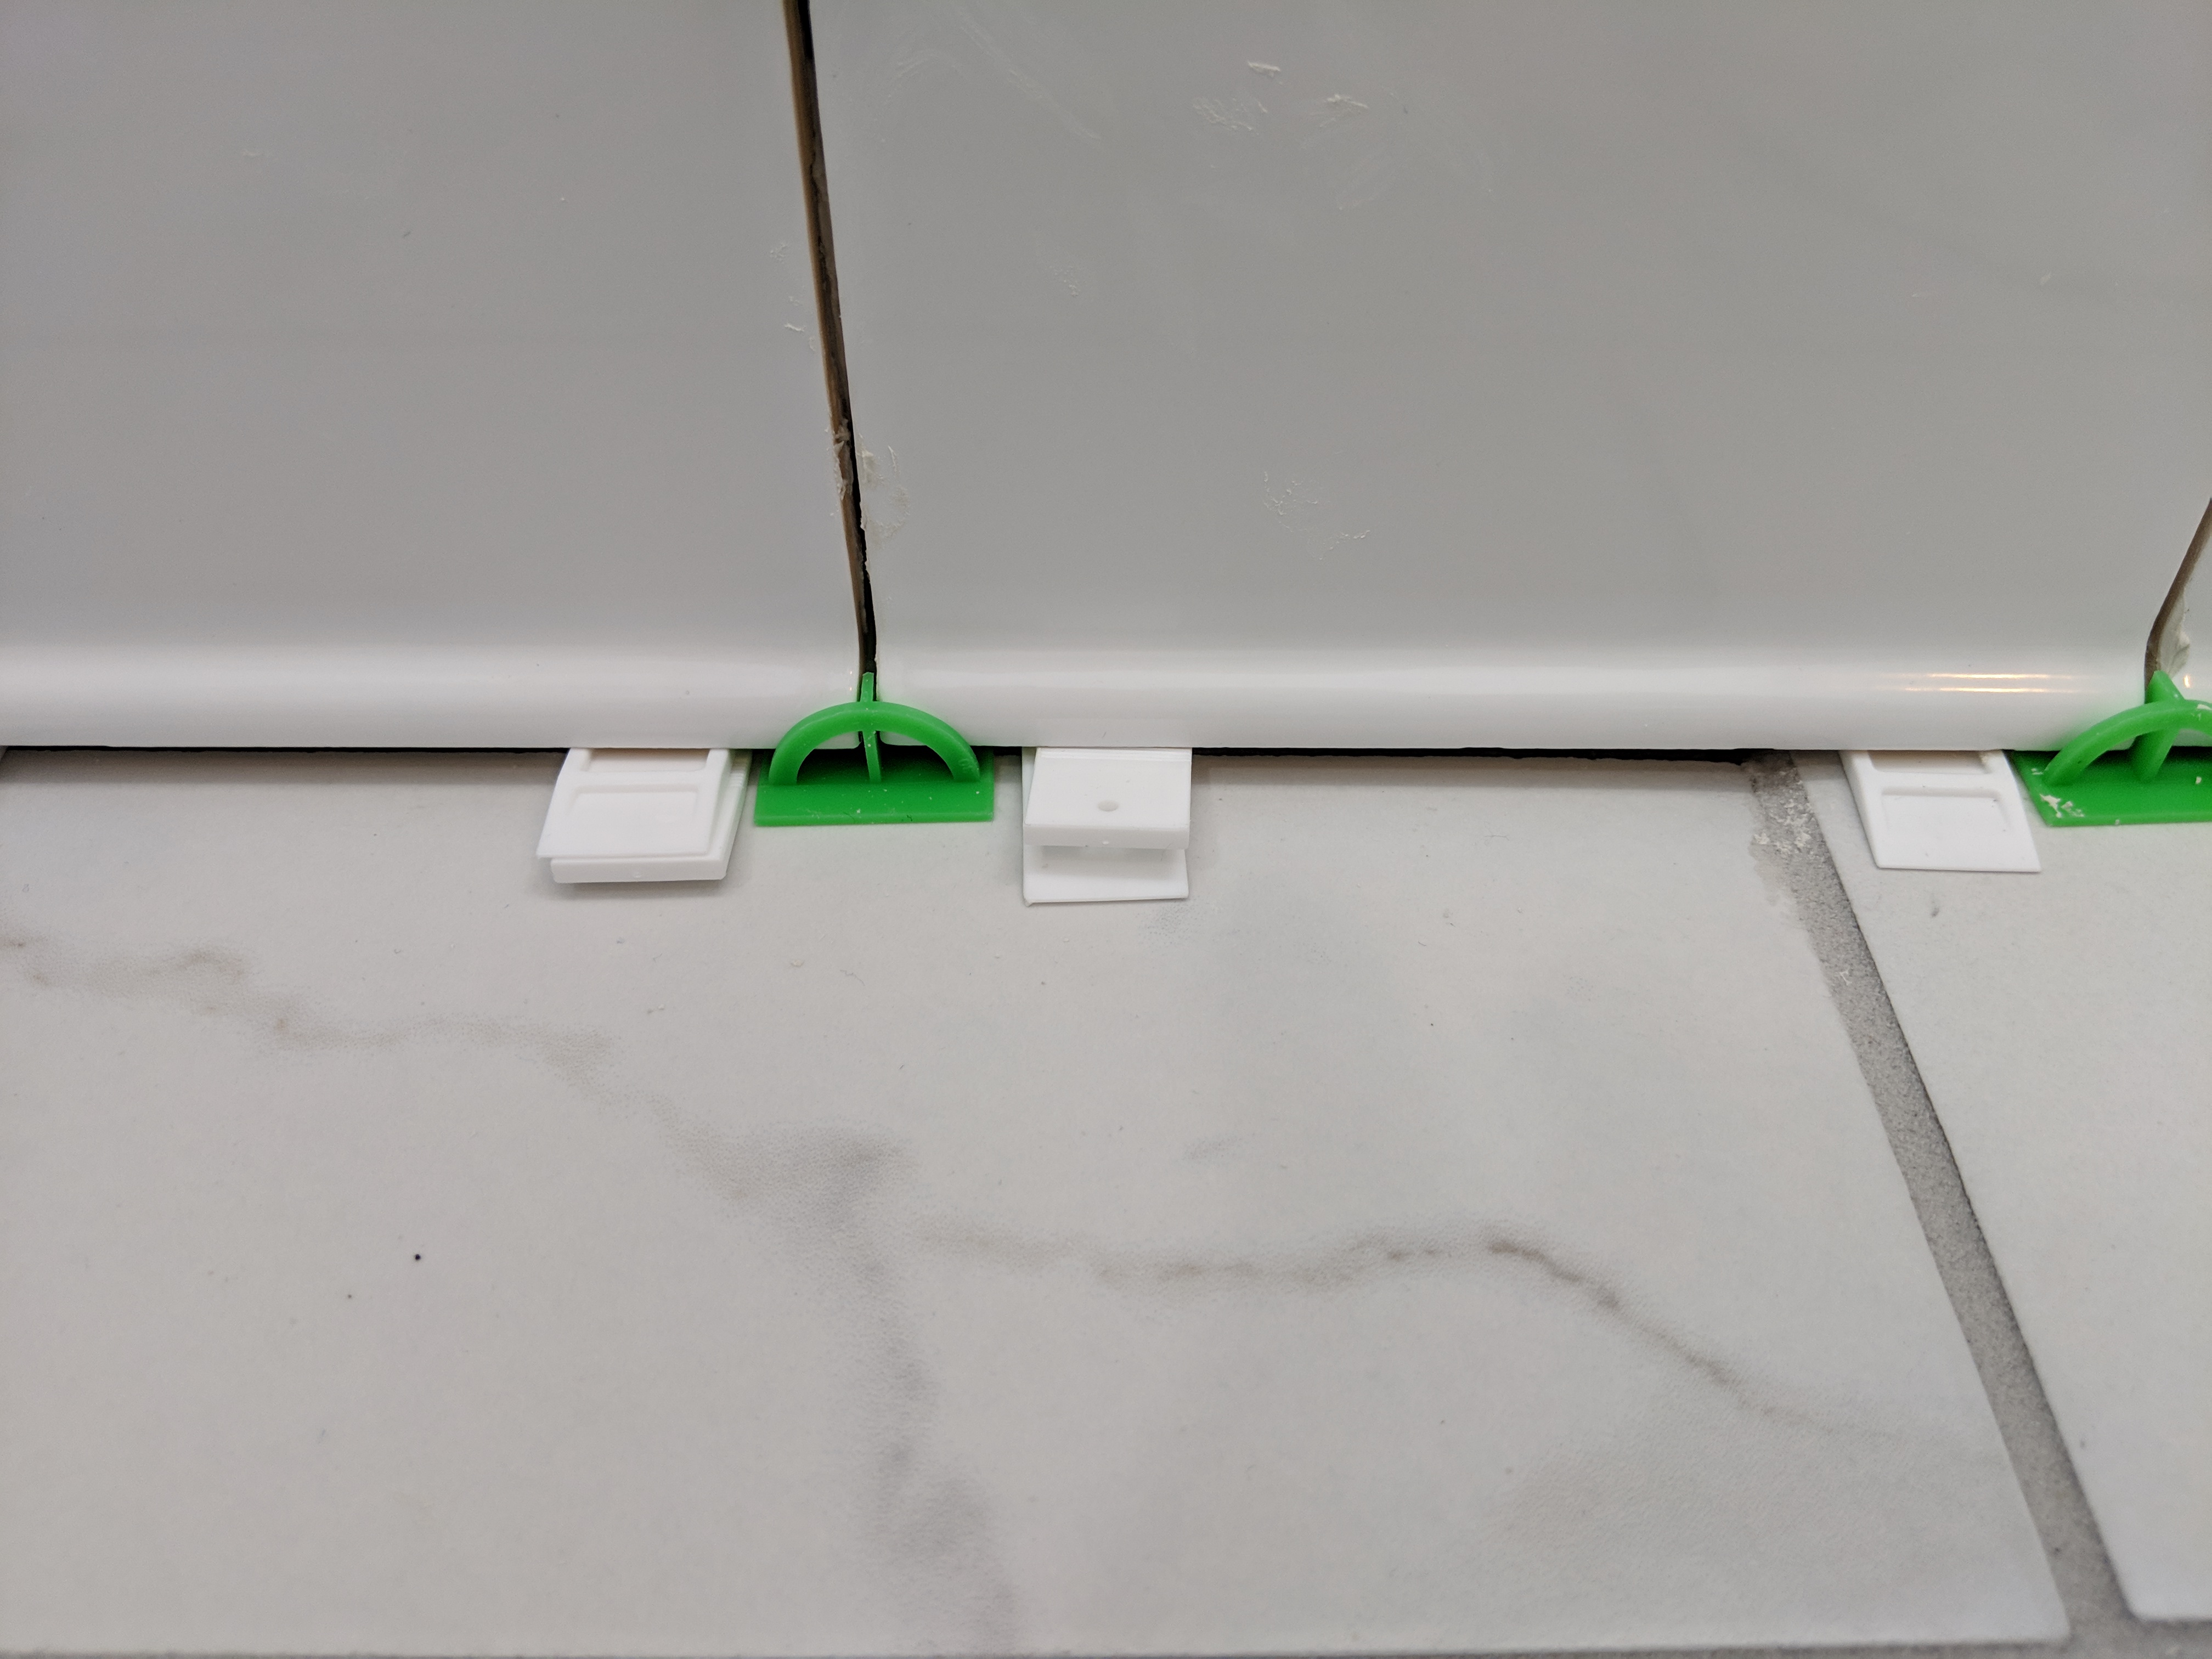
Yeah, my tiling skills aren’t the greatest. There are a few tiles in the room that were not perfectly level with one another. That’s because I didn’t have enough levelers to use everywhere. It’s barely noticeable normally, but here, the top of the tiles would have been uneven if I didn’t address it. As you can see, I just stacked a couple of wedge spacers in to level the tiles out at the top. I was focused on getting the vanity area done first, as I wanted to get it moved in on Friday or Saturday. So while I did work on the rest of the room, I made sure that these got finished on Wednesday, then grouted on Thursday.

Mortaring these tiles was a bit trickier due to the smaller area, and the curve at the base of the tiles, but still took very little time complete. Once I got them done it was time for caulk. I can now say with confidence that caulking has been my least favorite part of this job. I suck at doing tape and mud, but I do not have a steady hand for caulk! It’s simple enough to just squeeze the trigger and apply it to the lines, but once I pressed it, I got this shit everywhere! I got so frustrated with it, that I called Stephanie in to help try and clean up the lines. We made it look “better” by scrapping away excess, and forming some sort of a line, but in the end, I think it looks pretty terrible. It definitely does not help being gray (matched to the grout), as it is much more apparent.
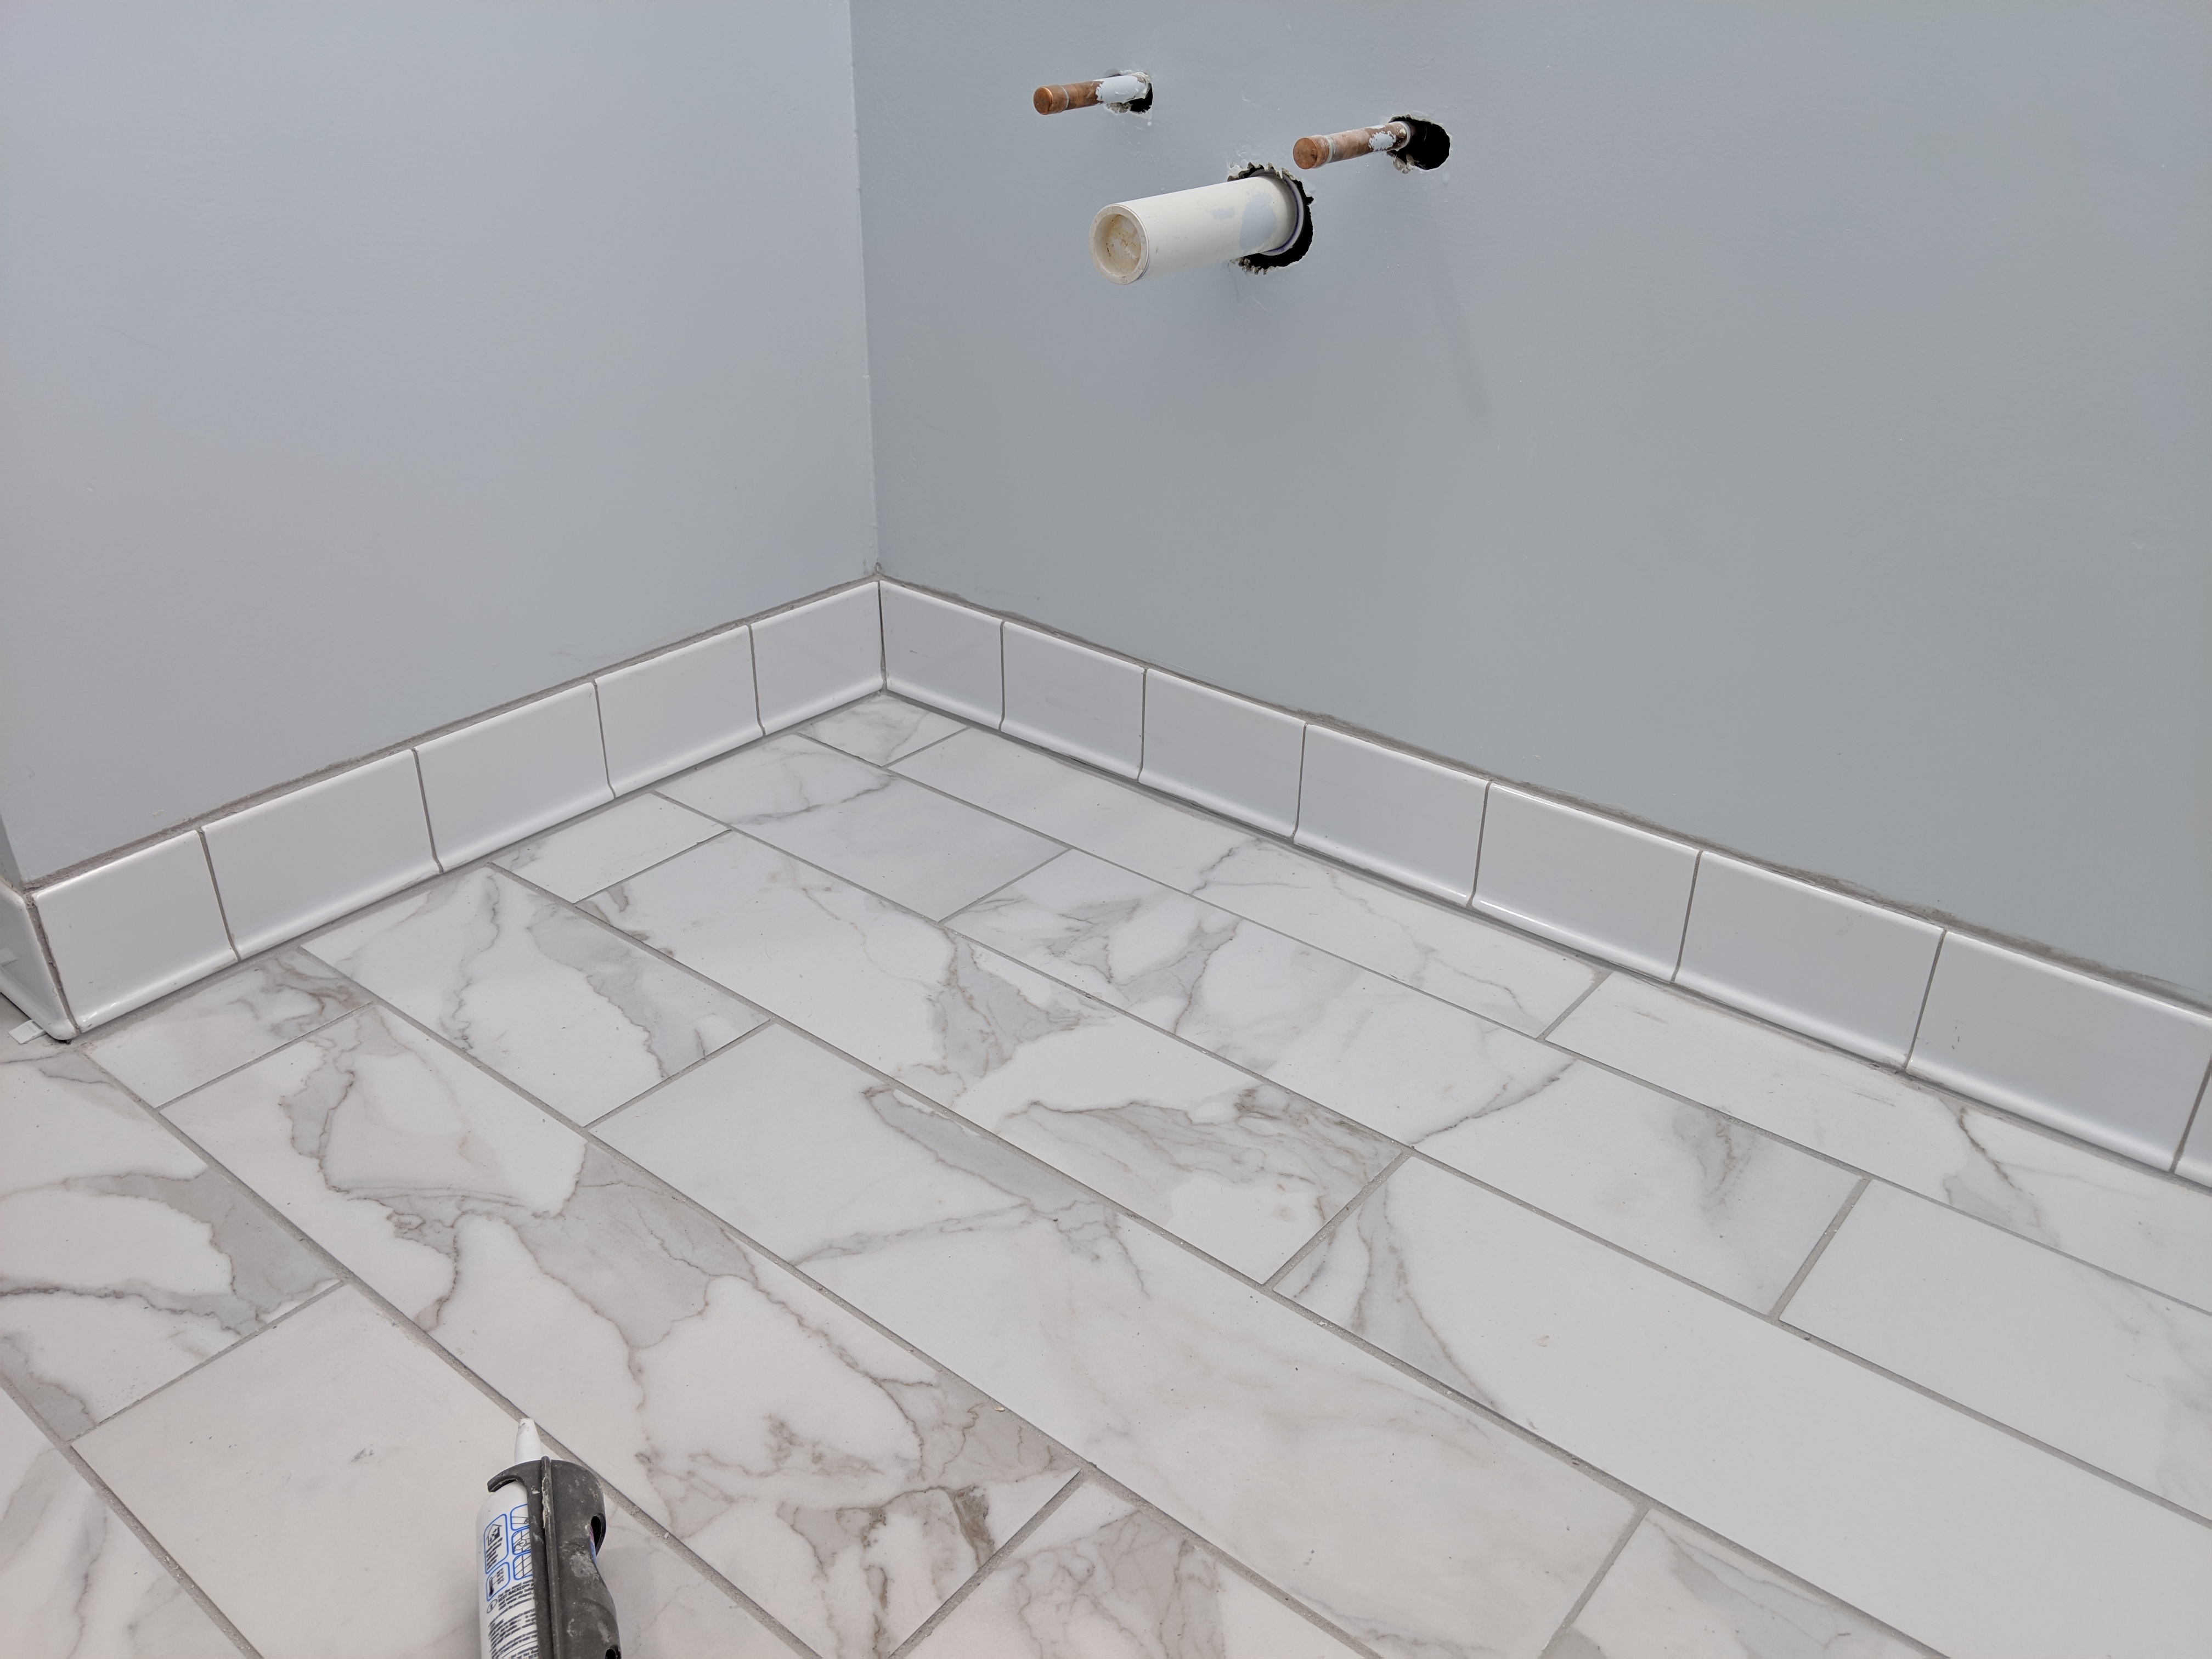
I cleaned it up a tiny bit more and decided I wasn’t going to let this get in the way of installing the vanity and finishing the plumbing, so it is what it is for now. Maybe one day I’ll go back and fix it, but for now, it’s there to do it’s job as a sealer. While I did get slightly better at it on the other areas, it’s still not great and I’ll continue to try and make the lines better there since they are much more exposed. This area is covered by the vanity.

On Friday evening a friend and I went to pickup this stair climbing dolly, so we could move the Vanity upstairs on Saturday morning. While a couple of beefcakes could probably heave this beast upstairs on their own, that is not me. The vanity with the already attached sinks and counter weighs in at about 350lbs, and is 36x60x22. This leaves very little room moving upstairs meaning no one could be on the sides of it. So enter the motorized dolly.
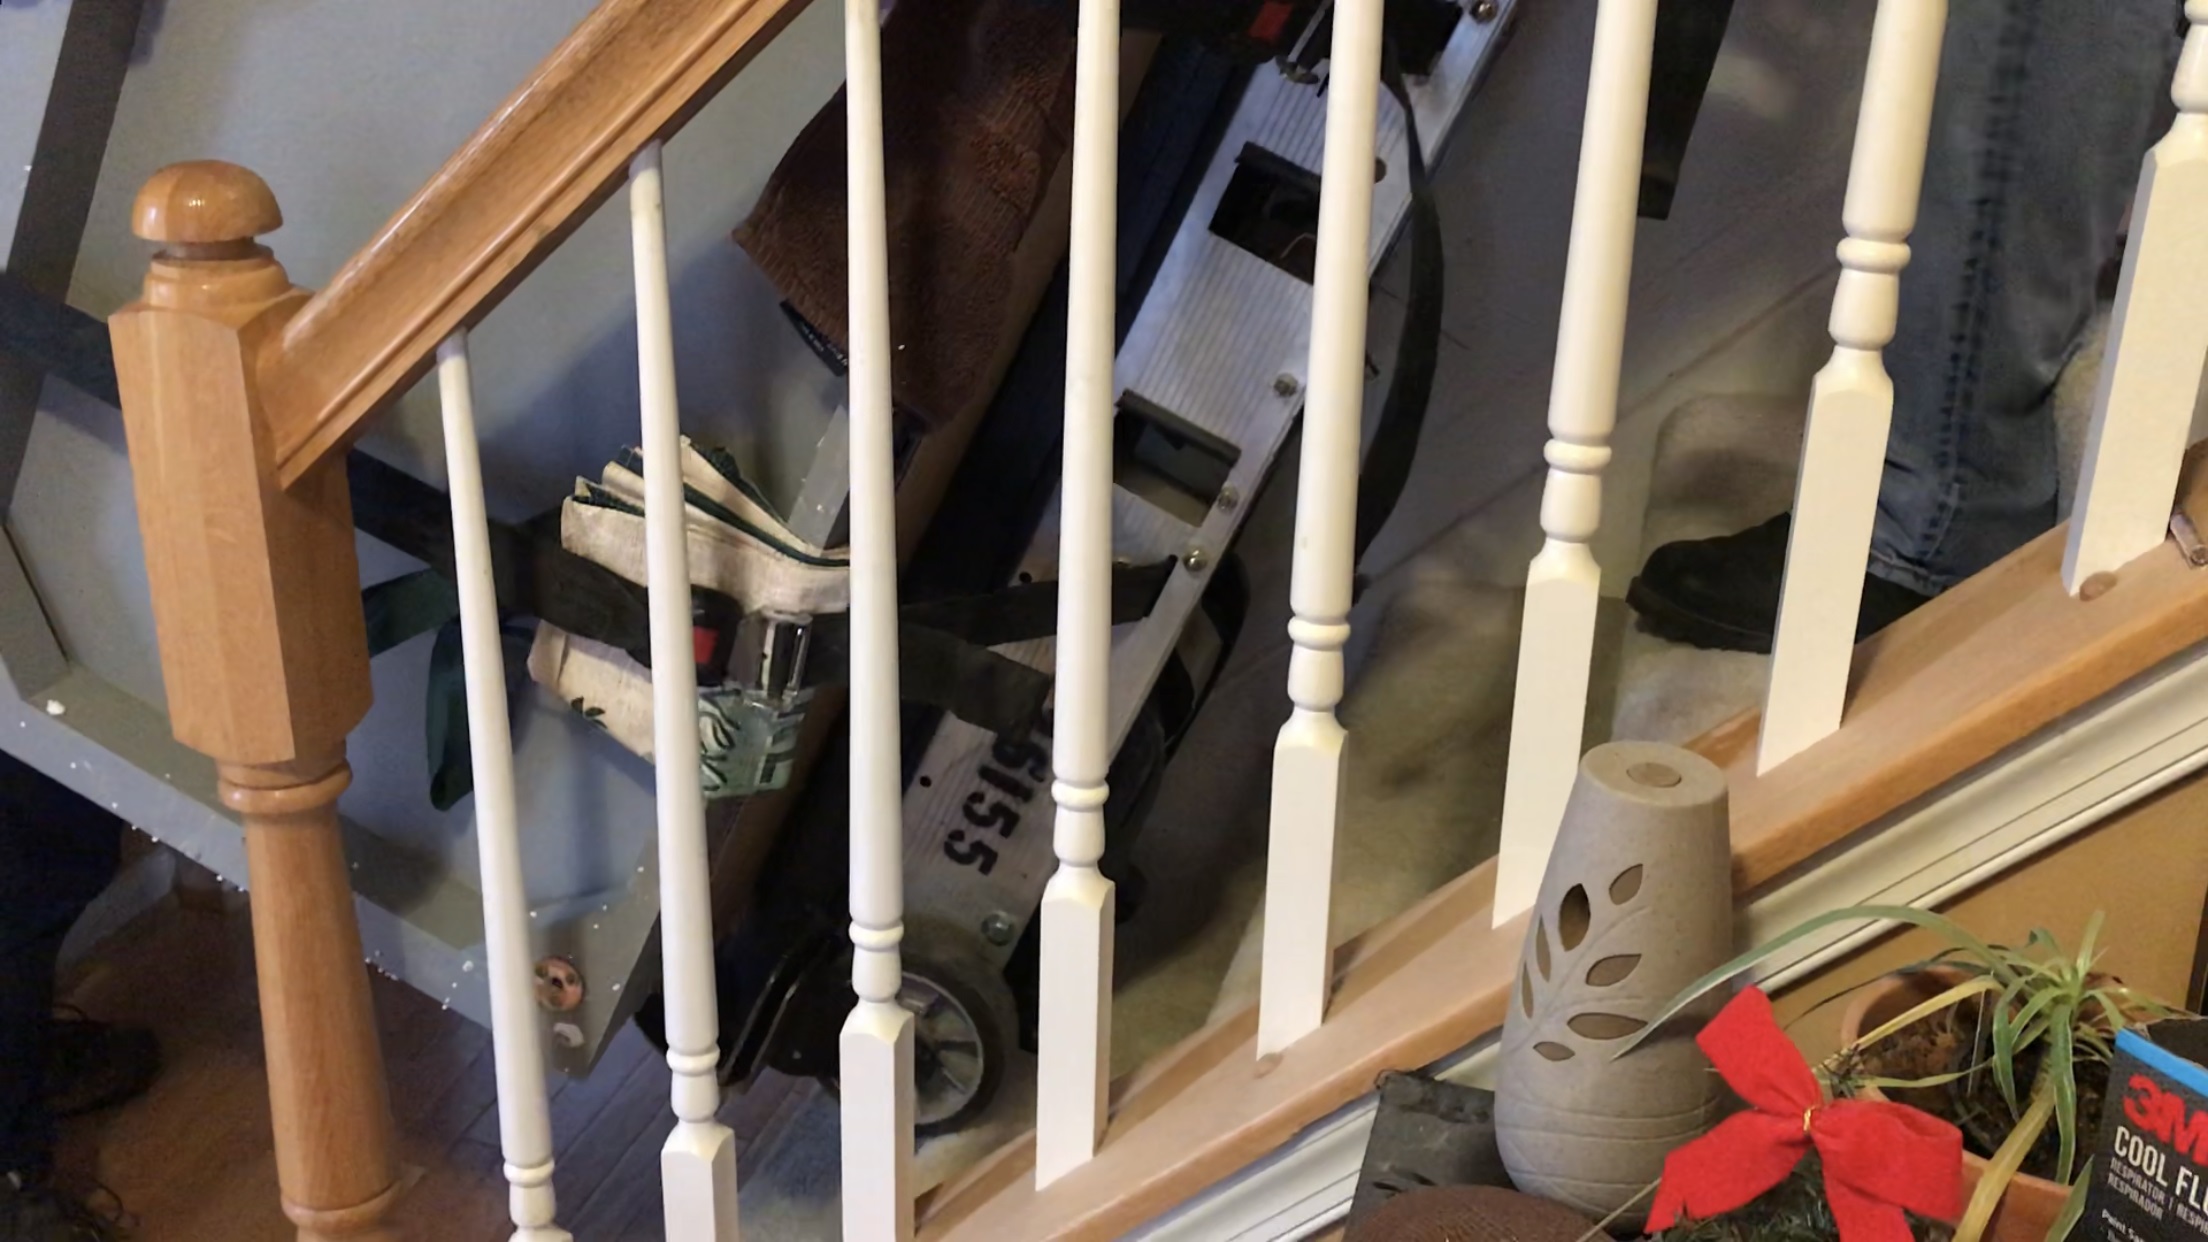
First of all, I knew this thing was a beast by weight alone. It weighs over 100lbs, is about 6 feet tall, and can lift up to 1200lbs. That’s why I brought a friend just to pick it up. I can lift 100lbs, but there’s no chance I would have gotten it into the Durango on my own without scratching the hell out of the truck. I also knew that it took some strength to help “guide” it up the stairs. I was not however, prepared for just how much work I still had to do!
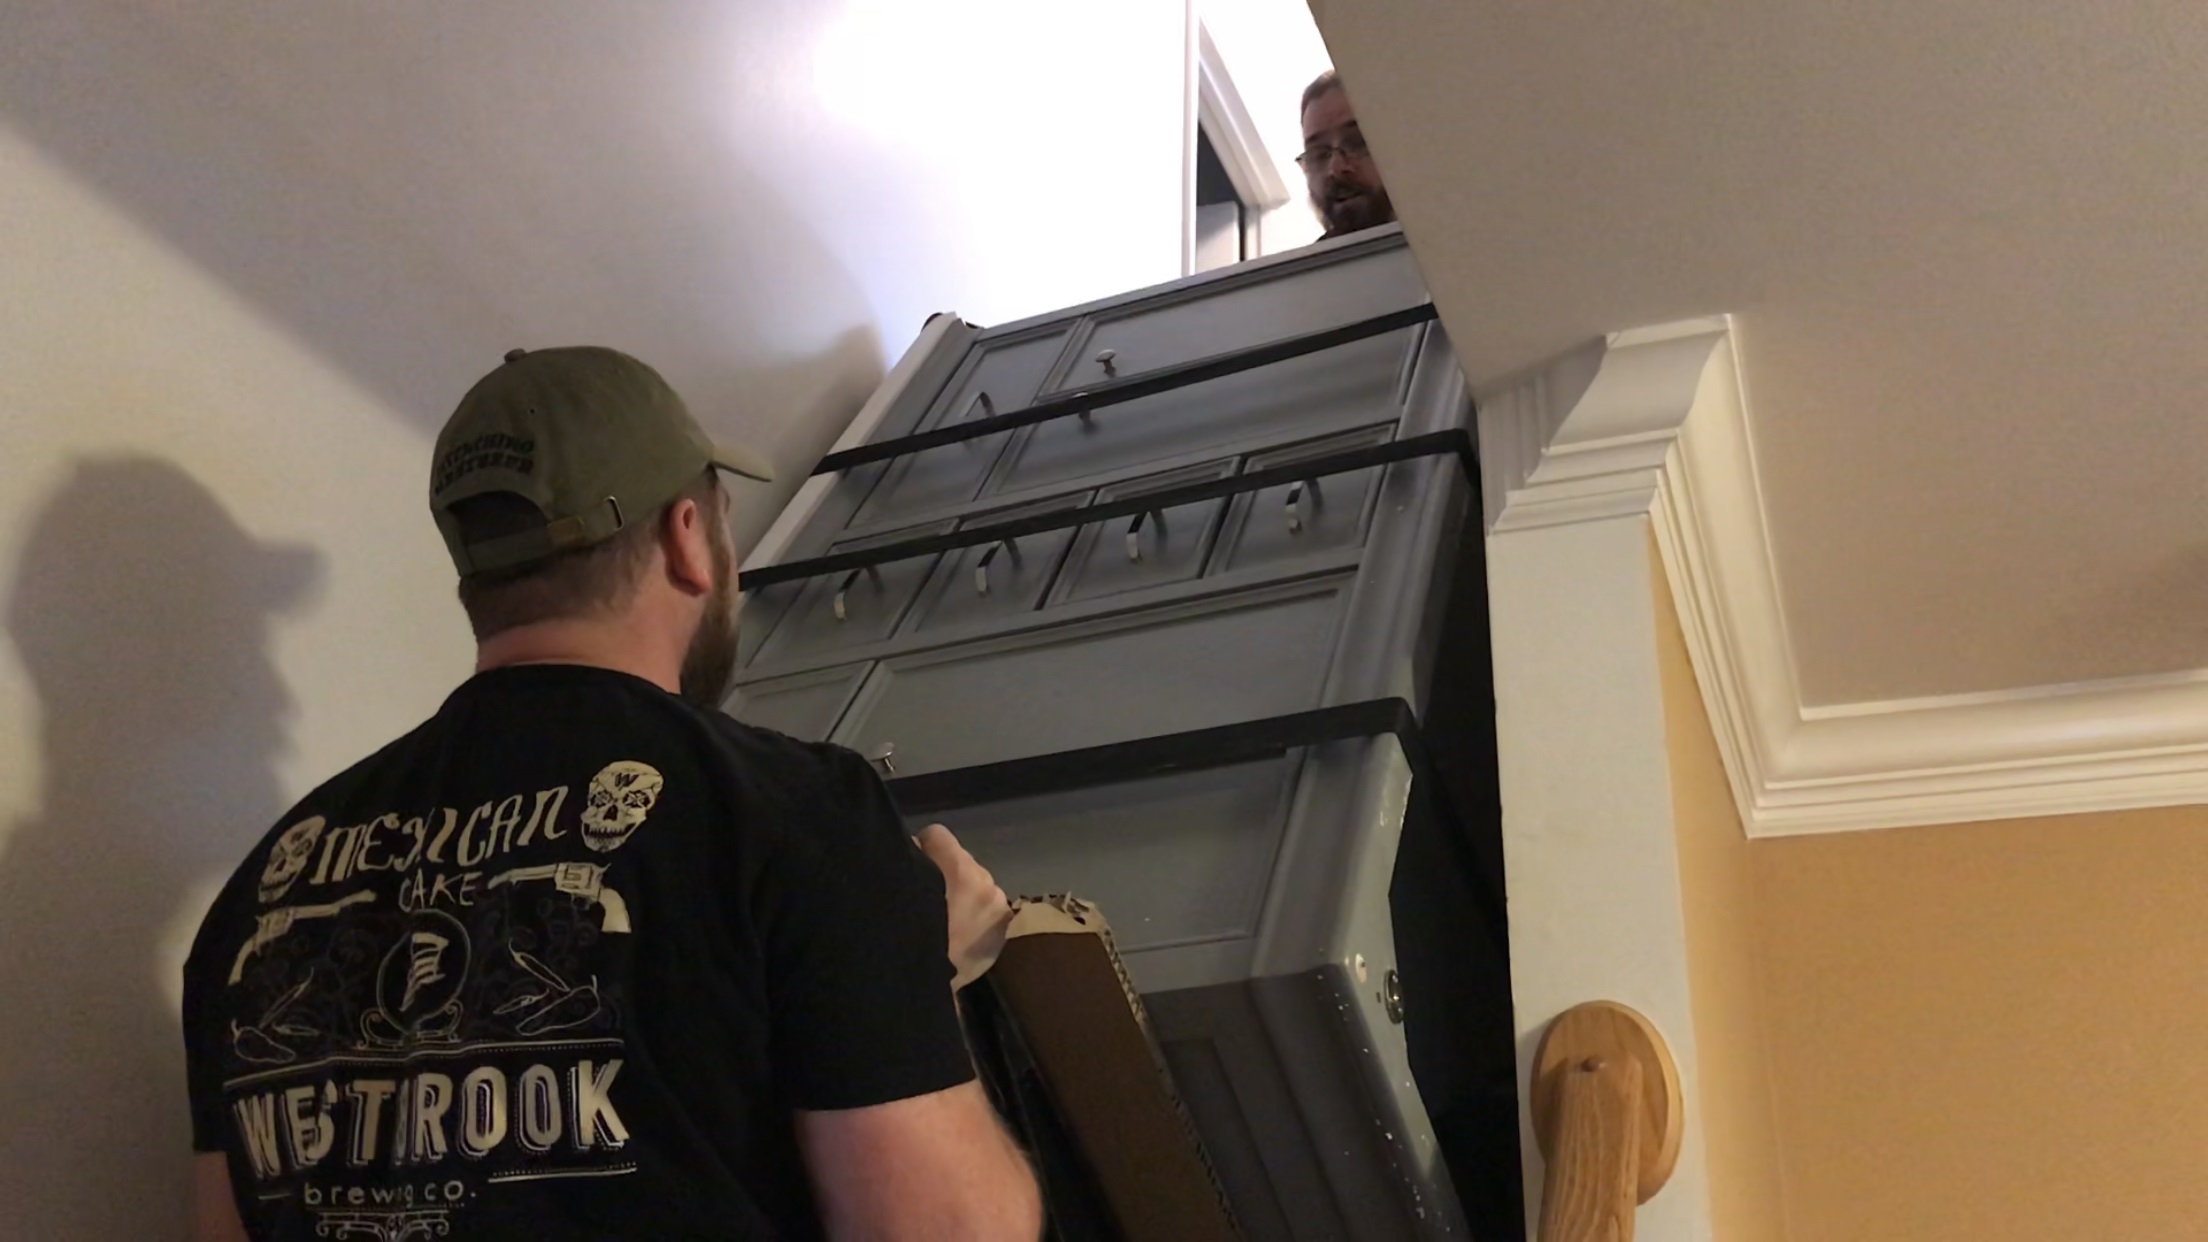
Getting started up the stairs was easy enough. You set the thing next to the stair and press the button to go up. Two little wheels on tracks, start rolling downward until they catch on the top of the stair, and begin lifting the whole thing up onto it. This is where the work begins. You have to hold the dolly tilted back, but still upright so that the tracks can roll their way to the next step. There’s actually 2 wheels on each track, so that it can move on to the next stair without having to make a full cycle around again. This worked pretty well for us in the beginning, once I felt confident about the way it worked. That didn’t last long though. Once the top of the dolly made it to the top of the stairs, and the bottom of it was still at least 5 stairs down, I was basically pinned underneath the thing between the now over 450lbs. and the stairs. It took a lot of strength and effort to right the ship, without sending it tumbling down on my spotter. I basically had to get it standing at about a 75 degree angle to the stair, in order to continue moving up. I somehow got it lifted enough to get out from under it and get it moving again.
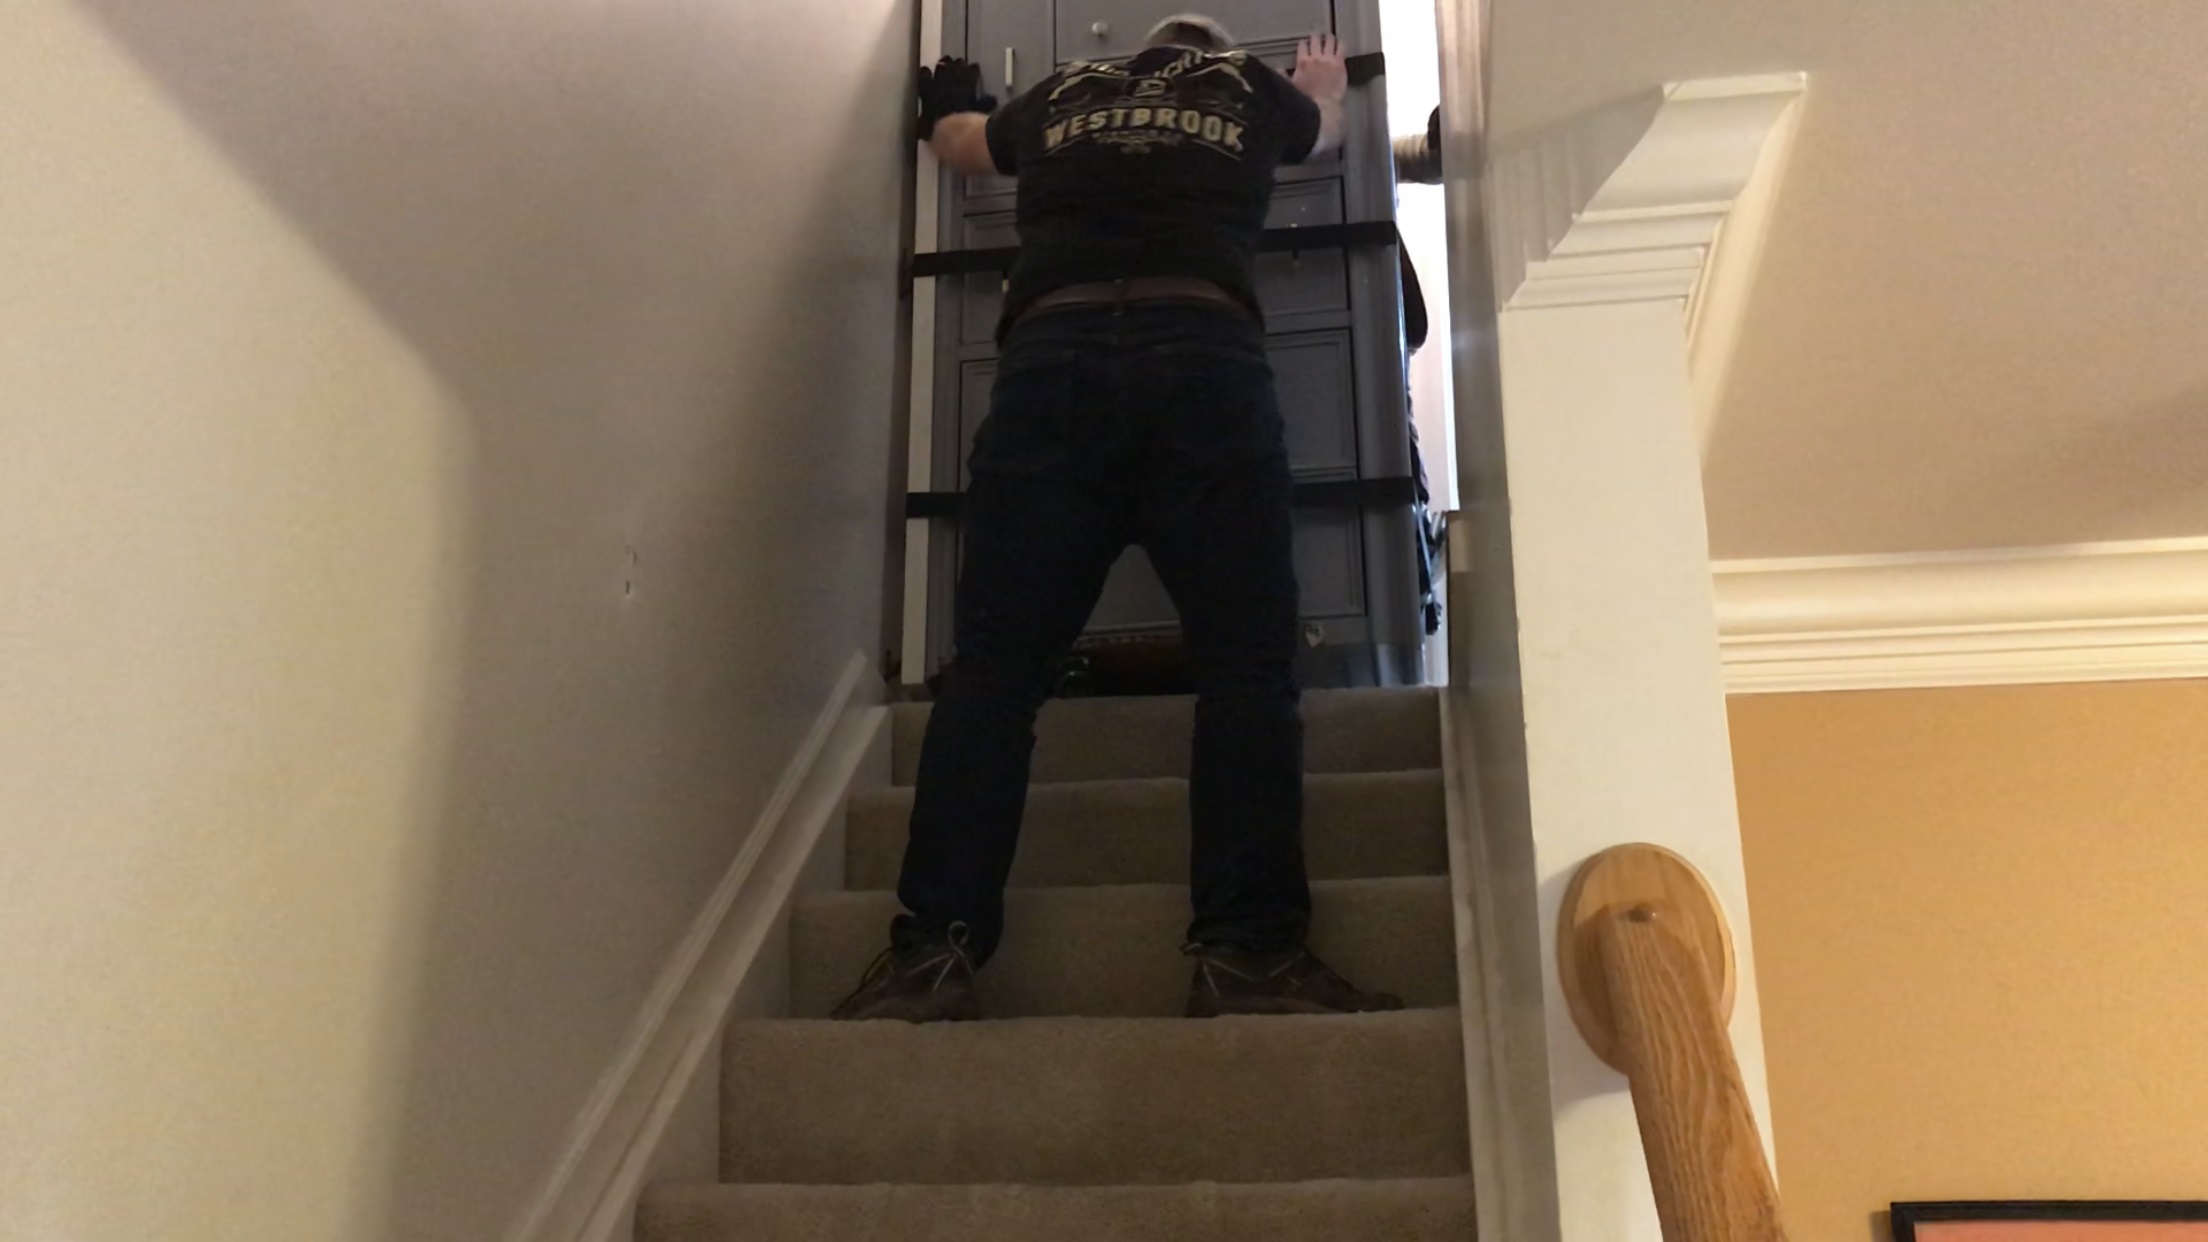
Once we got to the top of the stairs, I had to stop while hanging over the edge to get out from behind it and manually push it the rest of the way in. After that, my friend was able to squeeze by to get upstairs. Luckily for us, our master bedroom (which is left of the stairs) is attached to the nursery which has a door to the hall on the right. So he was able to go around to the other side and push the vanity while I pulled it off of the dolly. I neglected to mention before, but the arms on the dolly are about 3 feet long, and are a few inches high. So loading and unloading is a manual job. After we got it down on the carpet, we slid it over a few feet to line up with the door for the bathroom and conveniently the door into the nursery. We attached the feet and flipped it down on them in the nursery. Then it was a relatively simple move into the bathroom aligned in front of the spot it needed to be. Thinking ahead when we loaded it onto the dolly downstairs made this a lot easier than it could have been if we were to have to turn this thing up there.
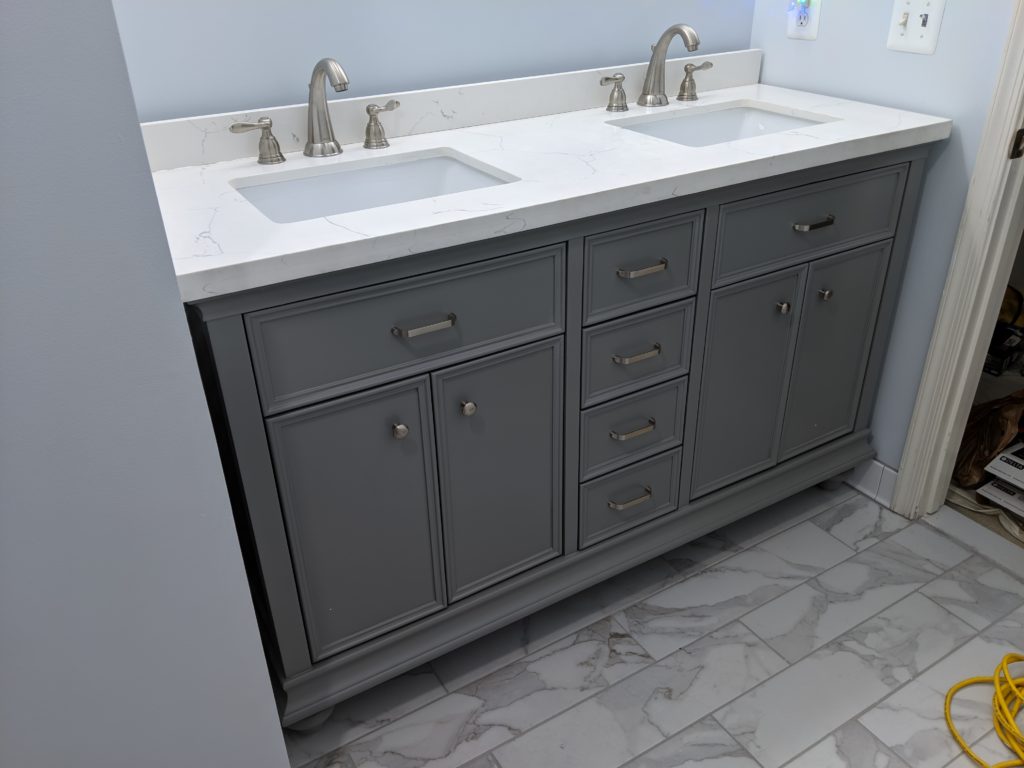
So about 3 weeks later than planned, the vanity is finally out of the playroom, and in it’s new home. It looks great there aside from 2 things that bother me a little. First is that the walls are not square. I knew this already, but it’s much more apparent when you don’t just glue some shit to the wall to cover it up. So unfortunately there’s an uneven gap on the sides that can’t be evened out due to lack of wiggle room. The other thing is that the rounded feet on the vanity push it out slightly from the wall. With the added space from the cove base, that means it’s about an inch from the back wall. It will be interesting to see how it looks with the mirrors there, which are going to be pretty close to the back splash.
That picture is also a bit deceiving. While I started the faucet installs, they weren’t fully connected yet. I actually snapped one of the handle stems clean off, when I tried opening it after slightly over torquing the base! As you can imagine, I was livid. These are not cheap faucets. They are all metal with the exception of the inside of the popup for the drain (even the drain pipe is metal which isn’t usually the case these days). But then there’s this garbage. If I broke one by trying to open it, imagine what two boys are going to do. I set out to find a replacement, and found that the replacement part has a brass stem! WTF Delta?!?!
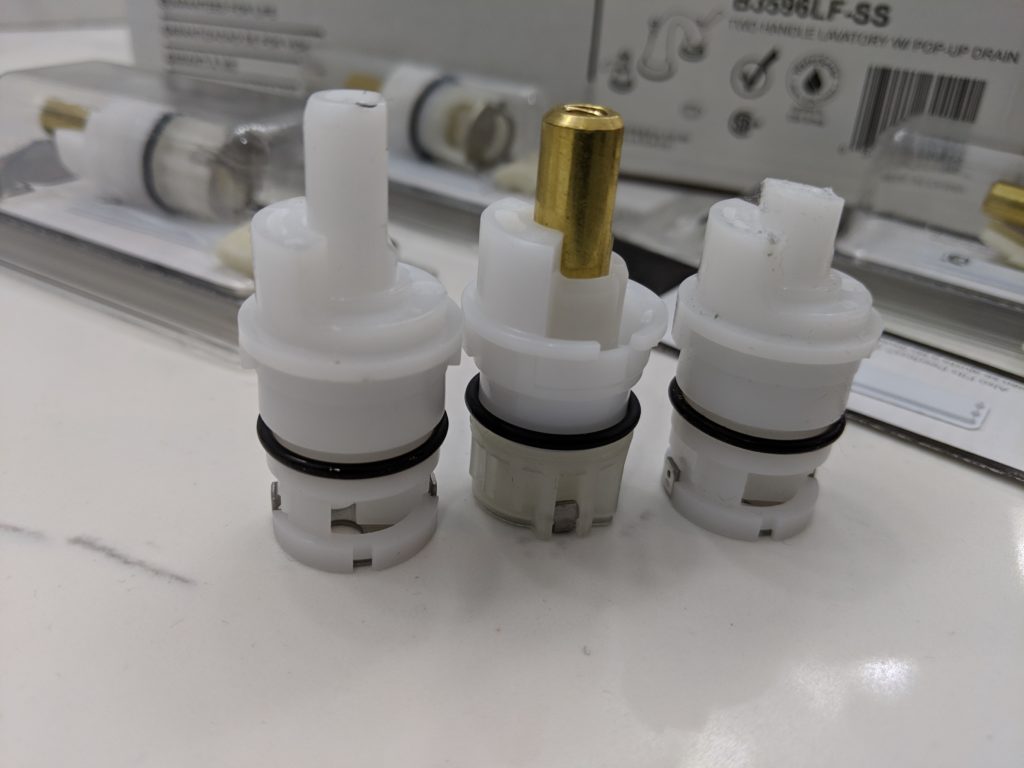
Luckily this was sold at Home Depot, so I could fix it the next day. I decided to buy four of them to replace them all, since I have little faith in them lasting. I’m gonna send a little hate mail to Delta about this. I shouldn’t have to spend an extra $60 to get the part that should have been there already.

Once I got the faucets rebuilt and installed, I moved on to the toilet. I was expecting my plumber this morning, so I wanted this in place since the water is going to be shutoff. He removed my shutoff valve for the toilet, and capped it when he was last here, because it was leaking. So I wanted to have it ready so I could connect it as soon as he put in the new shutoff valve. However, once I got the bowl in place, I realized that there was some slight unevenness either from the tile, or the flange, so it was rocking slightly. So I ran to Home Depot this morning and grabbed some toilet shims to fix that. Only to have them postpone the visit to tomorrow.
So that’s where things stand right now. Once the plumber is done, with installing new shutoffs and making the p-traps for the sinks, the bathroom will be operational again, with the exception of the tub/shower. That just needs to be tiled, but I probably won’t get much done on that until next week when I have some free time to dedicate more than a couple of hours at a time. I have to try and make the rest of the house presentable this week for a little get together I’m throwing on Friday. The next update will have some subway tile action finally!
You must be logged in to post a comment.