This is going to be a long post… I’d like to make it clear that these things are never as smooth as you imagine it will be. All the DIY blogs like to make it sound like their project went smoothly and was done in no time. The reality is that there are always curve balls and setbacks. So if you’re thinking of going down this road, it’s something you need to be prepared for. While it sucks having this bathroom out of commission for longer than I wanted, we are lucky enough to have others in the house, so it’s only a minor inconvenience for Jax to have to use the downstairs bathroom.
Well I’m a week late on this update, because not much actually happened until late last week. The plumber was here last Wednesday, but couldn’t finish everything due to late start, and having to leave early for another appointment. He planned to return early the next morning to finish things up. That morning however, we got hit with a freak snow storm with around 5 inches dumped on untreated roads. I was heading out of town on Friday, so I couldn’t get him back out until Monday morning. I was bummed, because not only had I lost 2 evenings of working that week, but I had also planned to get to work in there as soon as I got home on Sunday morning. I was able to get to grinding the old mortar off the subfloor at least.
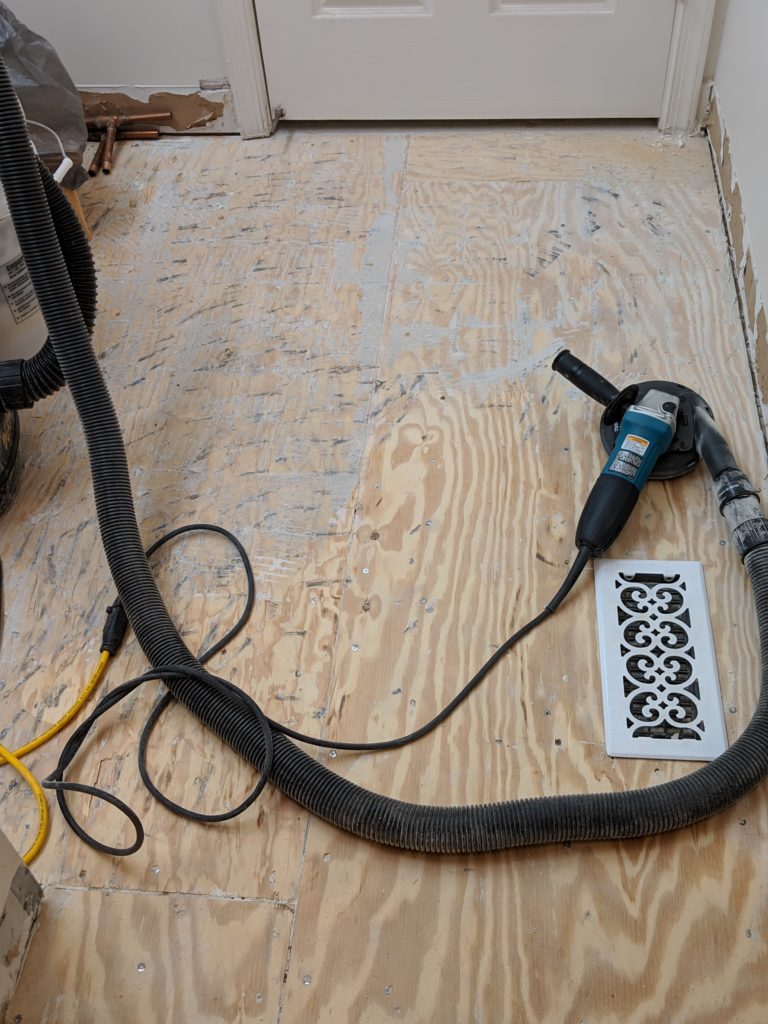
I used a 4 1/12″ grinder with a diamond cup wheel to clear the old mortar. It came up super easy. I used a dust shroud hooked up to a dust collection system, and there was very little airborne cement dust. I was actually shocked how well this worked, as that fine dust gets EVERYWHERE! I bought a Dust Deputy Cyclone, and hooked it up to my Vacmaster Beast shop vac. Not only does this thing do a great job of collecting all the fine dust, but hardly anything actually makes it to the vac itself, which is awesome. 100% worth the money to me.
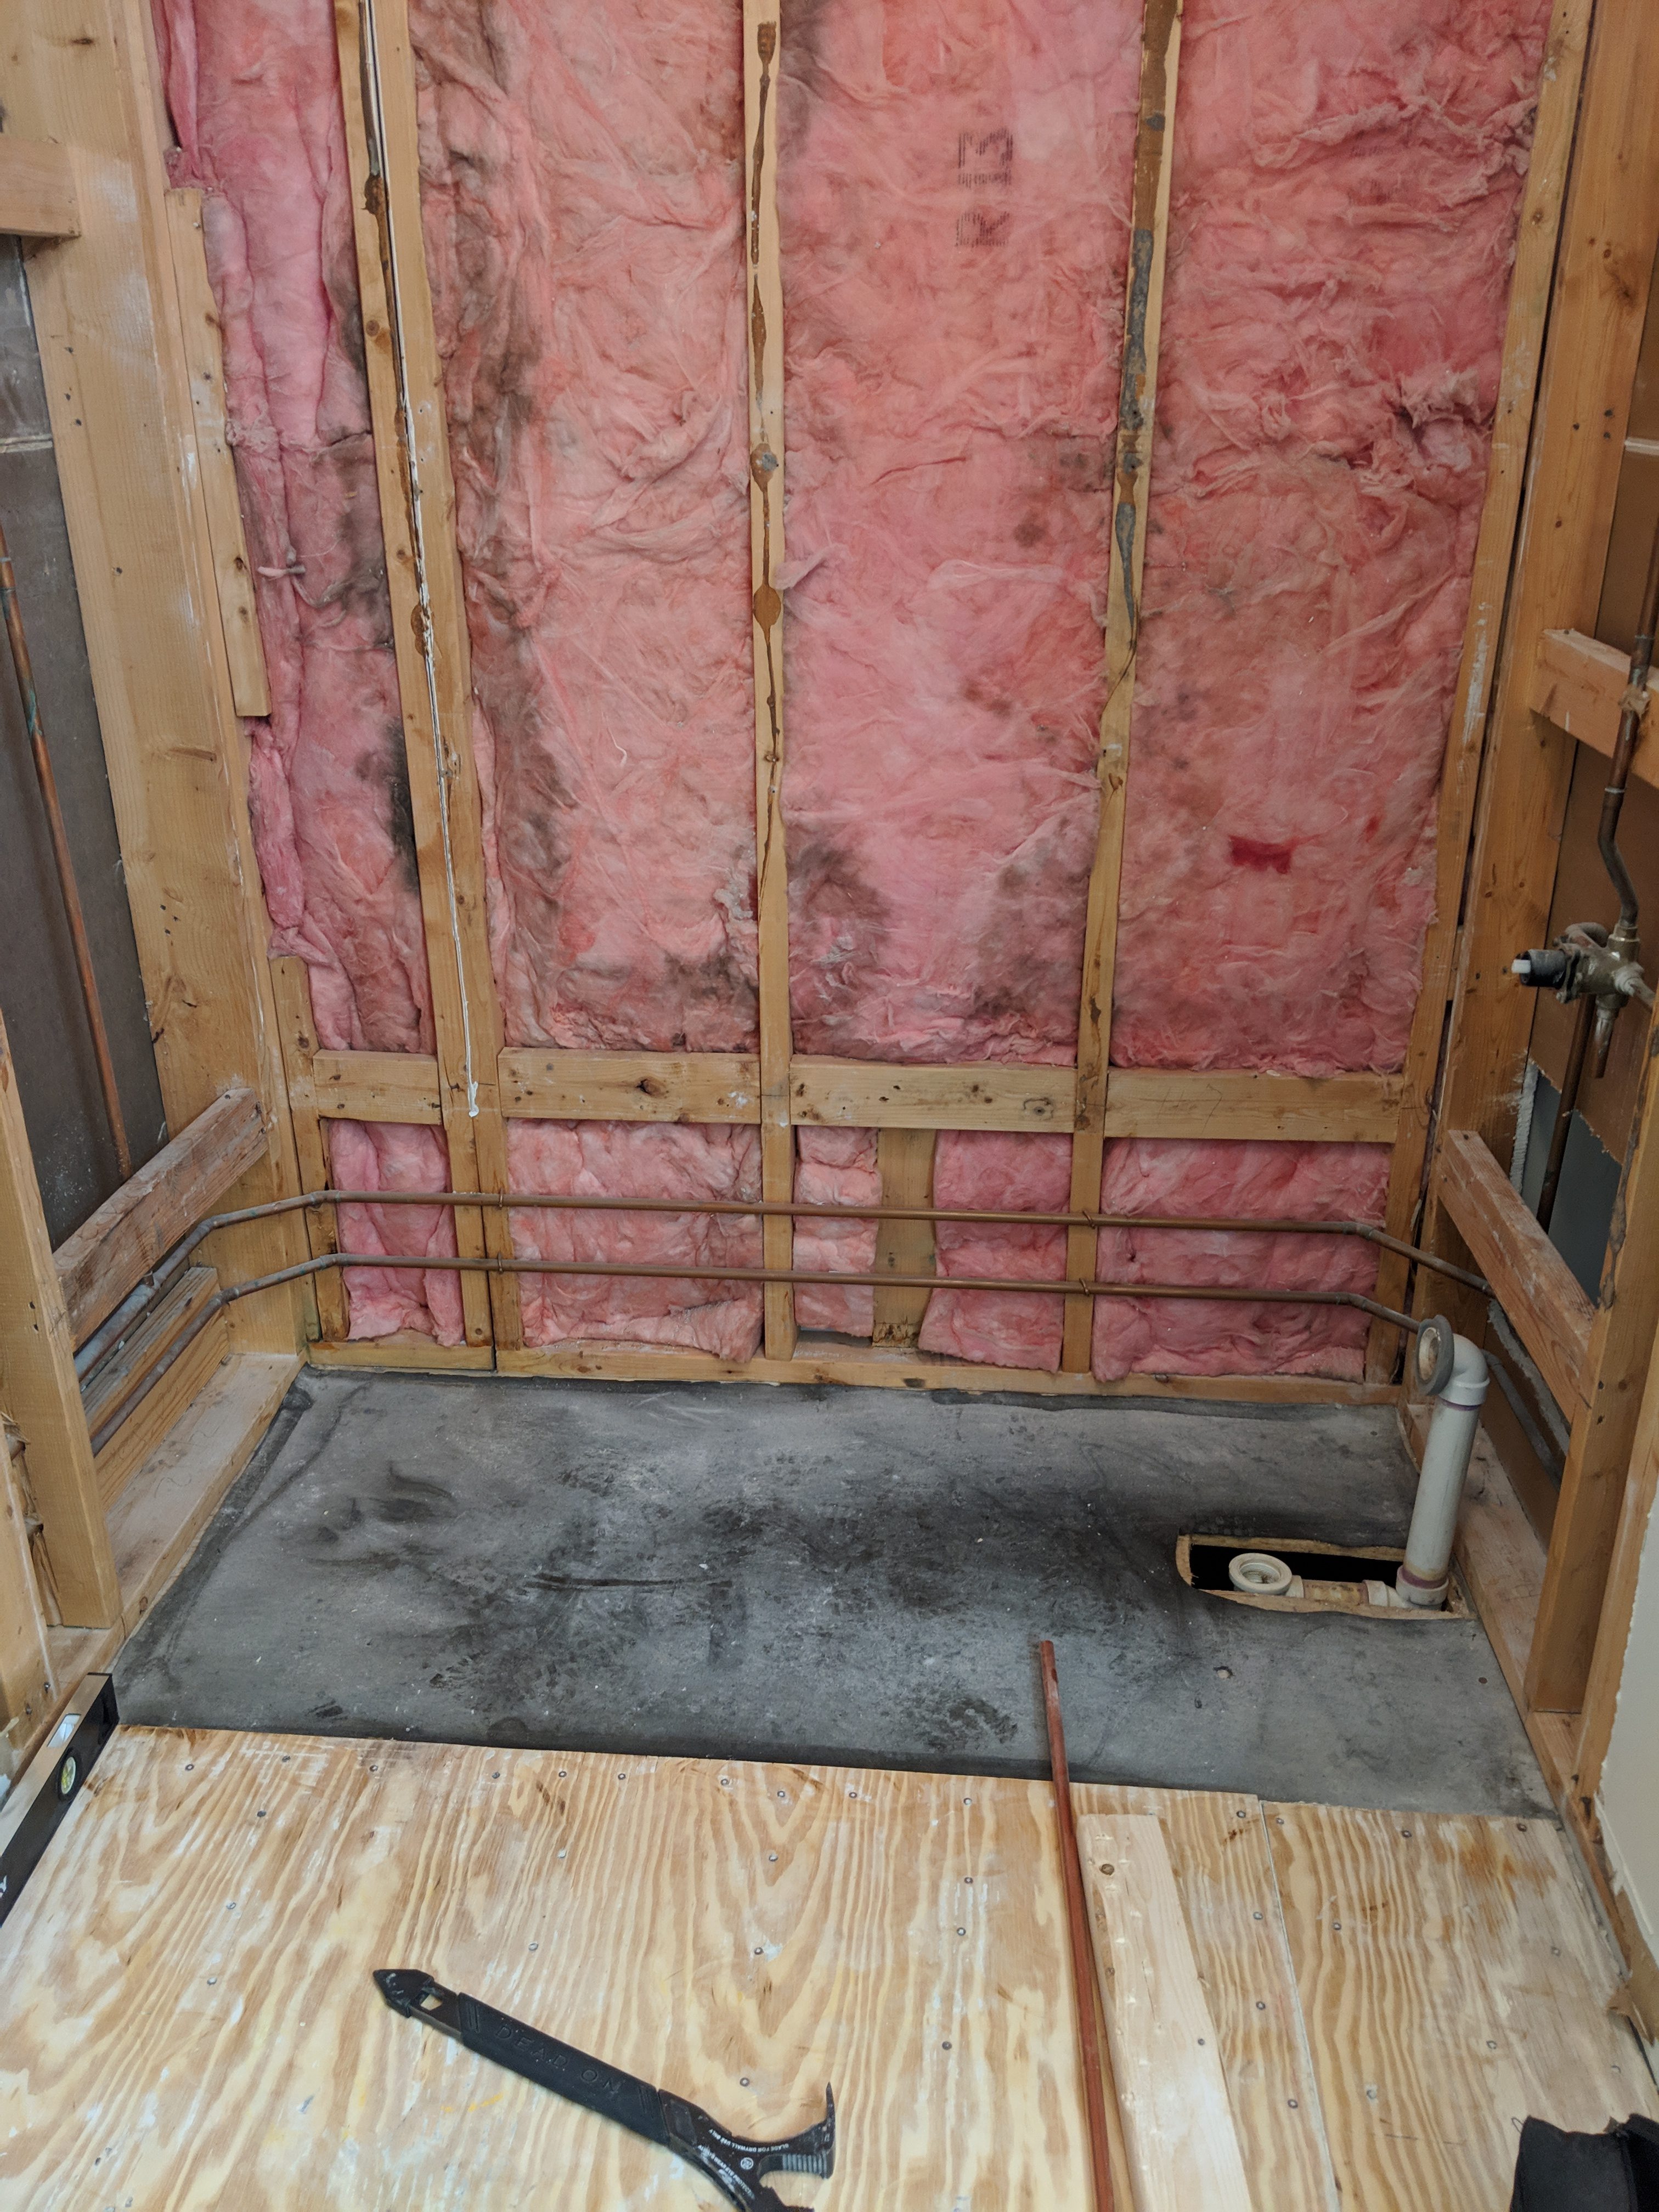
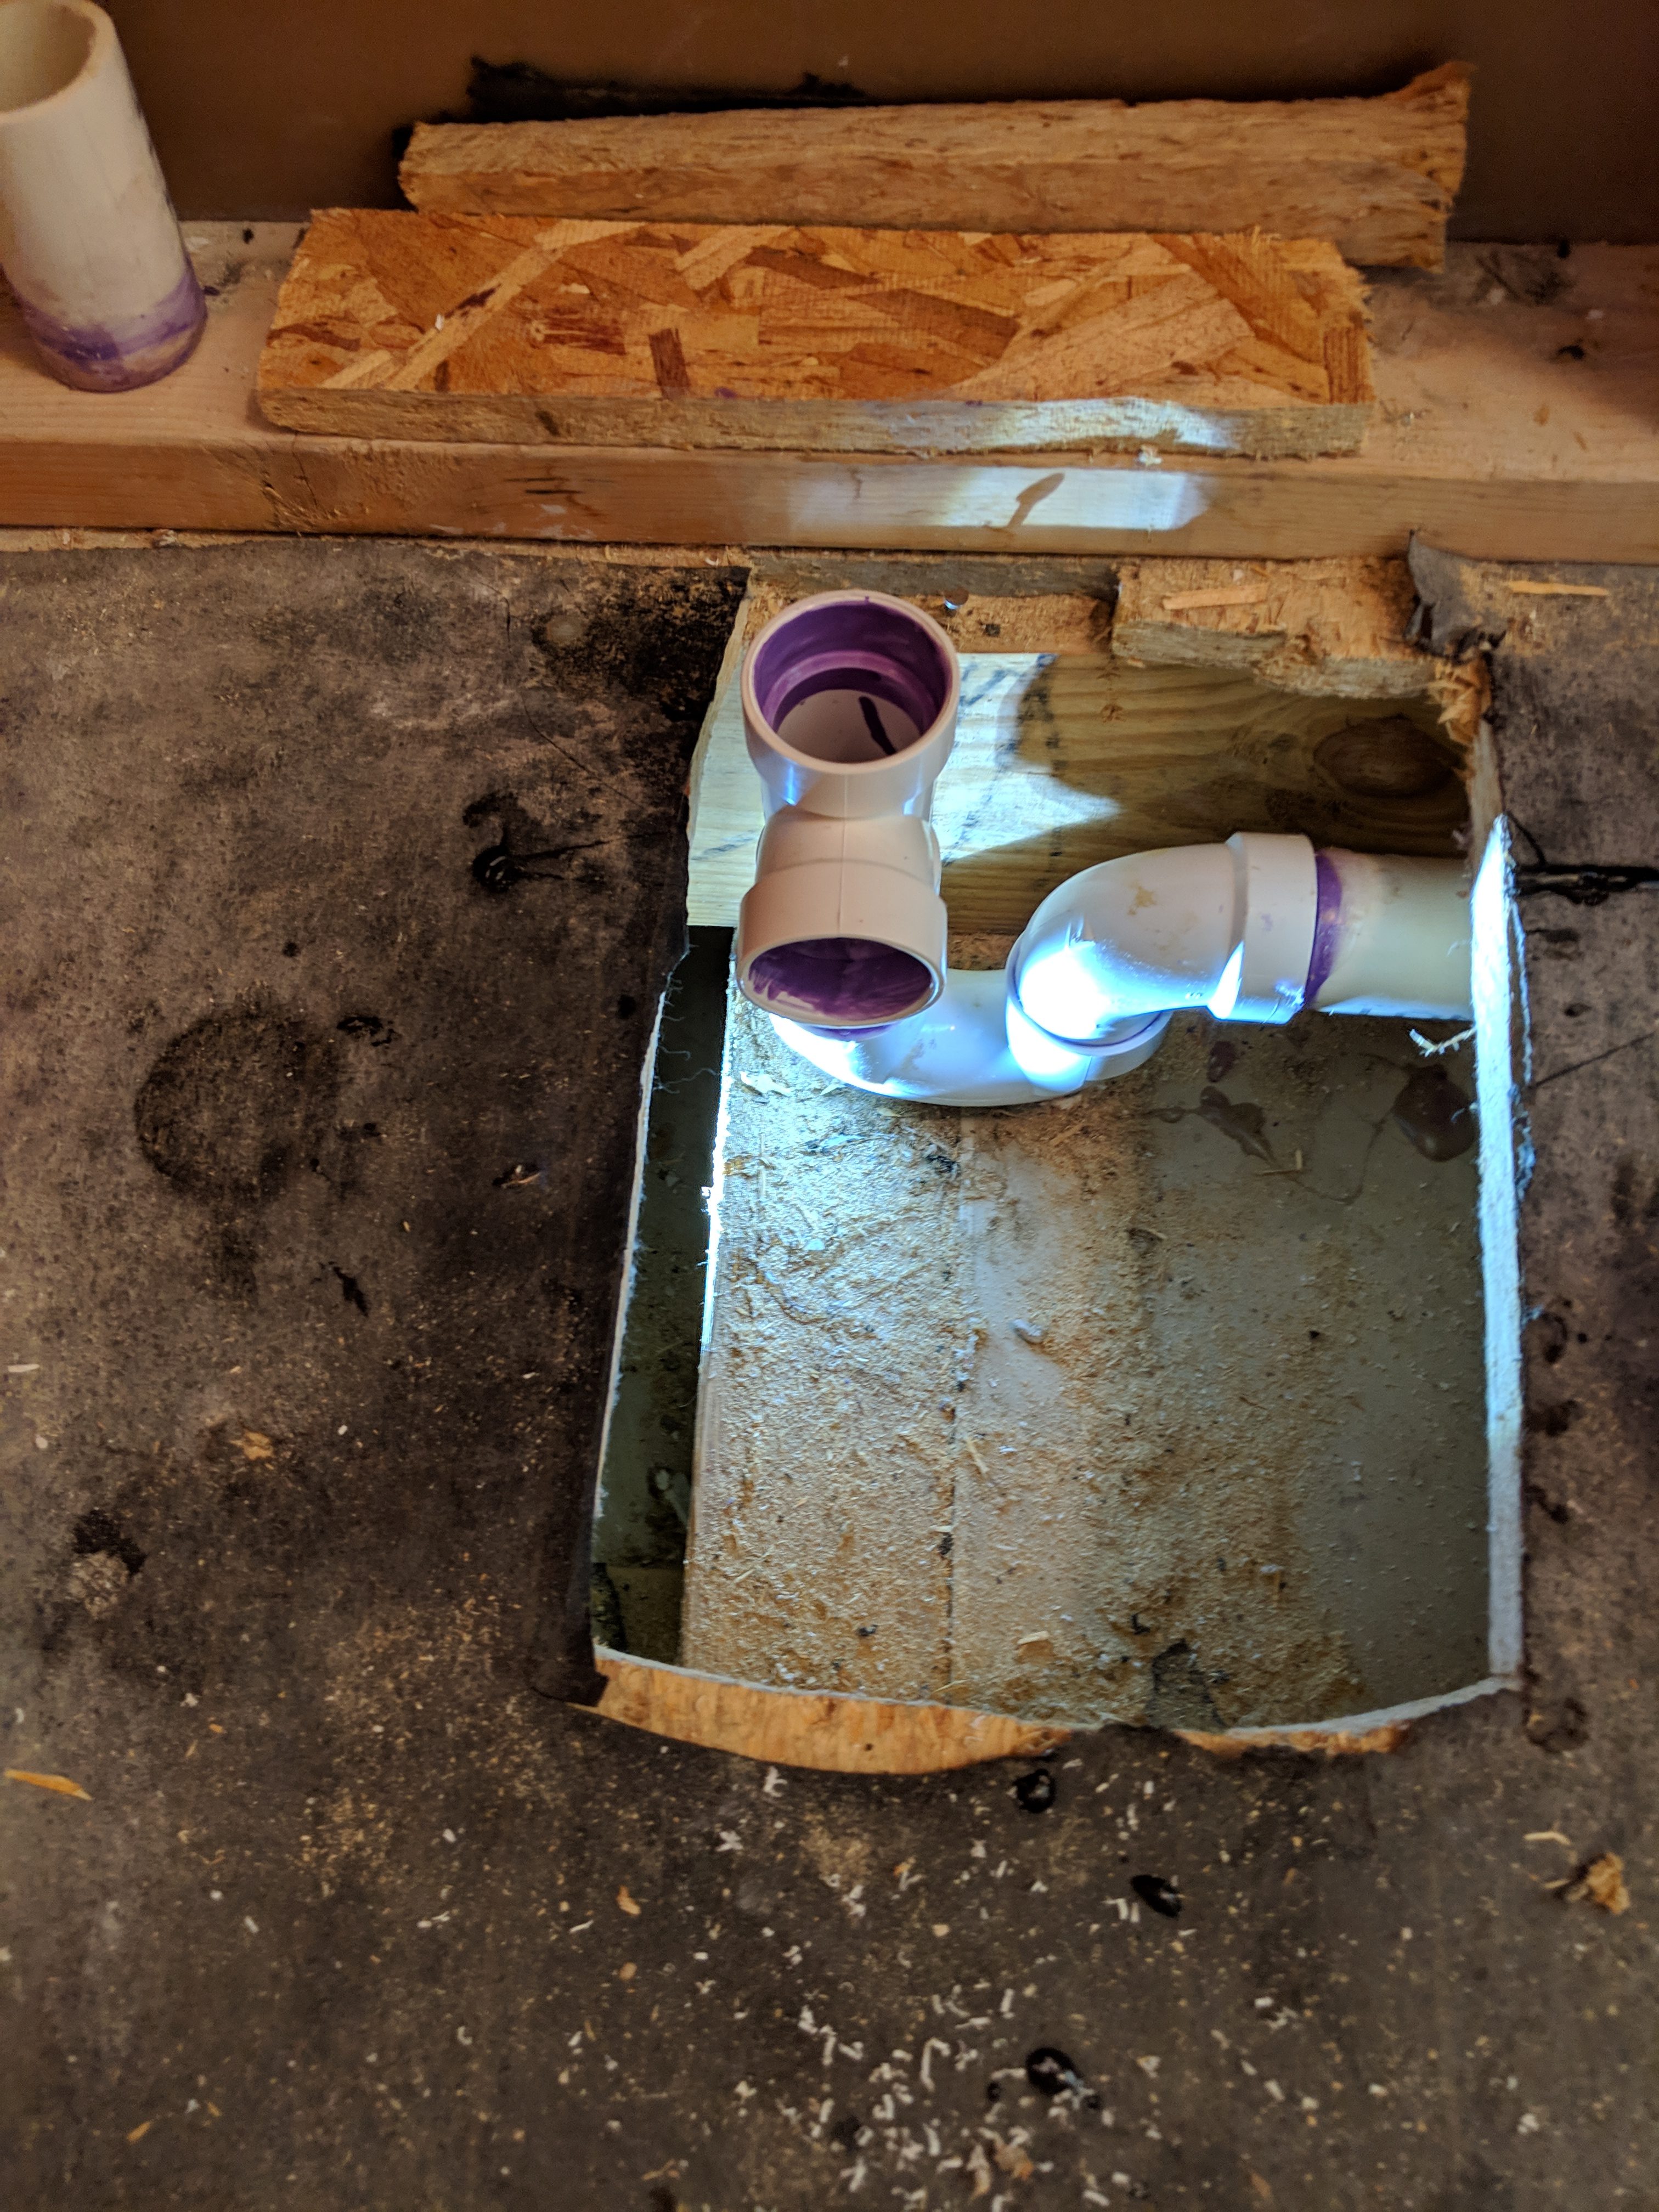
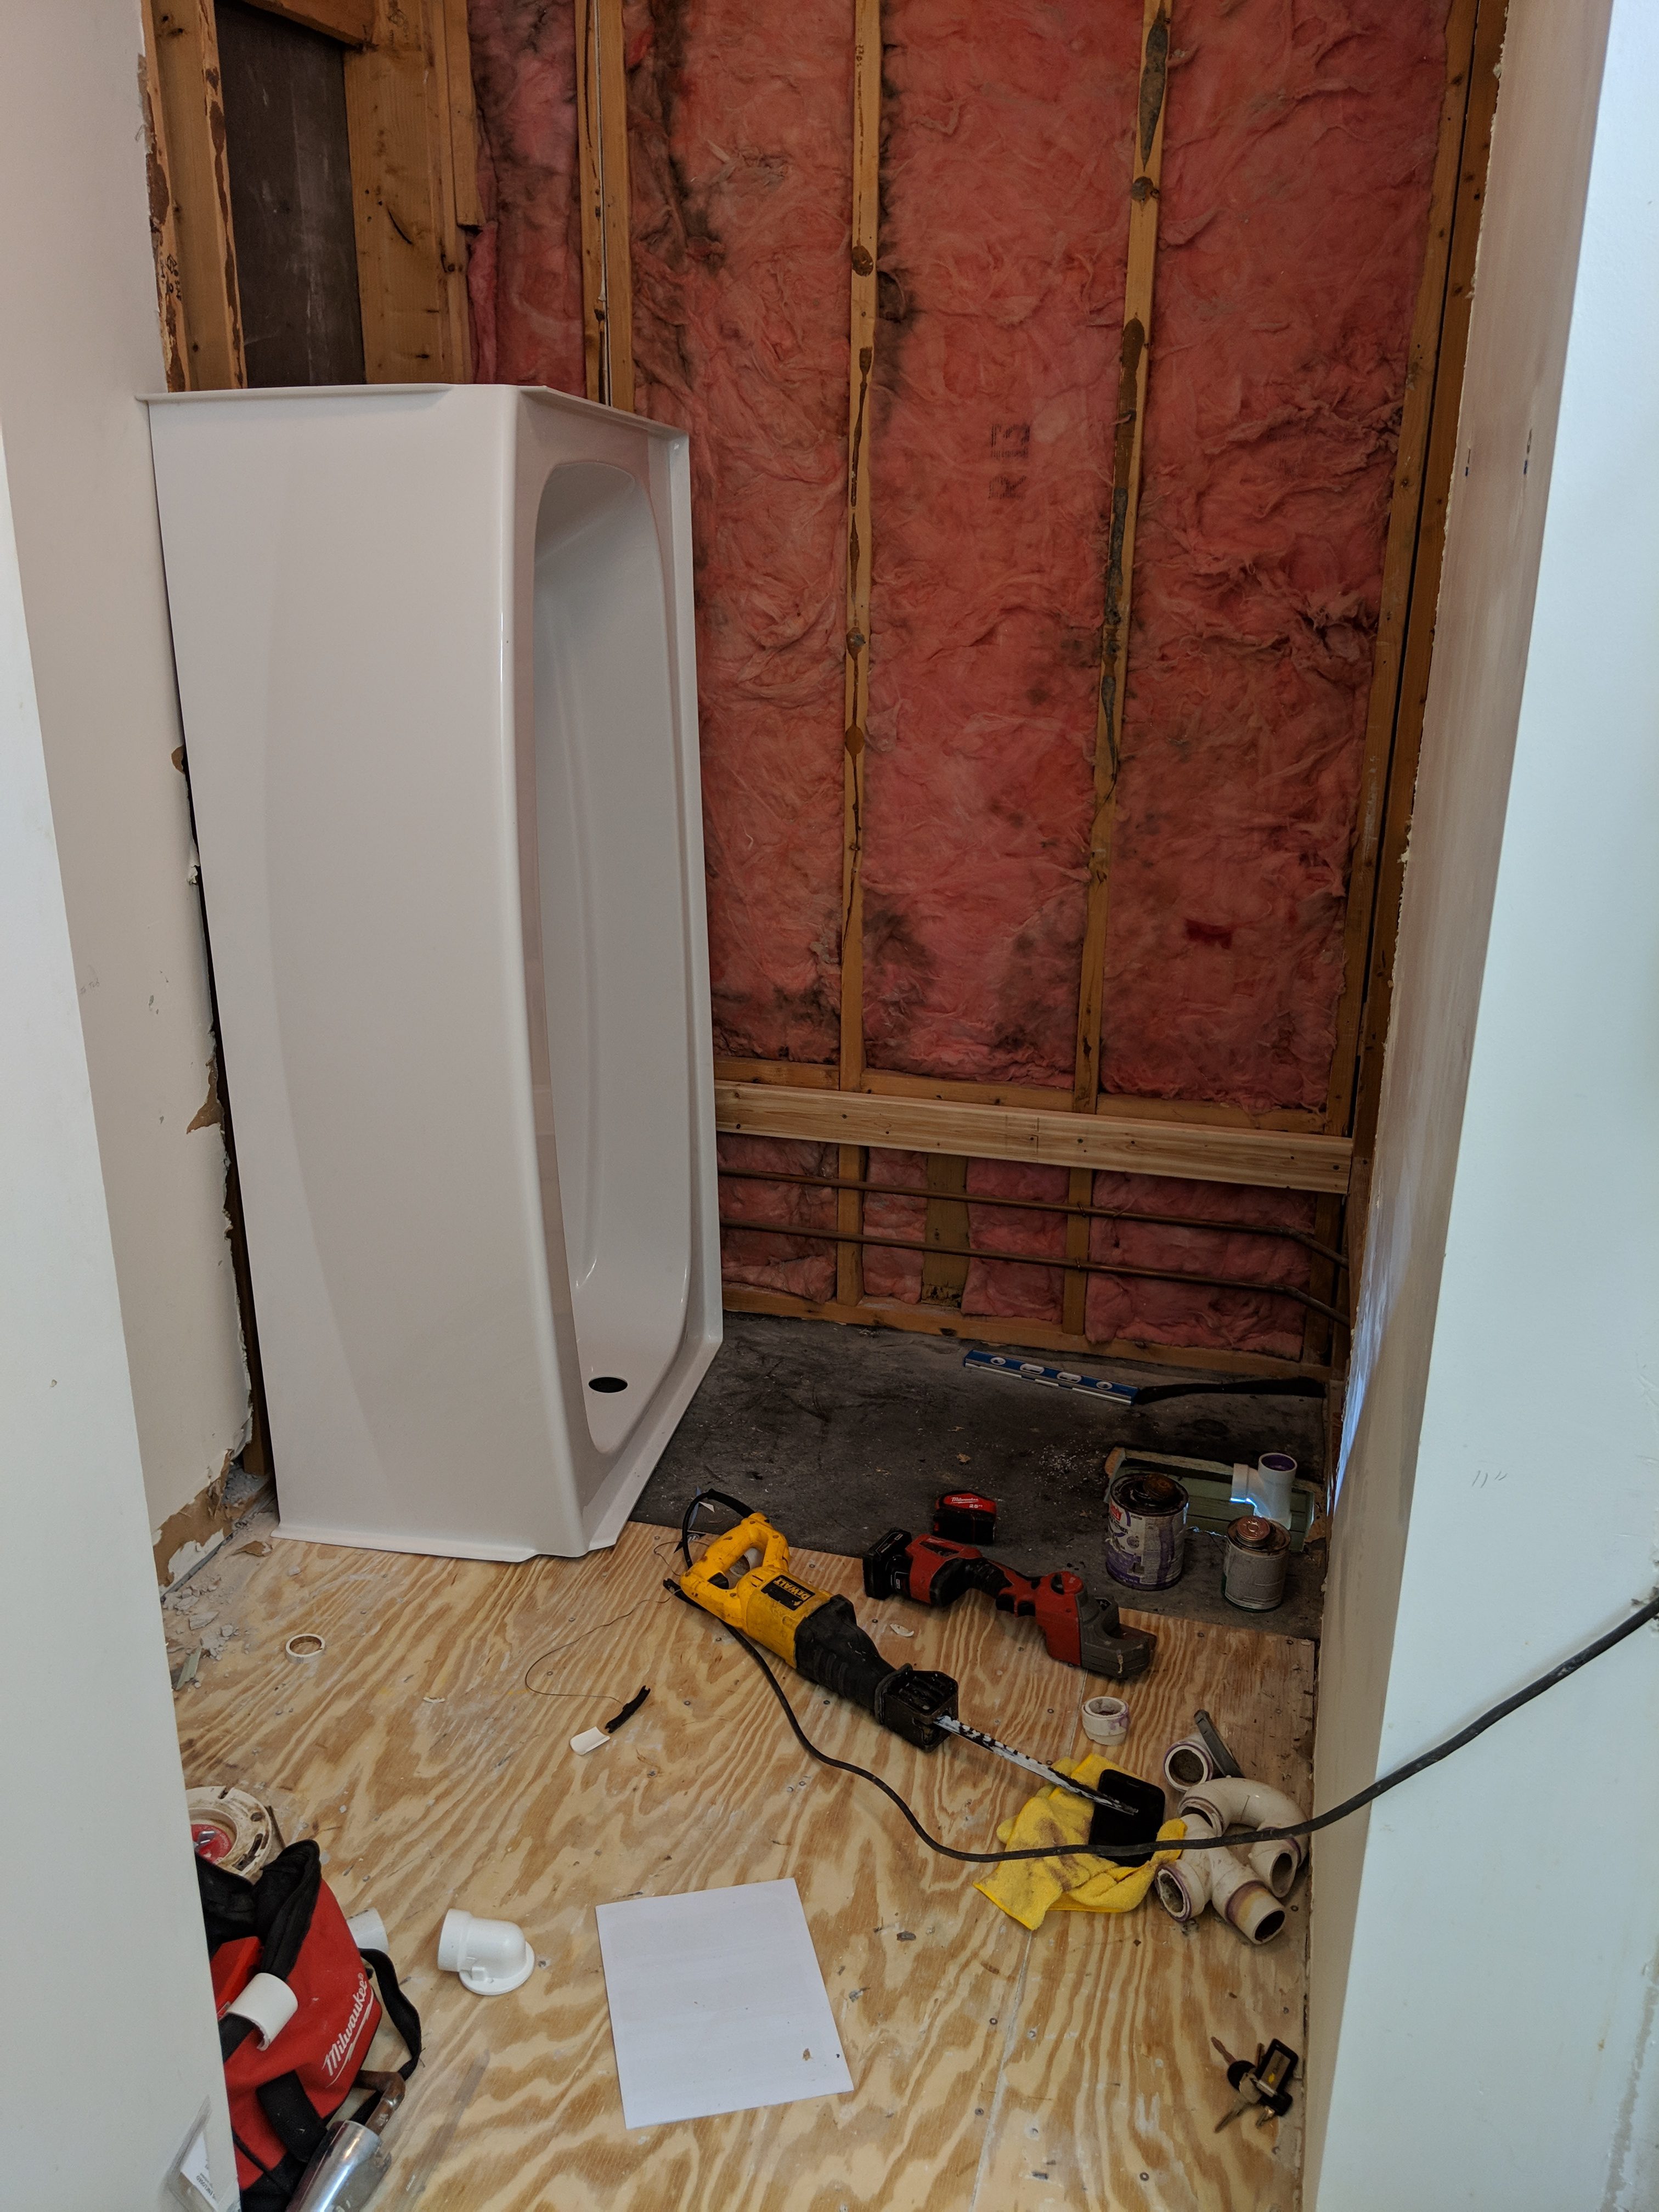
The plumber was here most of the day Monday, and we got the new tub installed and all the plumbing roughed in and capped with minimal issue. The new tub drain was off by about an inch, just enough that we had to cut a bigger hole in the subfloor and rebuild the whole waste pipe assembly.
Once the plumbing was done, and the new tub was in place, I started to have a minor panic attack about dealing with the mosaic tile on the floor. I don’t know what I was thinking choosing a tile with no straight edges, and tiny tiles in the mosaic to boot. This being my first major tile job, I really did not have much confidence in my ability to make clean cuts on nearly half of the tiles for all the wall/tub edges. Even if I could do it without destroying the tiles, this would have been a very time consuming effort. I consulted with the wife and decided to take the herringbone tile back and replace it with bigger straight tiles. This will give me way less headache, and also be easier to grout.
So Tuesday morning I had to go out to Maryland to swap out the tiles. Since I still needed to get a substrate for the walls that are not in the alcove, I decided to use Fiberock, which I could also pick up at Floor & Decor. I chose the fiberock over greenboard since it’s not that much more expensive, and makes a lot more sense in a bathroom. So once again I needed a truck on short notice. Being a couple days before Thanksgiving, there was absolutely nothing available at the car rental places, so my choices were basically U-haul & Home Depot. They are both about the same cost to start, around $20, but U-haul is for the day + $.69/mile, and HD is first 75 minutes, after which it’s $5 per 15 minutes. Because I was driving about 90 miles round trip, I chose to go with the HD rental since they don’t charge for mileage. I thought I’d be able to do it in 3 hours, and therefore it would be significantly cheaper than U-haul. Well it turned out to take like 4 1/2 hours, so in hindsight, it probably would have been better to go with U-haul so I wouldn’t have had to rush to unload and return it. ¯\_(?)_/¯ By the time I got finished unloading and returning the truck, it was about 4:00 and I was spent.
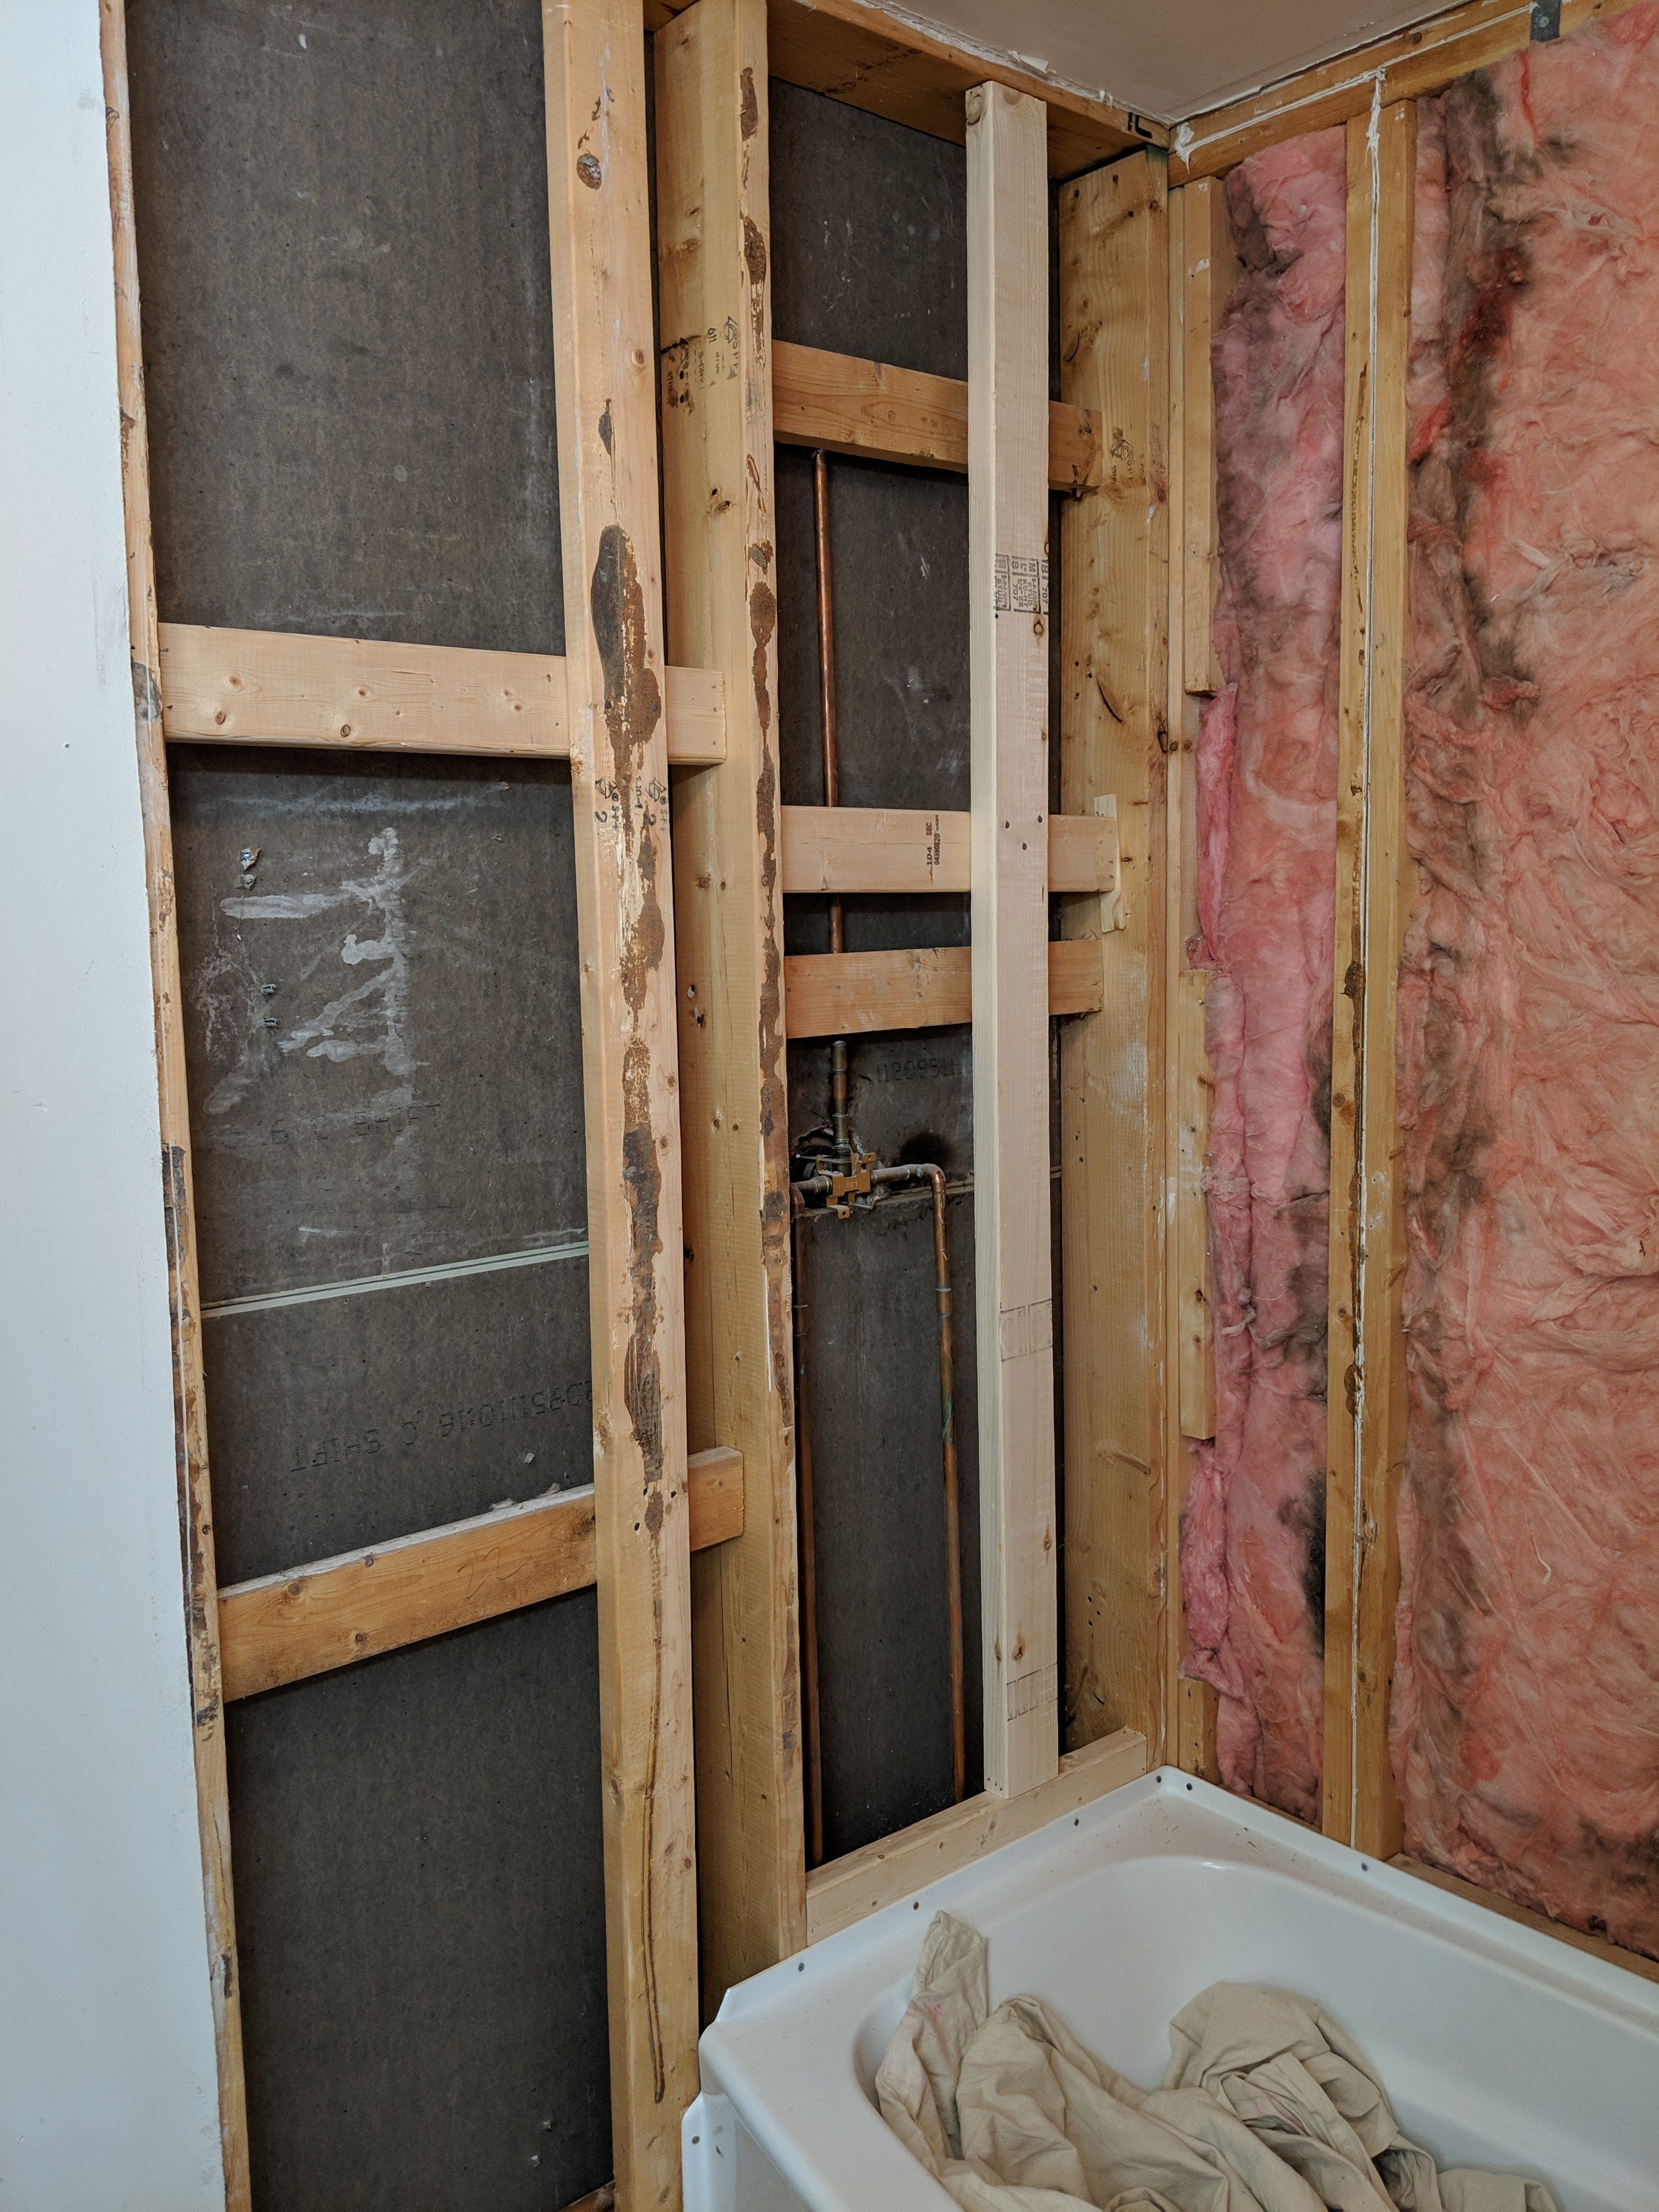
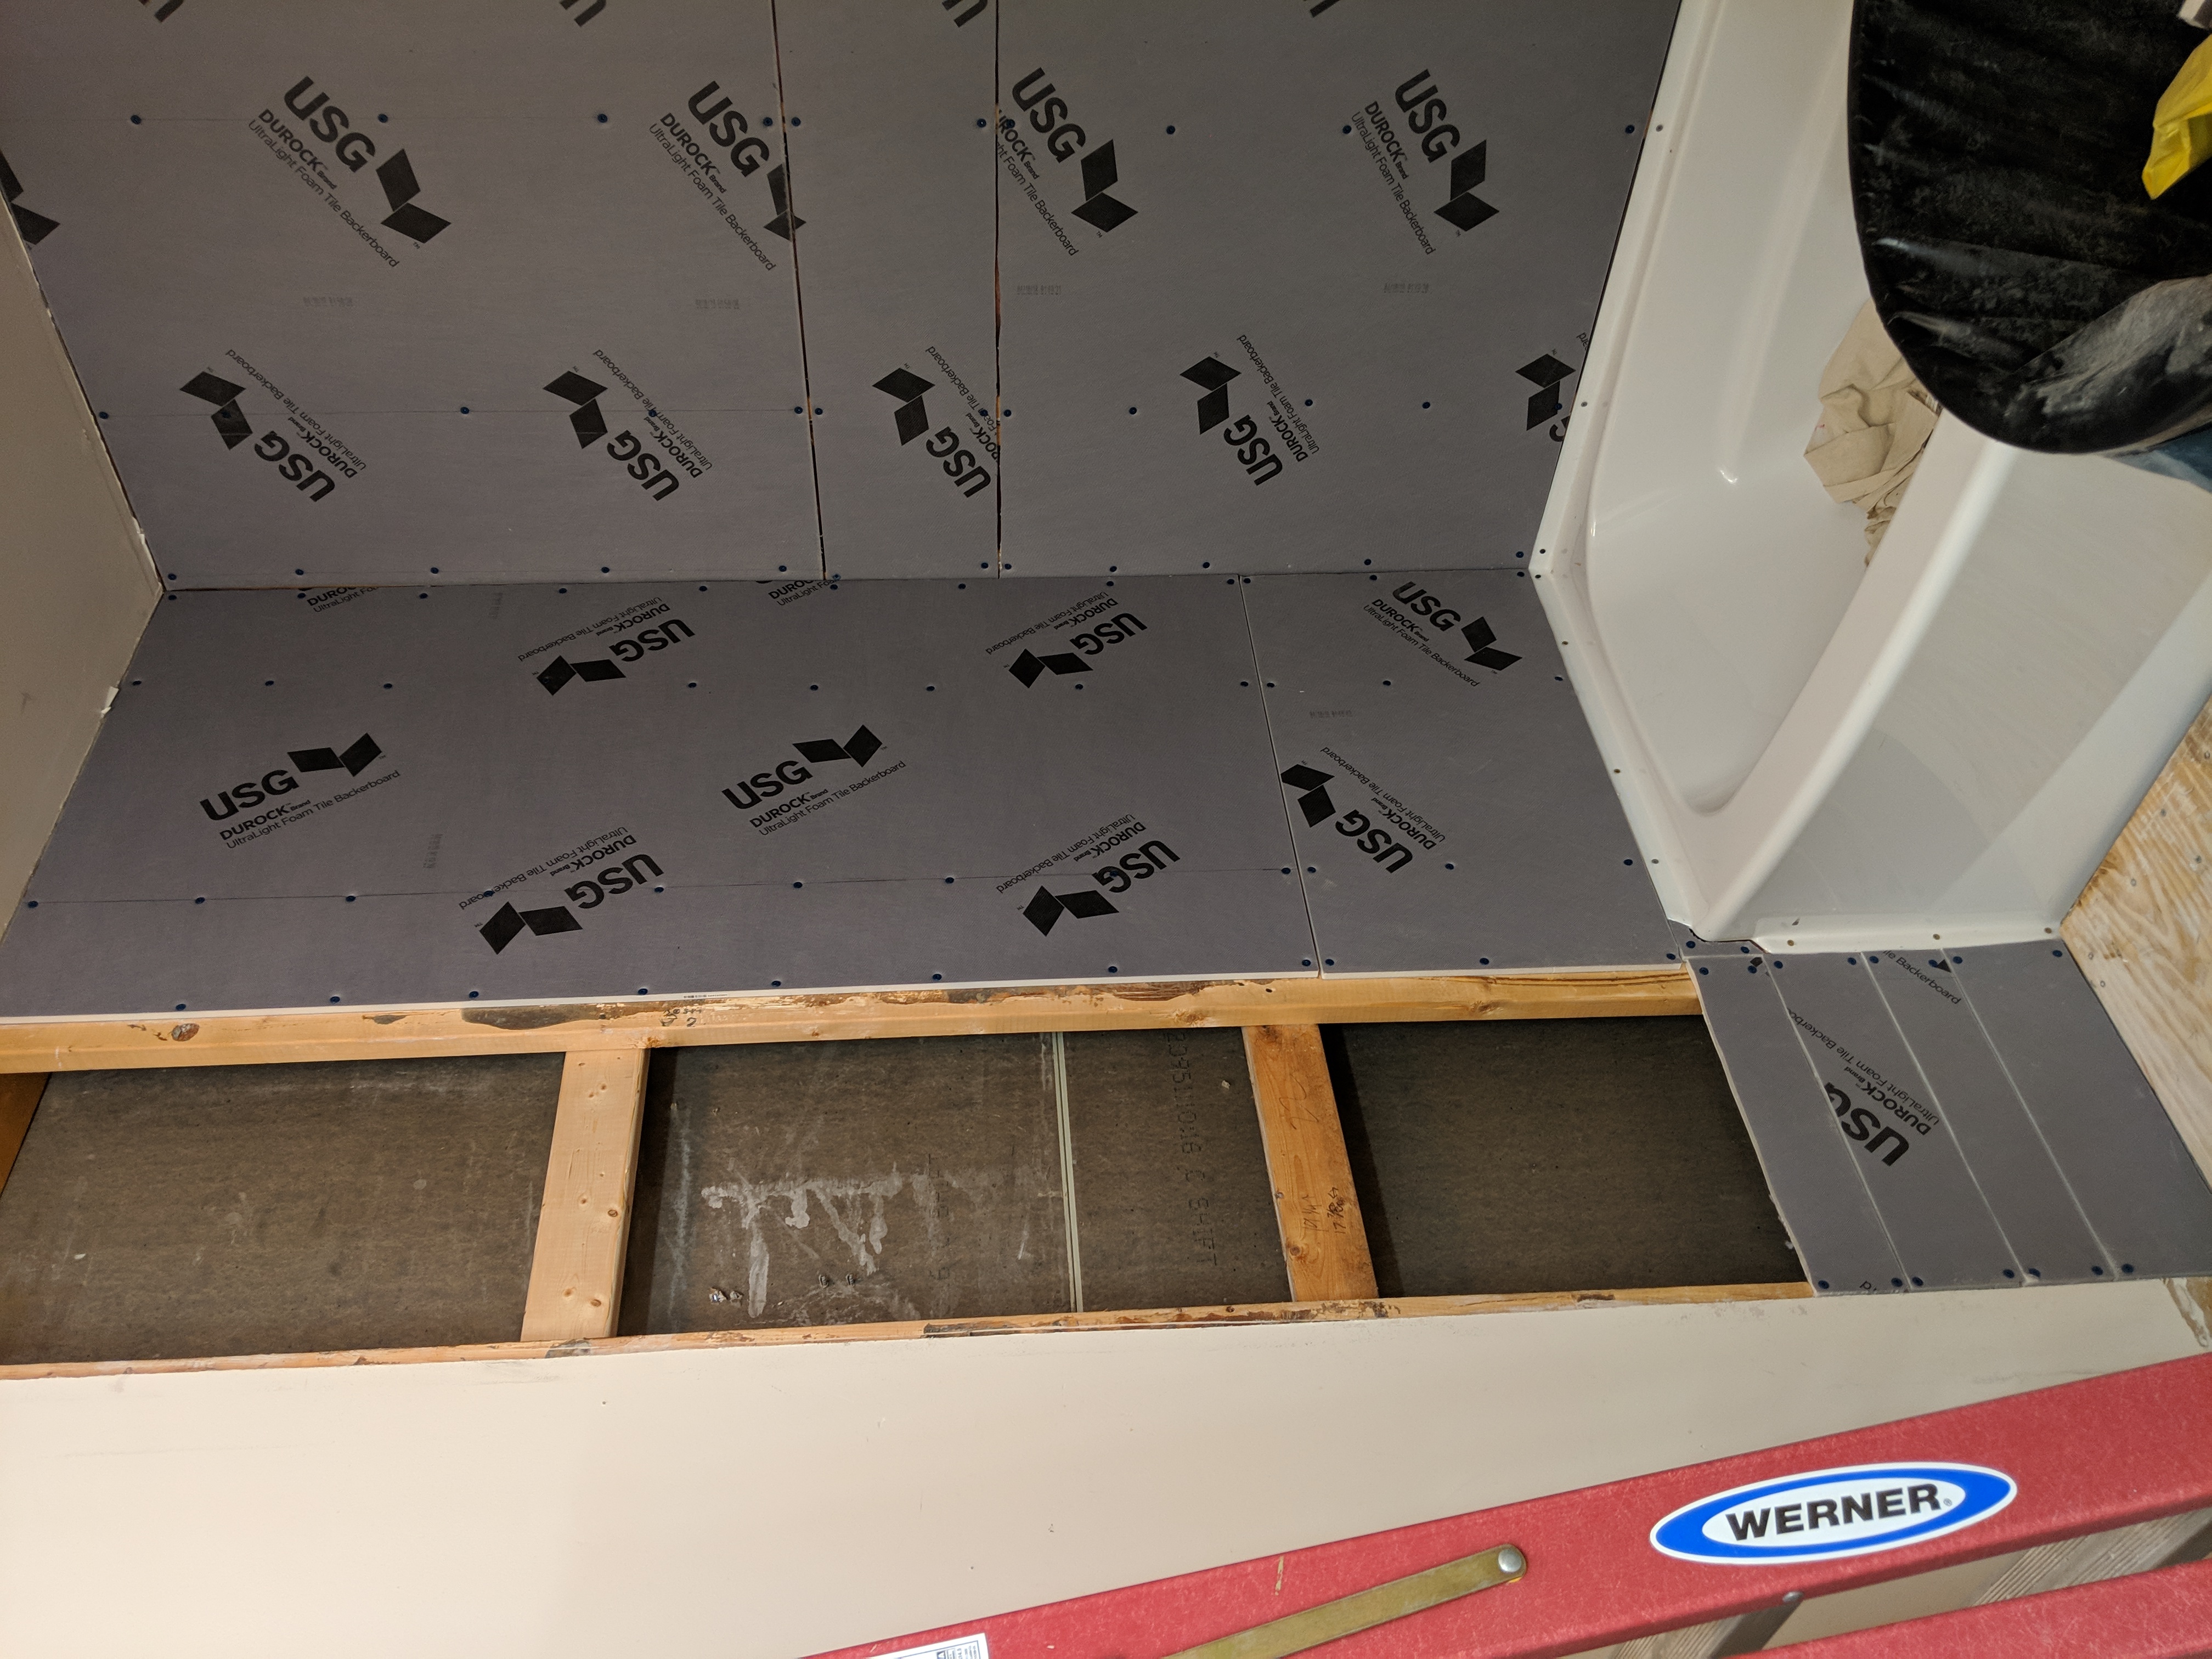
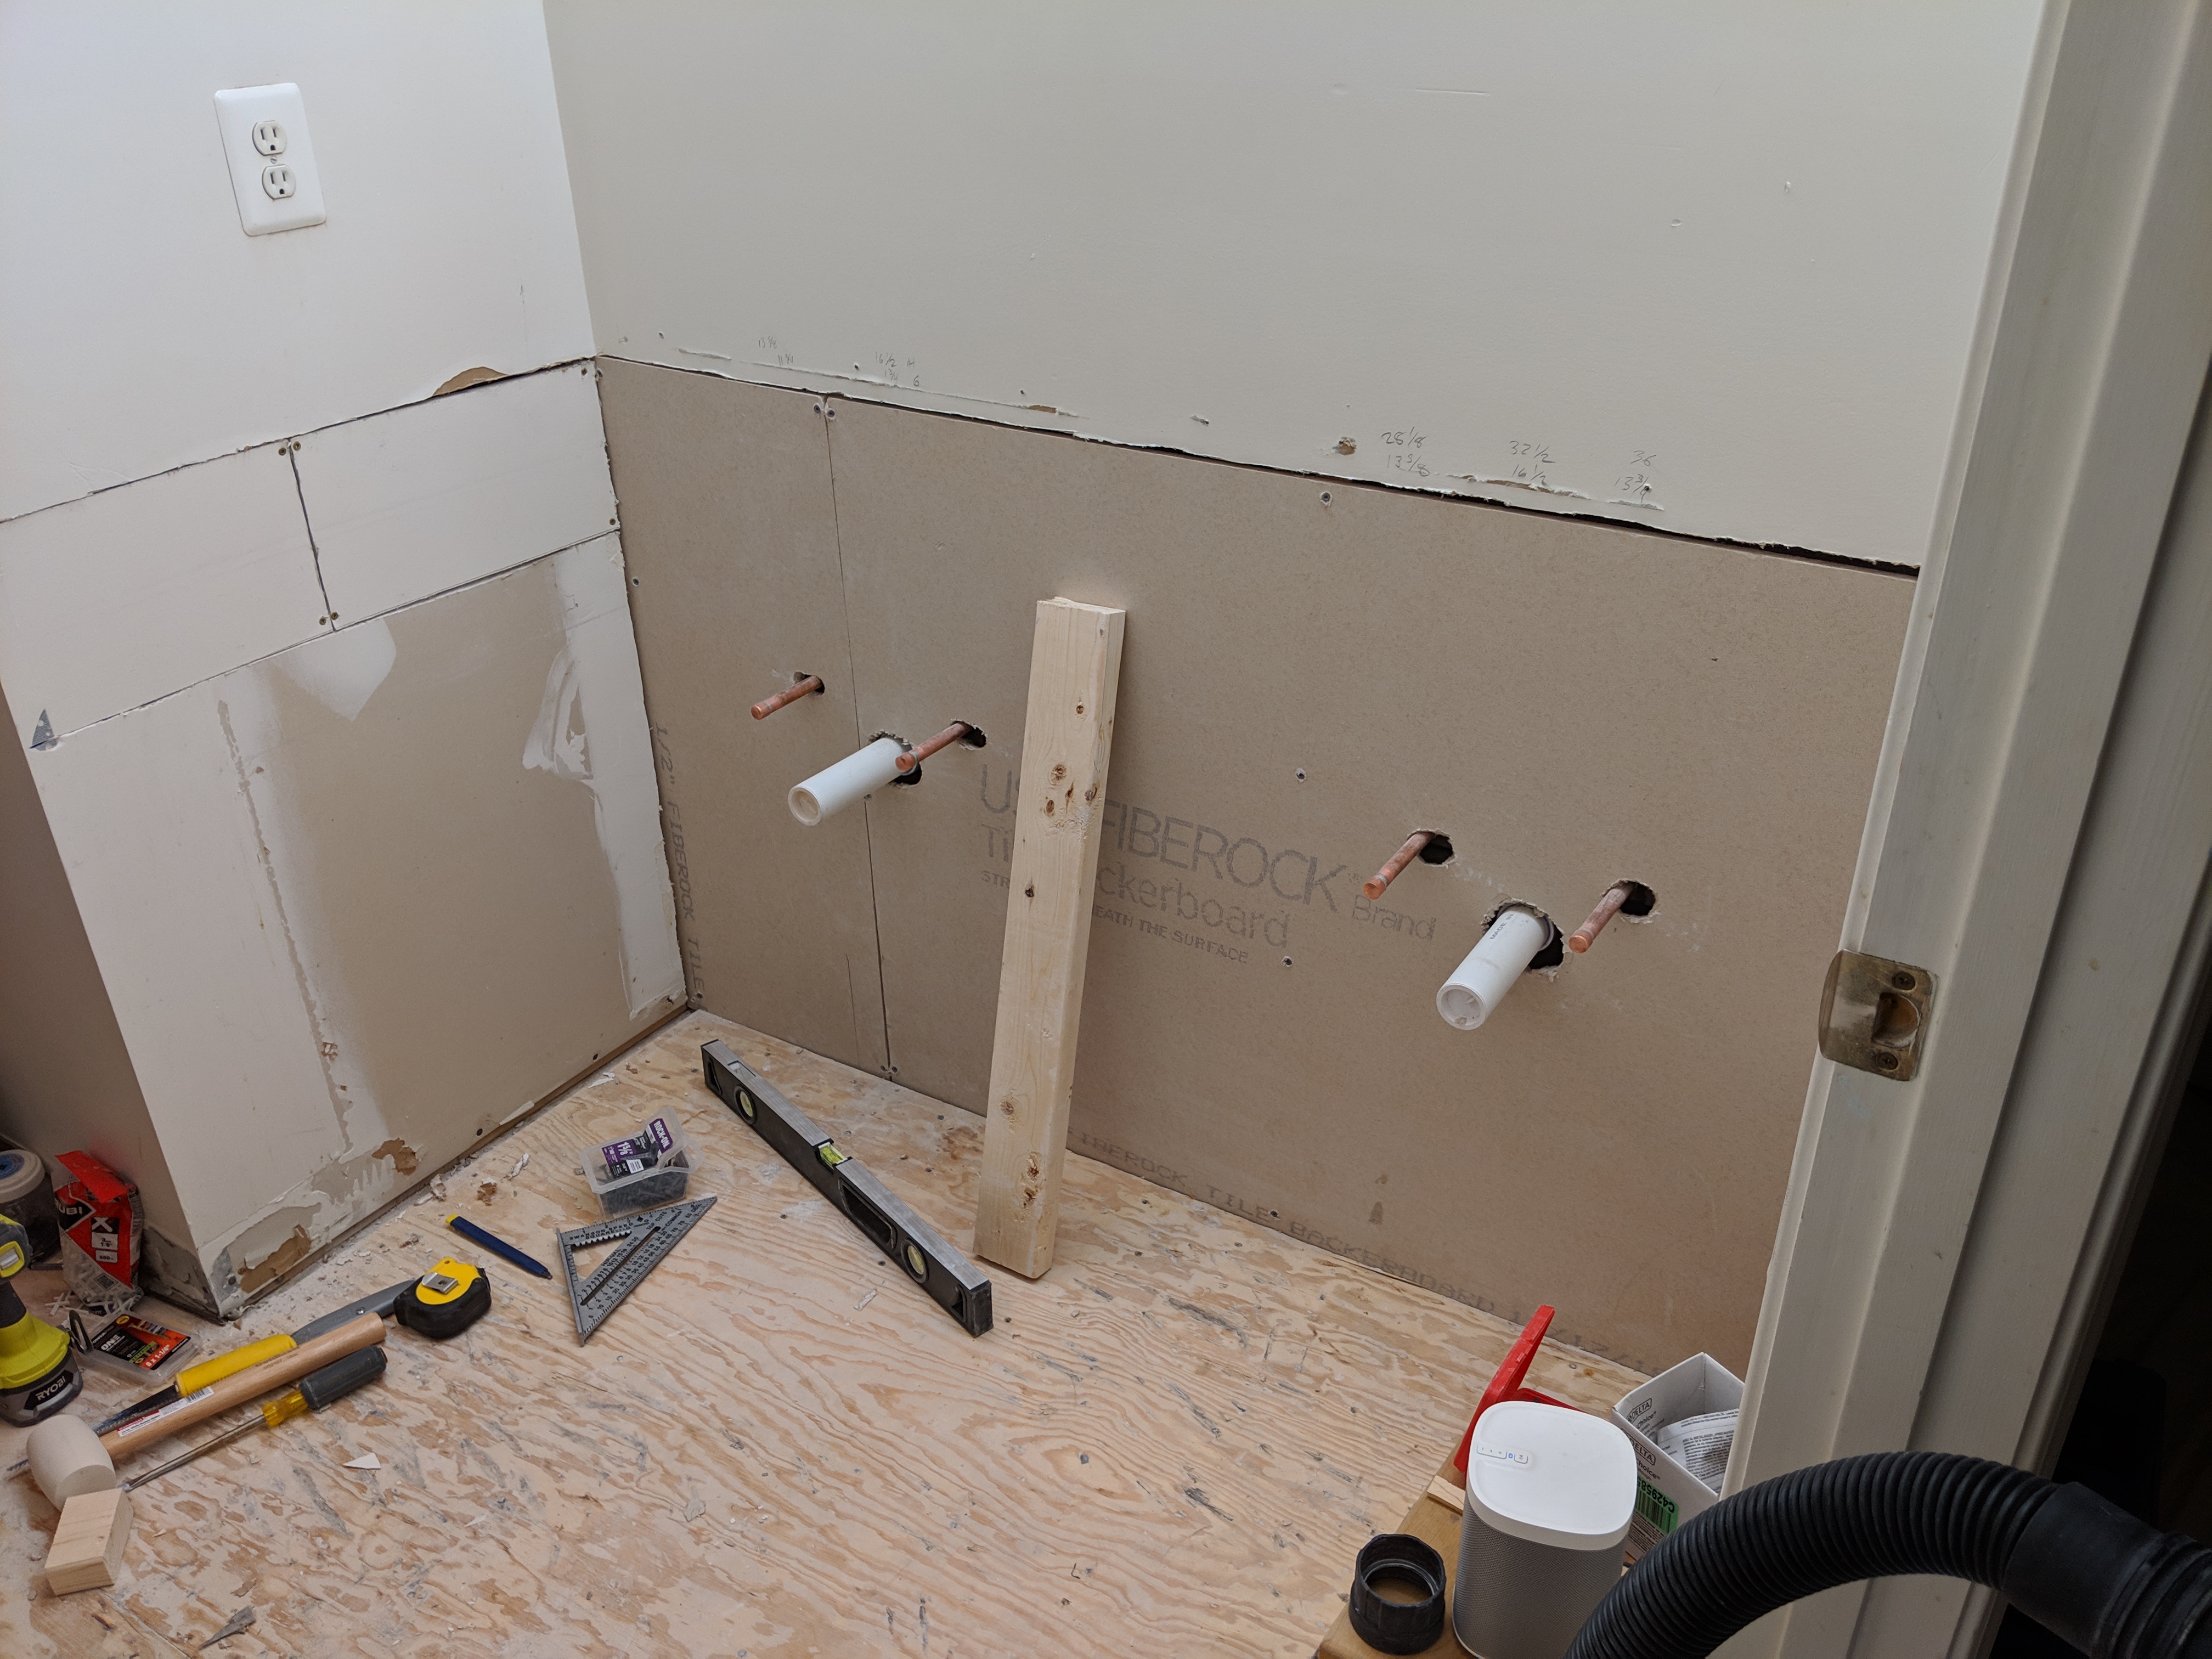
Wednesday morning after picking up a tile saw from a friend’s house (Thanks Norm!), I was finally able to get to work on the rebuild phase. The foam backer boards that I’m using require 16″ O.C. studs. The side walls of the alcove both have plumbing in them, and are 24″ O.C. So I had to add some support on both sides to get there. Unfortunately, the plumbing is right where I want to be. On the left side (image above), I was able to place it just to the right of the pipe which puts it 16″ from the left. I added a couple of blockers to attach it to/give it extra support.
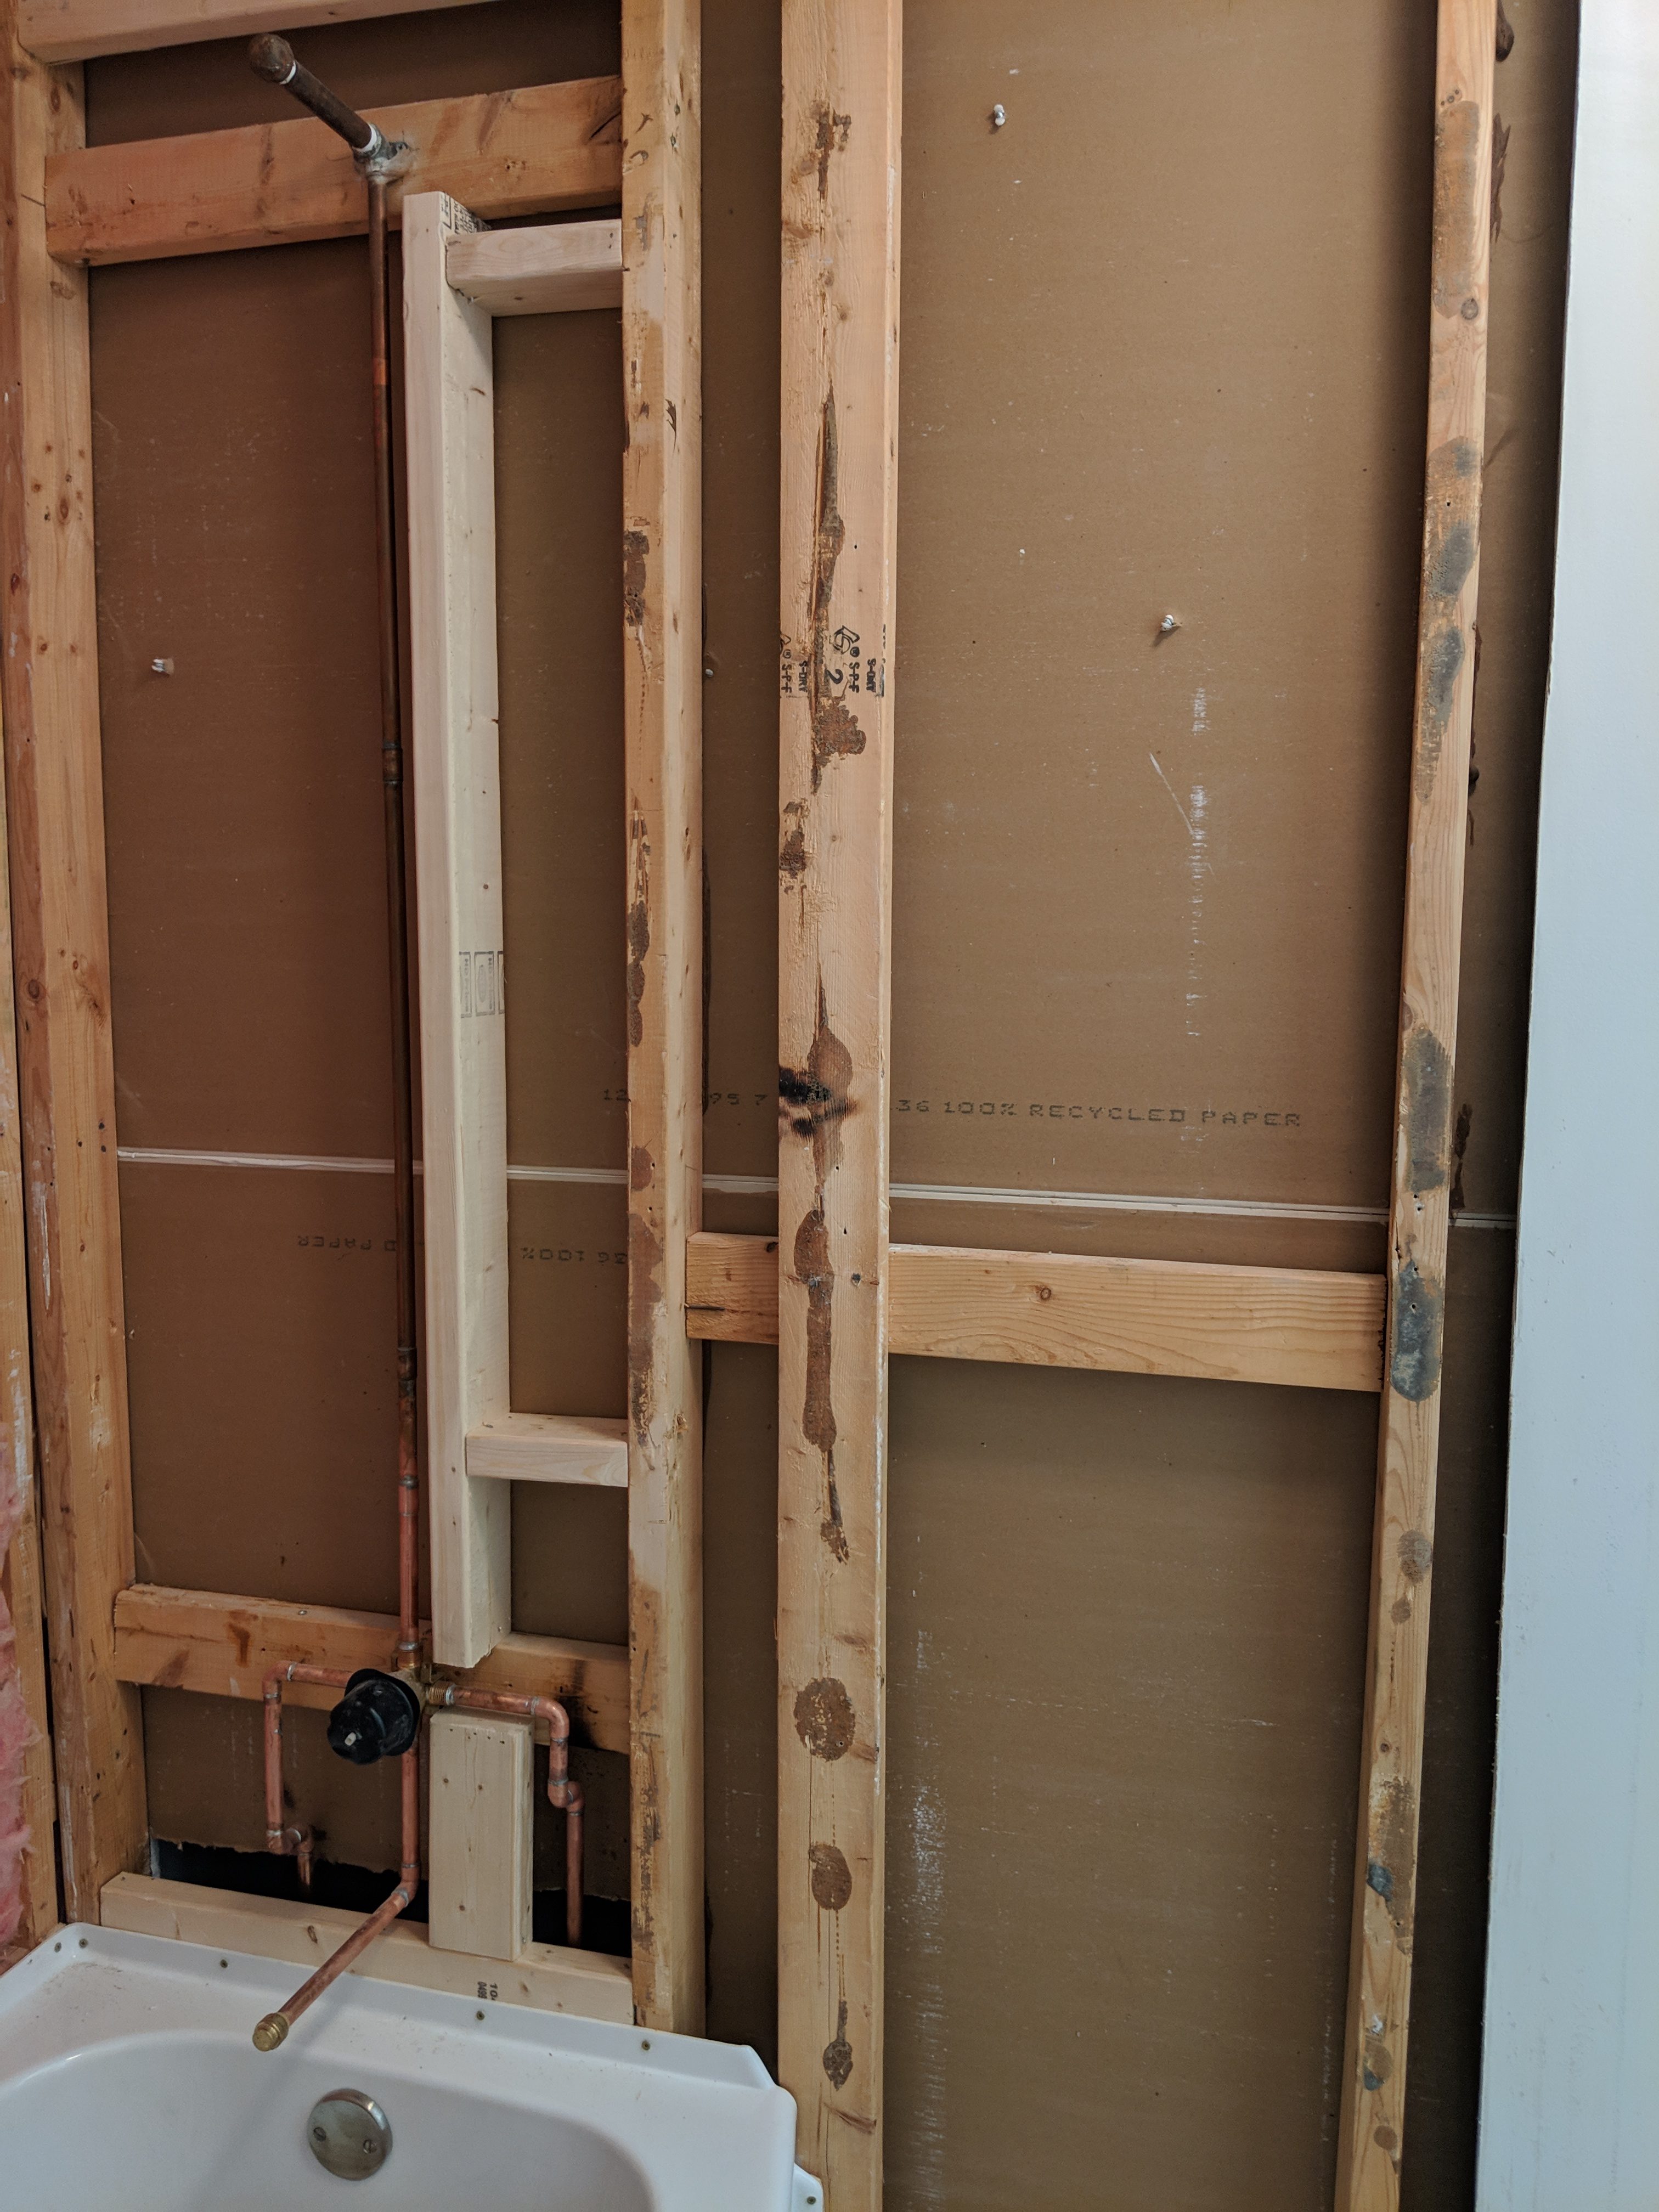
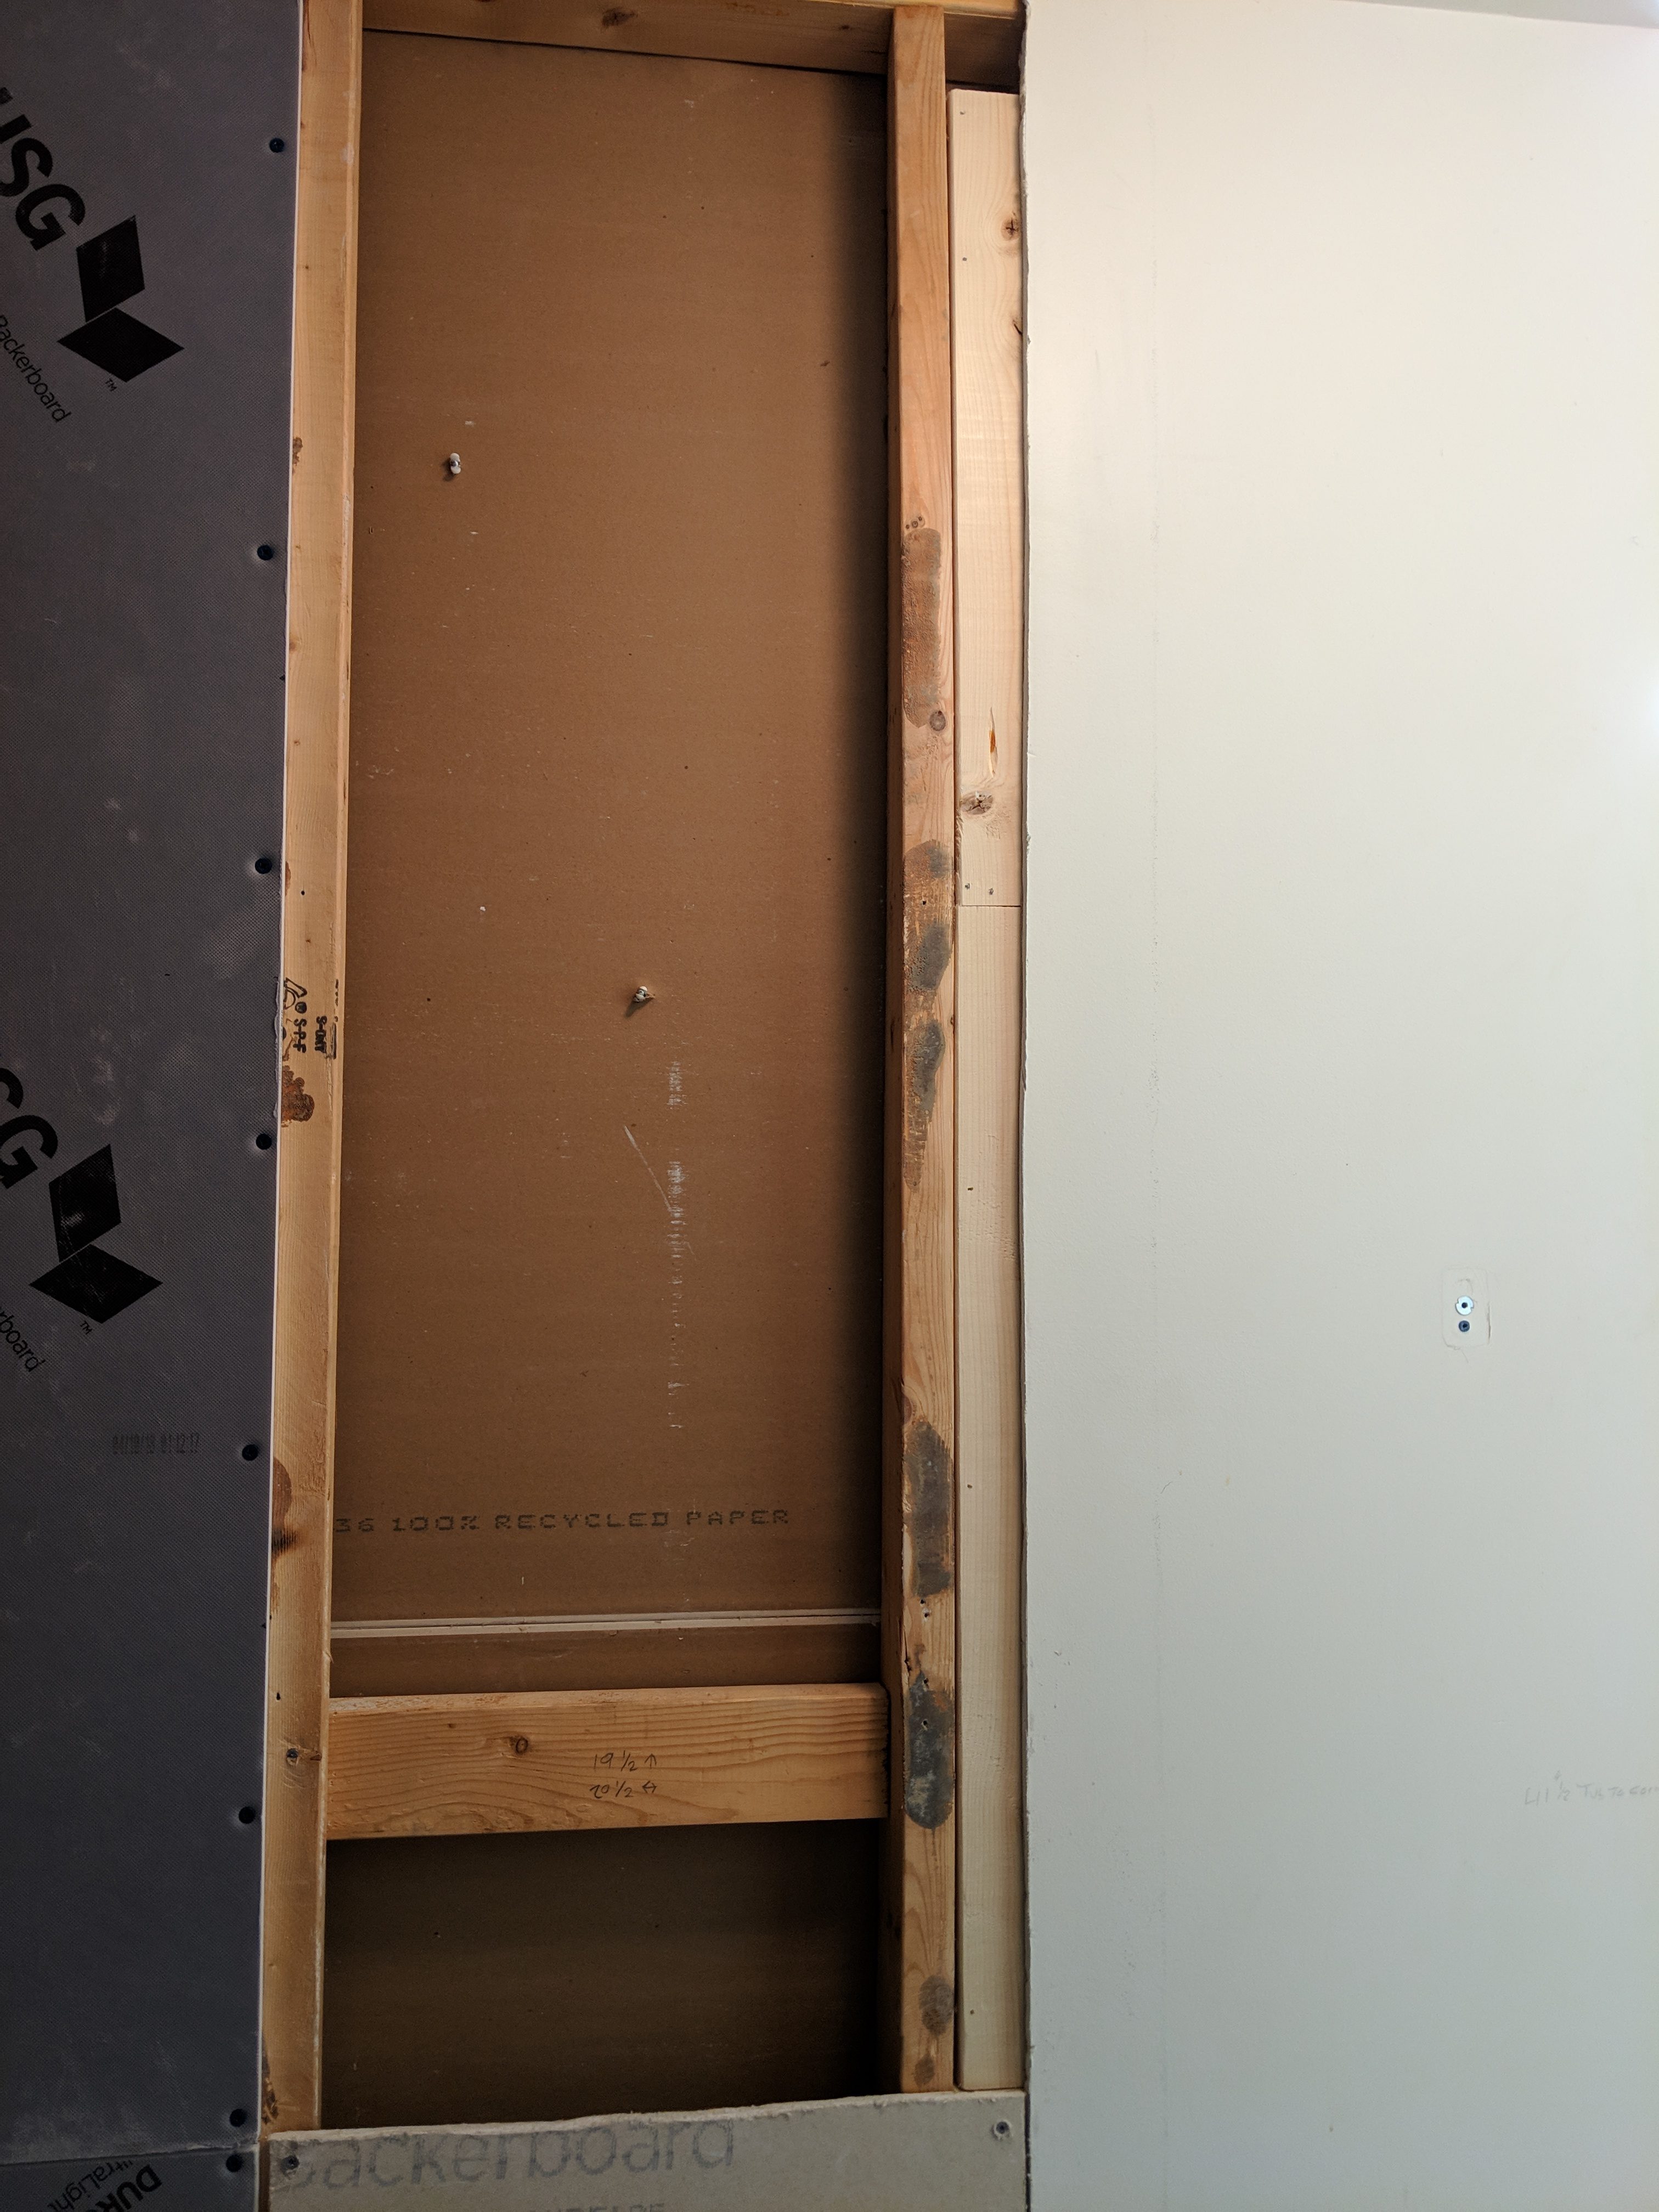
The right side was a hot mess! There was just nowhere to get a full board in around the plumbing. On top of that, the blockers that the are used for the plumbing, are not even with one another, nor are they inset to the right depth to be able to set a 2×4 level with the others. So I came up with this frankenstud configuration. It’s not pretty, but it gets me what I need. I also cut the old drywall a bit further than I planned, so I needed to sister in another stud so that the wall wouldn’t be floating in that gap. I’m glad I did, because that stud isn’t secured by anything but glue, and it’s actually twisted at the top and bottom.
I had already done a small one on the bottom, to support the lower boards. For whatever reason, I didn’t think I needed to for the rest. It would have been a lot easier if I had done it from there, but whatever. I actually lost a 2×4 behind the drywall on my first attempt. I had to call in reinforcements, and use Stephanie’s tiny arm to reach behind the wall and retrieve it, then hold it in place while I attached.

After getting all the framing completed, I was finally able to start hanging walls about mid afternoon Thursday. The foam boards were every bit as easy to work with as I had hoped they’d be. I needed a hand on the first one, only to get spacers in place since I wanted to work top down instead of bottom up. They were super easy to cut, and so light and easy to maneuver. I got a few boards up, took a quick break to eat a Thanksgiving meal with the family, and got back to it.
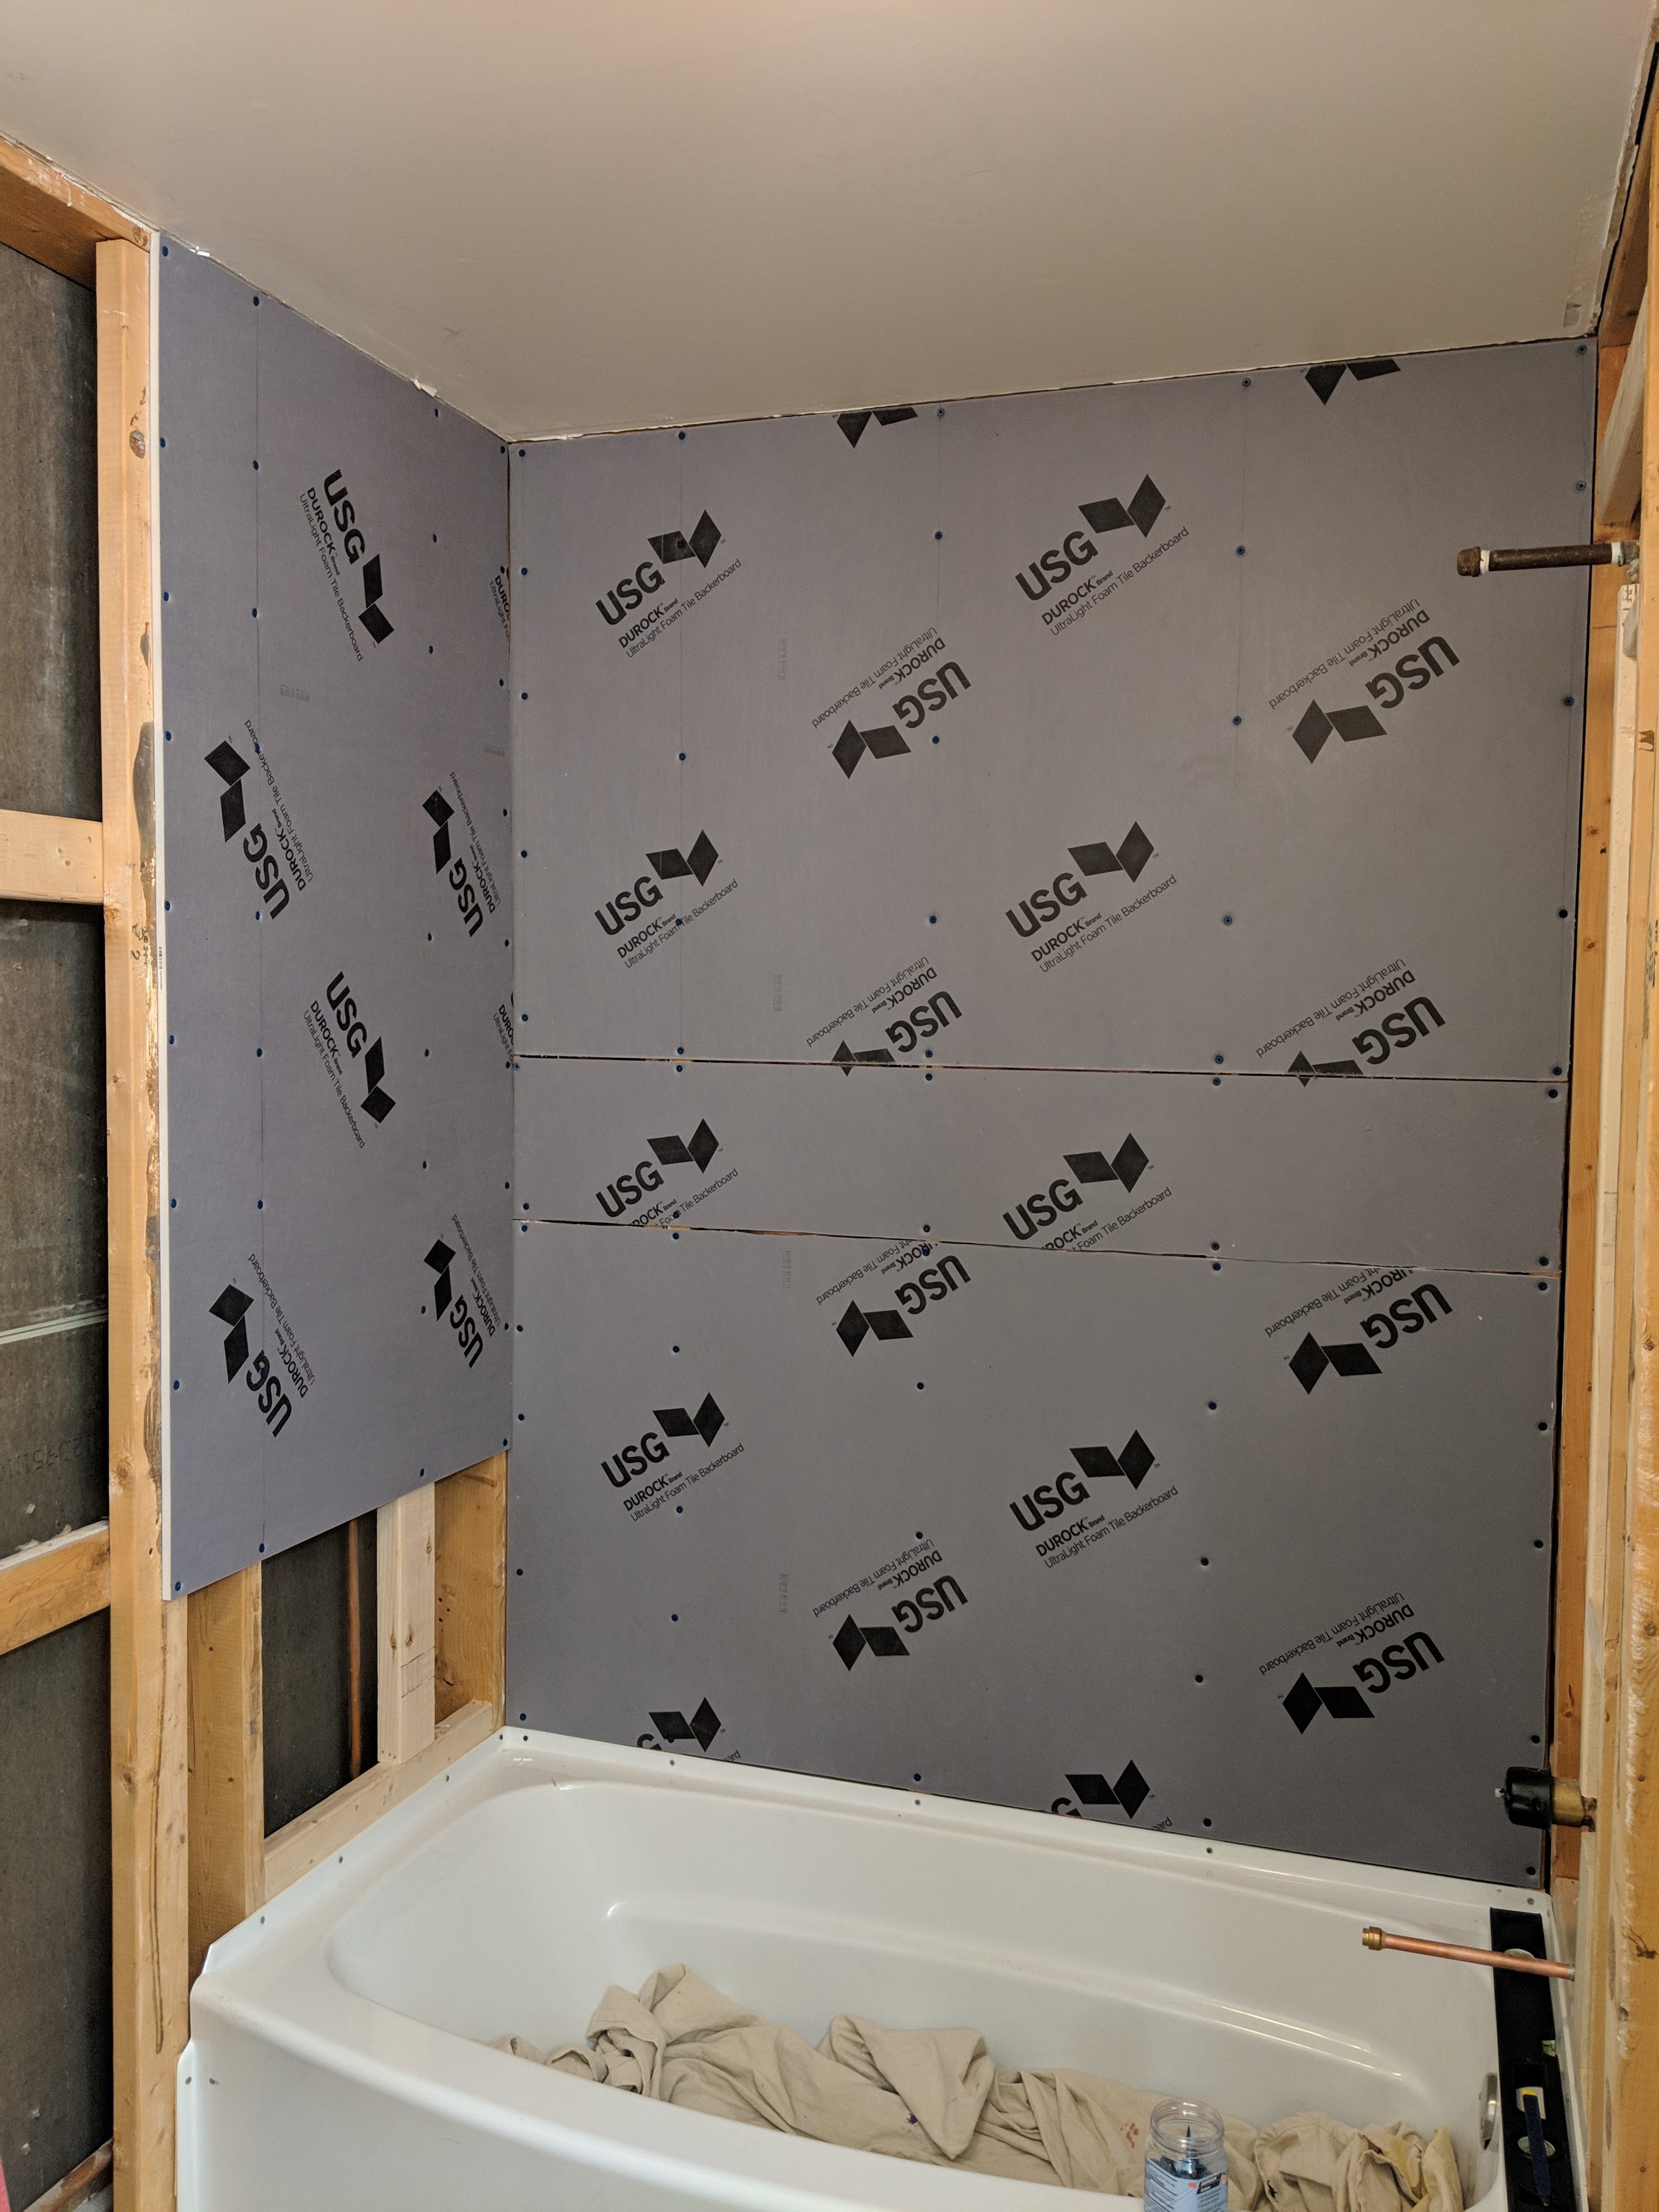
I pretty quickly got through the alcove boards on the back and left side since there are minimal cuts. The right side has 3 pipes to get around. 2 of them are just 1″ circle holes, so a few seconds with the hole saw on a drill. The mixing valve however, is about a 4″ circle.
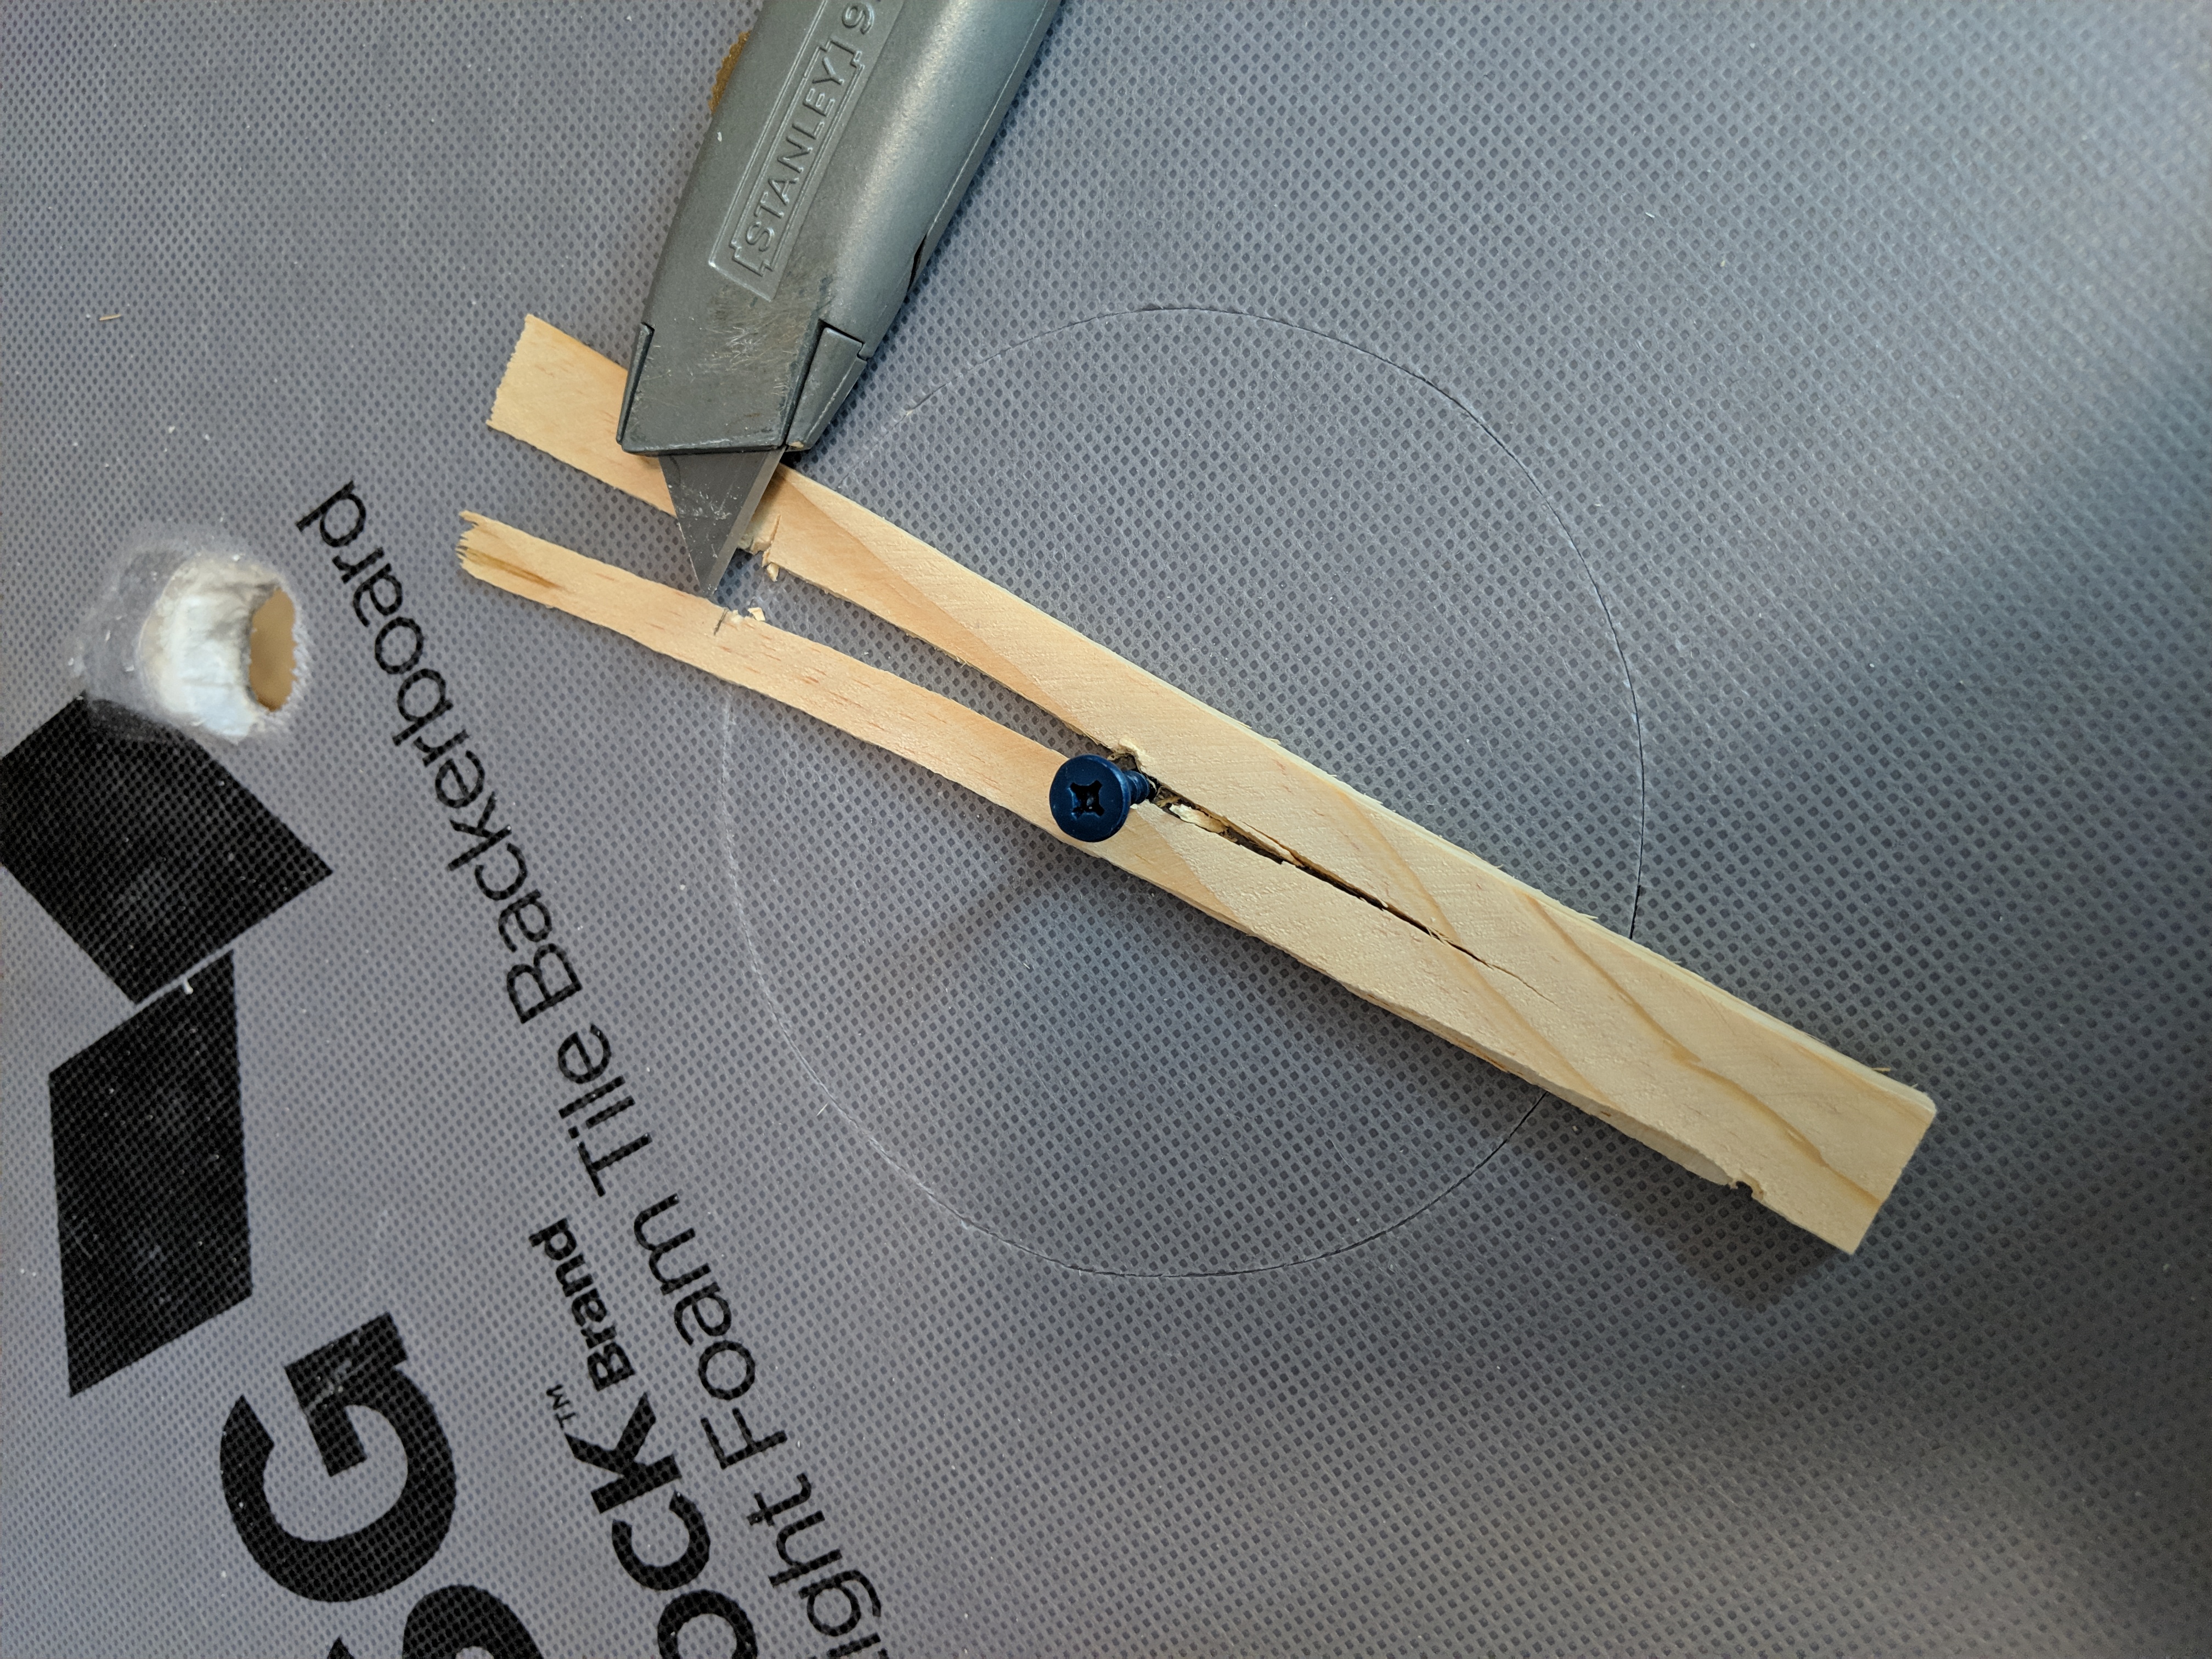
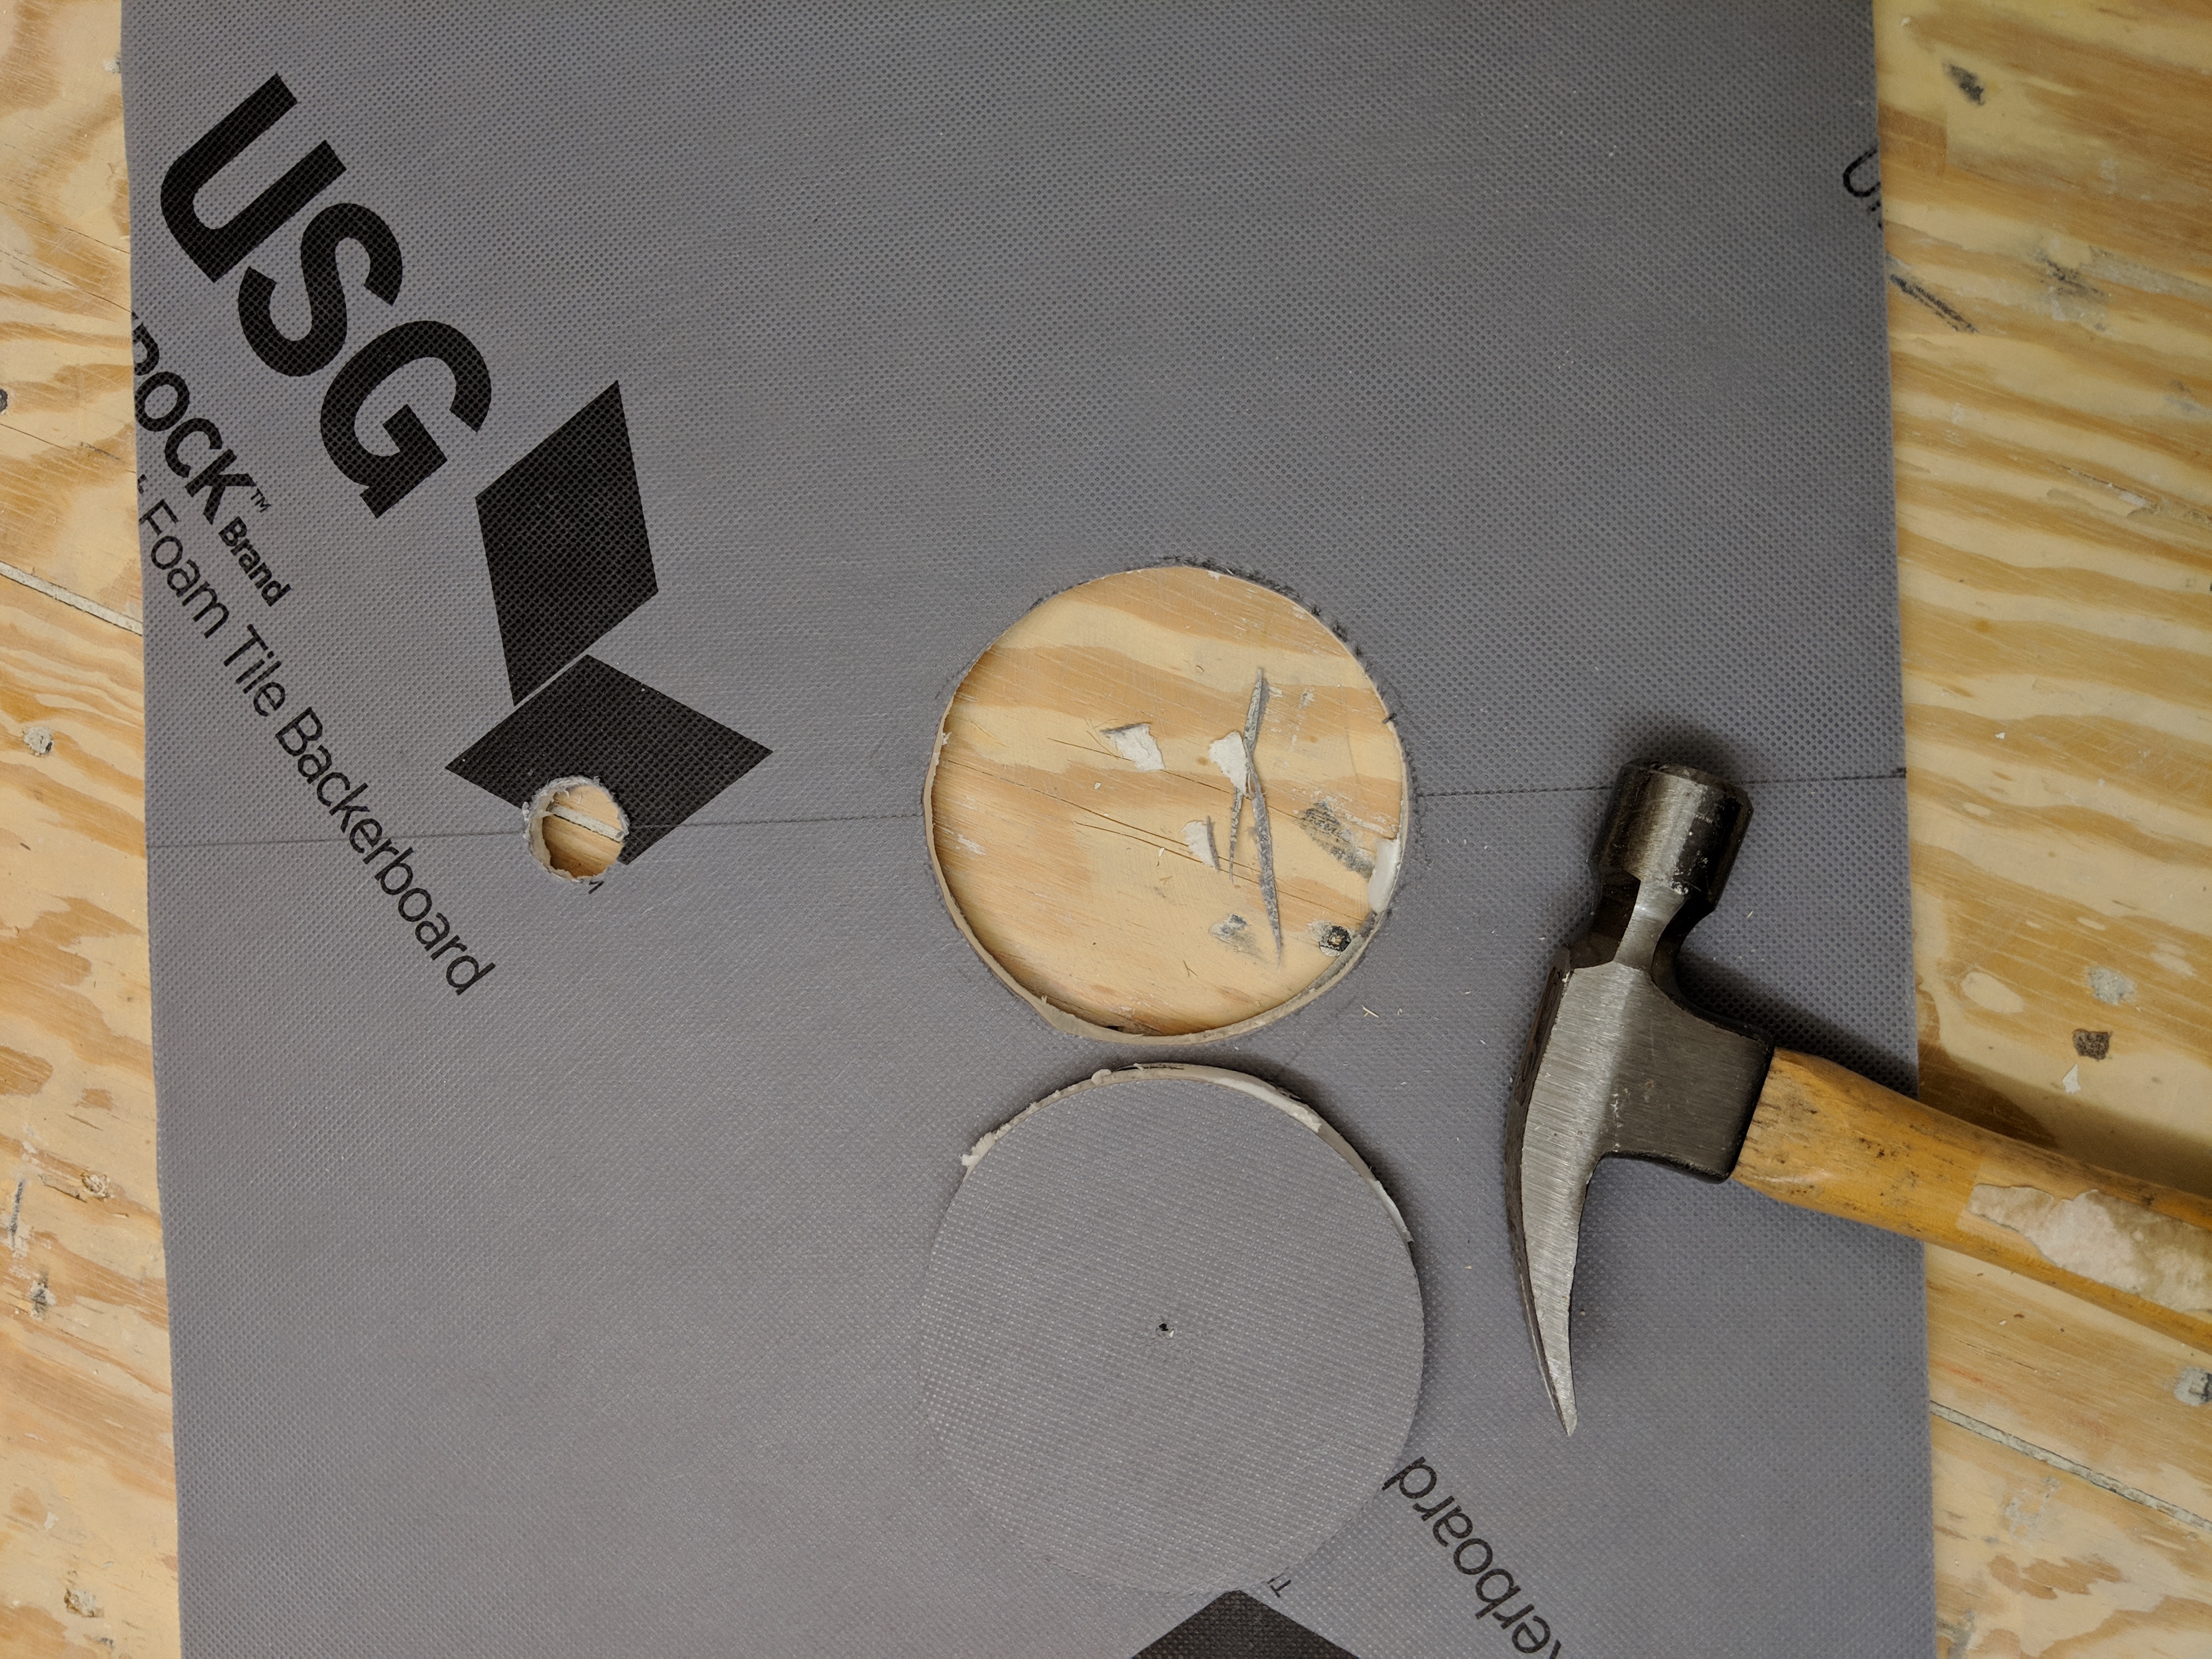
I was so proud of myself for fashioning a scribe out of a screw and a shim. Measure out the width and just spin the razor in a circle to score the board. Flip it and do the same, then give it a solid hit in the center with a hammer, and you’ve got a perfect circle (MJK rules)! Sadly, my other measurement for that 1″ hole was off somehow, so I had to cut that section off, and do a new board for it, but that was simple enough.
Once those were in place, the whole alcove was done. At 10:00pm!

Aside from the weird cut around the curve of the top of the tub and a 2″ strip from it down to the floor, this was all the foam board I was going to do. I actually had already done the one side, and it worked, but wasn’t really ideal. So I decided to just do the weird cut, then use remaining scraps to make an even transition at flange level, to provide better waterproof coverage next to the tub.
Finally called it a night after completing both sides at about 2:30am. Up again at 7 and back at it Friday. The Fiberock boards were a major PITA to cut. I scored the first board pretty good and put it up on my knee to snap it, and it just collapsed in the middle. I had to score super deep on them, like at least halfway through to get clean breaks. They also produce a TON of dust! After 2 cuts like this, I decided to put on a mask and take them outside and use the circular saw for the rest of the cuts. Aside from that, they are really solid boards. As long as you don’t get to close to the edges screwing them in, the go up nice and easy.
My brotha from anotha motha showed up around 3:30 to help finish with the walls. We had hoped to get the first round of taping and mudding done as well, but by 7:30pm we had only just gotten all the walls up due to more framing support needing to be done on the vanity wall as well. Measuring and cutting all those holes for the sink plumbing was fun. The boards needed to be able to shift about a half inch in both directions to get behind the side walls, so the holes had to be bigger, and offcenter to account for that. Remember my awesome scribing technique? I didn’t bother on these since I knew the boards were more difficult to cut. I decided to just drill a bunch of holes in a circle and knock it out with a hammer instead. Worked great. The next day I found a circle cutter tool that I forgot that I had bought a few days before. Exhausted, I decided to call it for the night and go get some food.
Saturday was the first round of taping and mudding. The vanity (which was supposed to arrive on Monday) also showed up at 7:45am. Luckily it looks to be in good shape, and looks awesome! Watched a couple of youtube videos and read howto’s to figure out how to do the mudding. I didn’t realize this was a multi-day thing. Again in my naivety, I thought we’d knock this out quickly and move on to test fitting the hardibacker on the floor. It ended up taking us quite a while just to prep the area, and a trip to Home Depot for a few extra supplies I needed.
Once we actually got started, we quickly realized that this is definitely an art form that takes some finesse, that neither of us has. The guys in the videos (who clearly have years of experience) make it look so easy to get a good coat. Obviously, they are also working with near perfect conditions using all the same materials that are mostly even. In my case I have some less than perfect transitions, and screws in some places that could not be driven further in for various reasons. This means I have to build up around them in order to level them out.

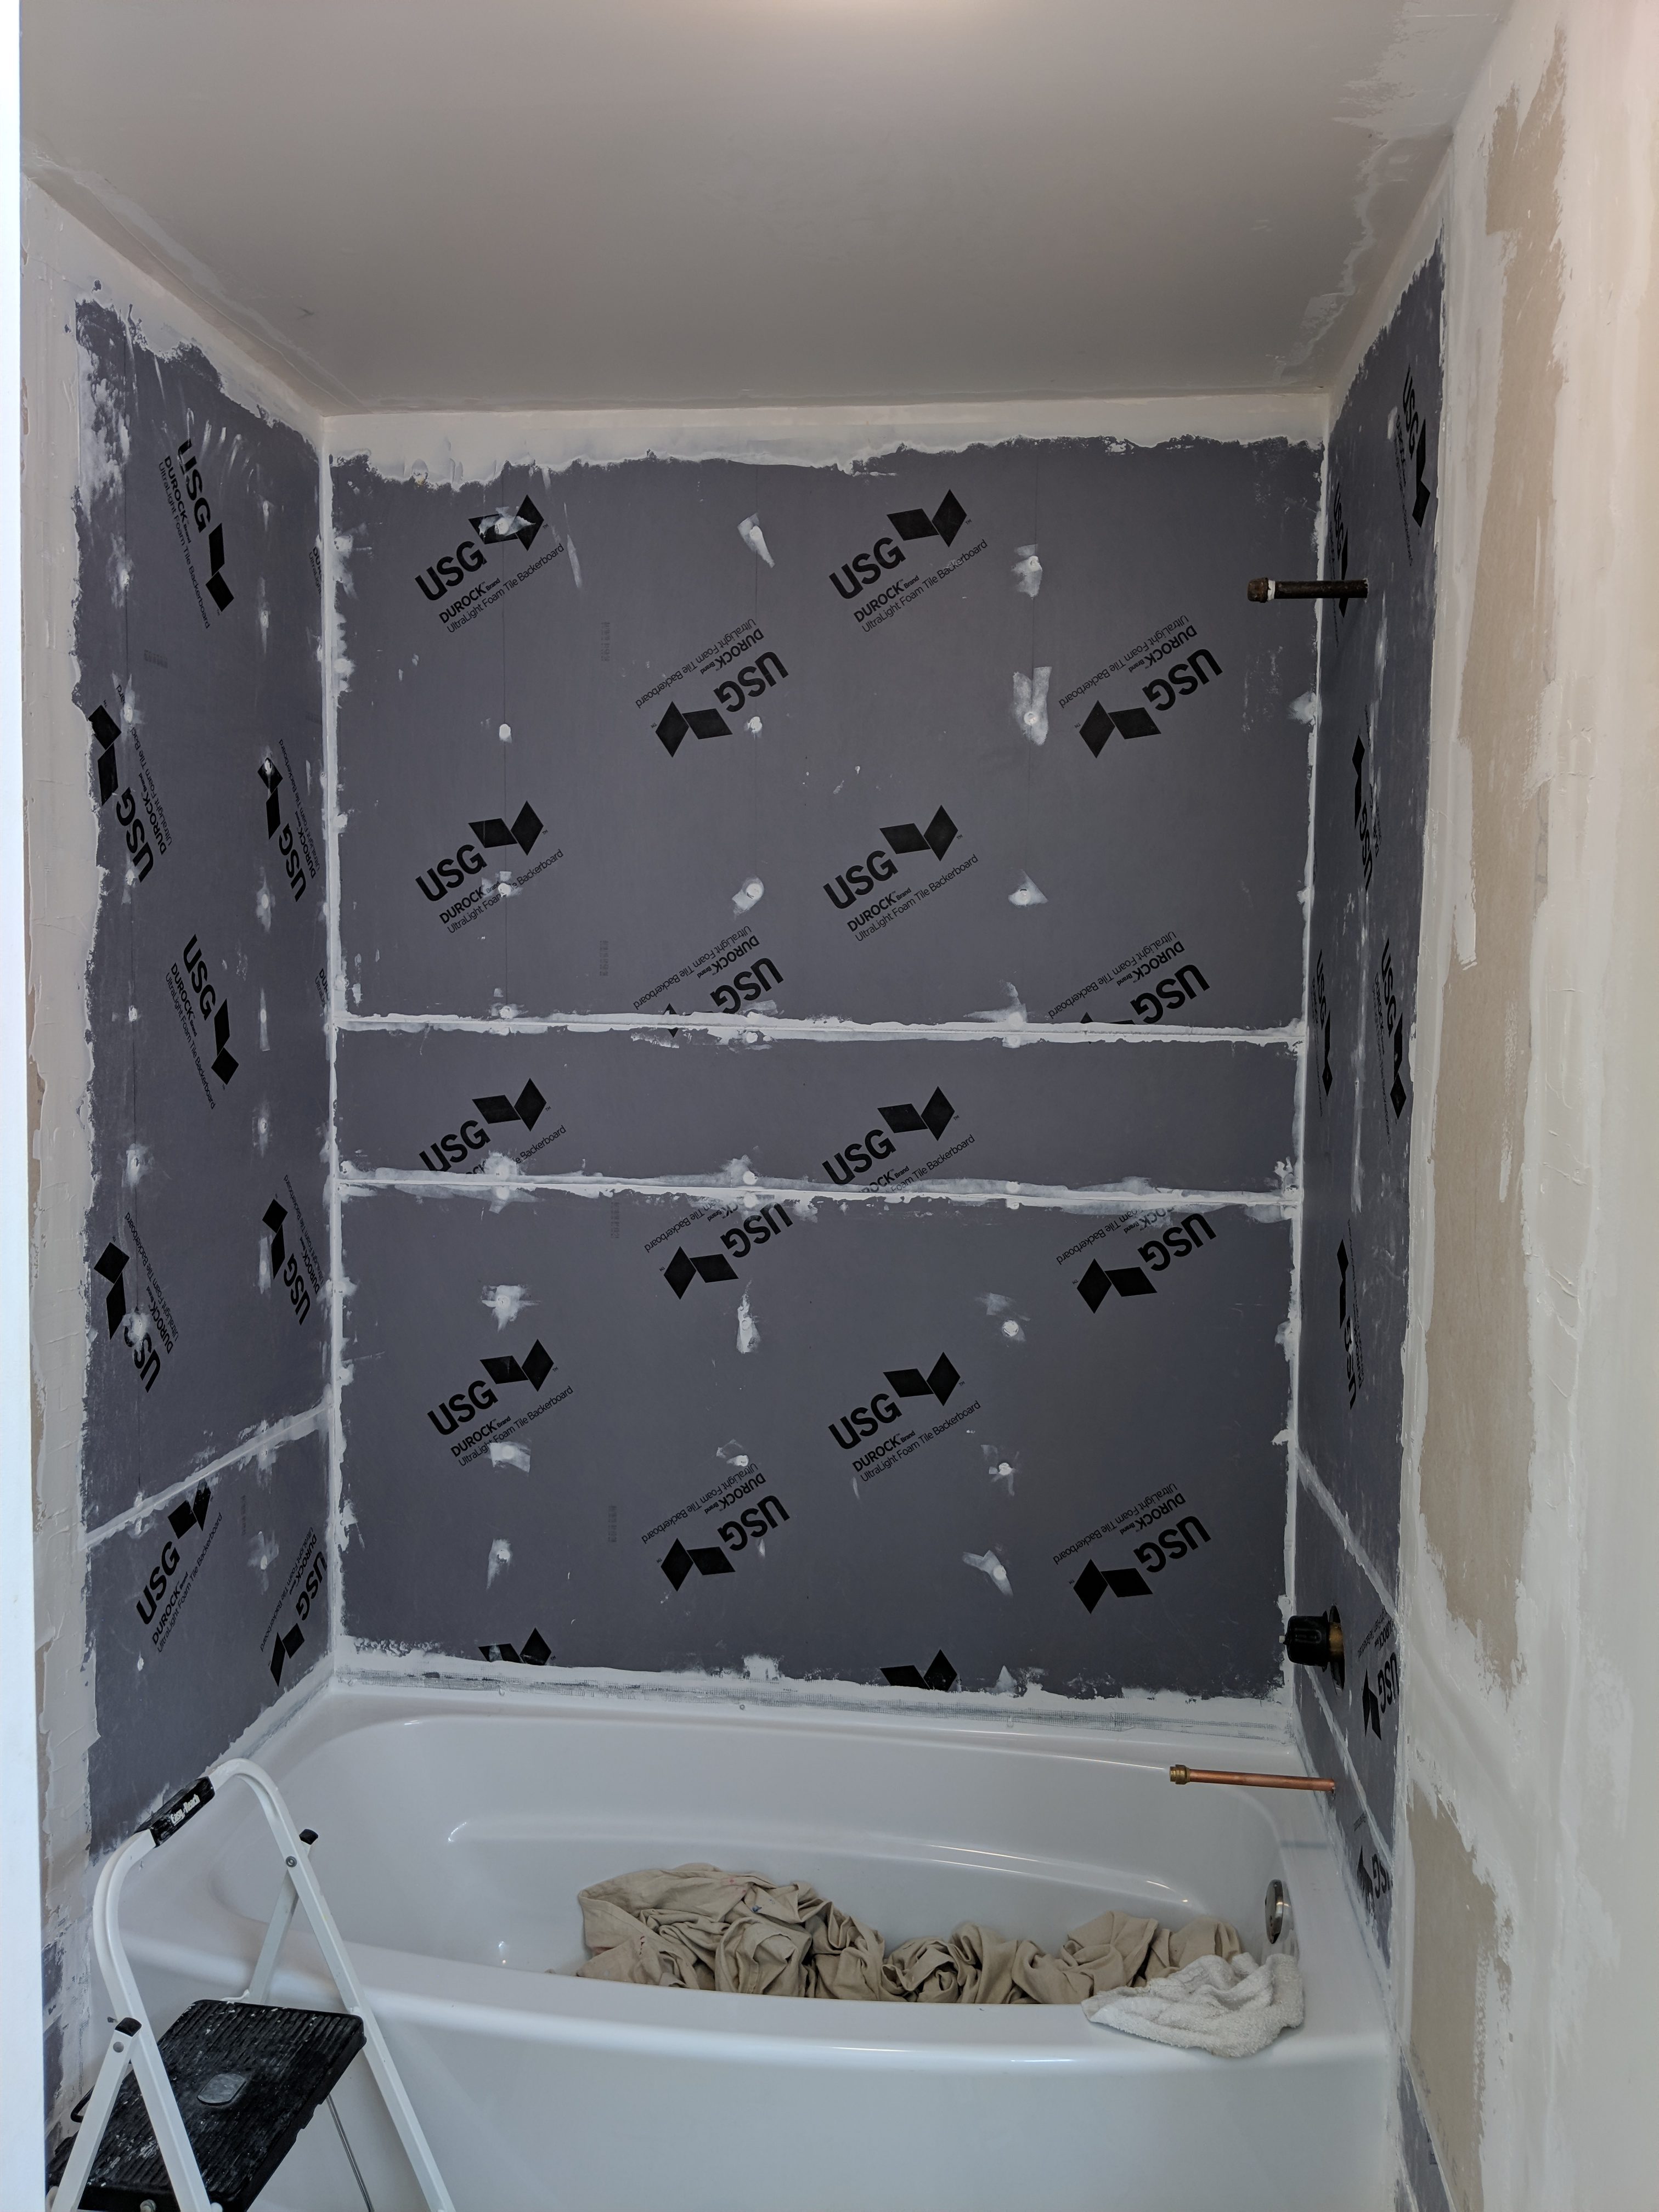
Yesterday, I was solo again, and since I knew the first coat needed a full 24 hours to dry, I started on sealing the foam boards after breakfast. The idea is simple. You put a dot of sealant on each screw, and fill in all the seams between boards using a caulk gun. These sealant tubes were not great. They had buildup in them, causing the gun to tilt the tub to get over the bumps in them, and making it incredibly difficult to squeeze out. My hands are way sore from this. It ended up taking me several hours to finish. In hindsight, I would have made sure that some of the gaps were tighter. The wider seams were much harder to fill. The transition at the tub flange was especially difficult to get enough product into. I used mesh tape there with the sealant to improve the bond. I’ll probably hit it a second time today, just to be on the safe side.
After a quick bite, I came back and tackled round 2 (and round 1 for the ceiling of the alcove) of the mudding. A quick sanding of the base coat and cleanup, then on to application. While it was easier than the first pass, it was still quite a challenge to get any sort of level, so I went with the more is better approach again, focusing on building up around the taped seams.
This evening, I’ll try to do a finishing pass on the majority of the mud. I’m fairly sure that I’ll have to do another round to get things leveled out properly though. With any luck, I’ll be able to get the hardibacker down, and the walls can be painted on Wednesday before I start the floor tile.
You must be logged in to post a comment.